Top HDPE Tarpaulin Manufacturer: Finding the Best Quality Tarp Supplier

It’s essential to know how to select a manufacturer when dealing with tarpaulins of high-grade quality HDPE. In this post, I aim to provide a guide that will assist readers in navigating and grasping the primary aspects of the best suppliers of HDPE tarpaulins. Everything from the characteristics and advantages of tarpaulins to the reputation, manufacturing capability, and product range of the suppliers is included. Whether you are a business owner or an individual needing strong and dependable tarps, this article will aid you in attaining the information necessary to make the right choice.

What Is HDPE Tarpaulin and How Is It Different from Other Types?

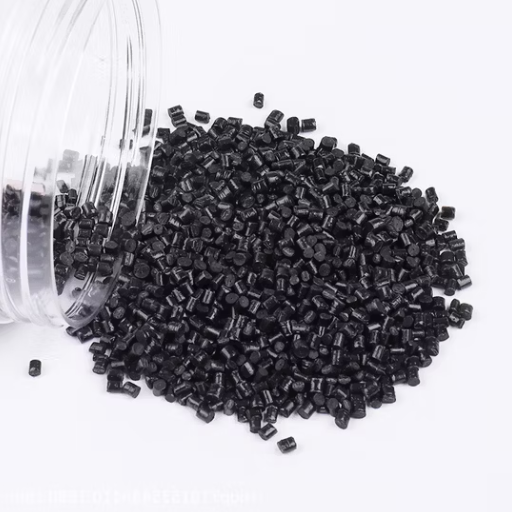
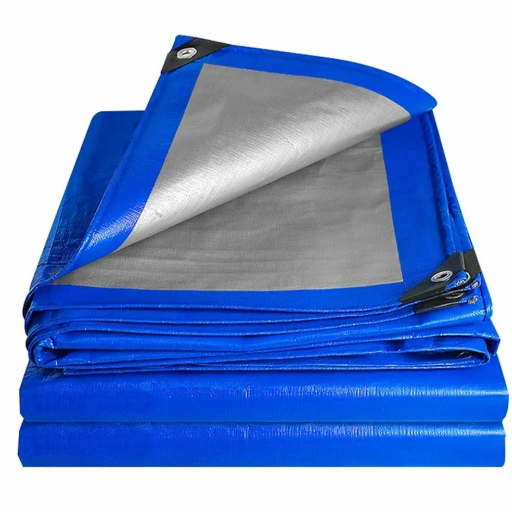
HDPE tarpaulin or High-Density Polyethylene tarpaulin is a type of tarp made of strong and flexible material consisting of high-density polyethylene fiber woven together and laminated with polyethylene sheets. Its exceptional strength, lightweight, water and tear-resistant properties, alongside its resistance to chemicals and ultraviolet rays, separate it from other tarpaulin types. In contrast with PVC tarpaulins, HDPE tarps are more environmentally friendly as they can be reused and negatively impact the ecosystem less. Due to these qualities, HDPE tarpaulin is the most preferred tarp in agricultural, industrial, and commercial fields.

Understanding High-Density Polyethylene Tarpaulin Materials

The most notable feature of High-Density Polyethylene (HDPE) tarpaulins is their durability and variety of uses. They are constructed by weaving HDPE fibers and applying laminated polyethylene sheets for strength and flexibility. Although the HDPE tarps are lightweight, making them easy to carry, they are powerful and offer superior resistance to tearing, puncturing, and environmental stress.

UV rays and long periods of sunlight do not damage HDPE tarpaulins, enabling their use in any weather condition without degrading over time. These materials are also water—and chemical-resistant, further increasing their applicability for harsh environments where long material endurance is required. Moreover, sein HDPE tarpaulins are recyclable, making them environmentally superior to materials such as PVC.

Their unique features enable an extensive application of HDPE tarpaulins in farming for crop protection, industrial settings for covering machines and materials, and commercial sectors for designing tents and shelters or using them as temporary storage facilities. Their unmatched durability while remaining lightweight and environmental sustainability provides an economic upper hand across numerous industries.

Comparing HDPE Tarps vs. PE Tarpaulin and LDPE Options

In the comparison of HDPE (High-Density Polyethylene) tarps with the PE (Polyethylene) and LDPE (Low-Density Polyethylene) options, the differences appear to be in the durability, strength, and applications. HDPE tarps have superior strength and tear resistance due to their woven design and high-density structure. These are more rigid, weather resistant, and long-lasting, which makes them ideal for heavy-duty uses such as construction covers, agricultural uses, and industrial storage.

The opposite is true for PE tarpaulins, including LDPE and other polyethylene forms. These tend to be lighter and more flexible. On the other hand, LDPE tarps are softer but less durable and more prone to damage with more significant stress or lousy weather. Their application is typically better suited for covering furniture mids and providing temporary waterproof seals than more demanding tasks.

In general, while HDPE excels in performance for heavy-duty, long-term use, PE and LDPE offer an economical resolution for lightweight, short-term purposes. Selecting the correct option depends upon the particular strength, budget, and longevity requirements, all of which will influence the final decision.

Benefits of Woven HDPE Fabric in Tarpaulin Manufacturing

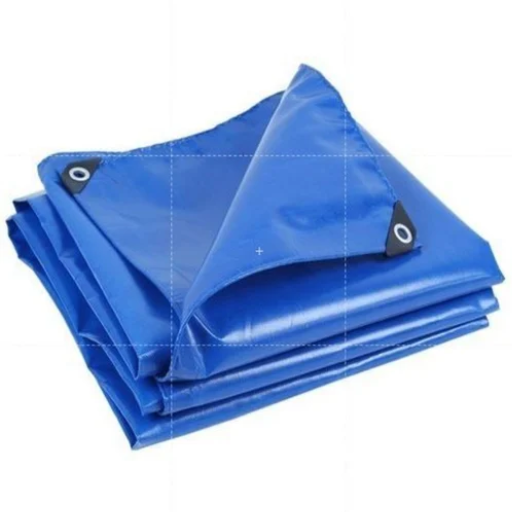
Woven HDPE fabric is one of the popular features due to its remarkable strength and long-lasting qualities used in making tarpaulins. The woven structure of the tarpaulin HDPE features gives ample tearing, stretching, and puncturing protection, ensuring its durability when exposed to challenging conditions. Besides, HDPE tarpaulins are lightweight and sturdy, which allows for effortless handling and deployment without performance setbacks.

Woven HDPE fabric’s most striking properties feature resistance to harsh weather, UV rays, and water. The material does not allow water to seep in and stand consistent sunlight for long periods, guaranteeing durable, functional efficiency. Moreover, woven HDPE fabric is recyclable, eco-friendly, and offers better sustainability options than synthetic materials. These remarkable features make the HDPE fabric ideal for industrial and personal use, adding to its versatility. These defining qualities make HDPE fabric popular in agriculture, construction, and logistics.

How to Choose a Reliable HDPE Tarpaulin Manufacturer?

Consider starting with the reviews and reputation of an HDPE tarpaulin manufacturer. It is essential to check if they consistently have quality products. Check their production processes and certifications to verify if they comply with safety and quality measurements relevant to your needs. In addition, check if the tarpaulins offered meet the required specifications and are strong enough to serve the purpose intended. The manufacturer should also provide unambiguous charges, reasonable warranty lengths, effective customer service, and access upon request. Most importantly, focus on those with a good history of fulfilling orders and that are environmentally friendly.

Identifying Leading Manufacturers of HDPE Tarpaulin Worldwide

When mentioning the best HDPE tarpaulin manufacturers globally, it is also imperative to note the key market players that offer exceptional products and services.

Cosmoplast Industrial Company LLC (UAE) is one of the strongest players in quality and durability. It offers various HDPE tarpaulin solutions for industrial, agricultural, and commercial purposes. Cosmoplast’s certifications meet international requirements regarding safety and environmental norms. The company focuses on customer support, provides quality services at reasonable prices, and ensures timely delivery.

Shree Tarpaulin Industries (India) Shree Tarpaulin is one of India’s largest HDPE manufacturers and exporters. The company is acclaimed for its increasing product range and customization capabilities. Their products are known for being lightweight yet highly durable, waterproof, UV-resistant, and cost-effective. The company also implements a sustainable development policy without compromising the quality of its services.

KSA Polymer (China) is one of the top HDPE tarpaulin producers in the world. It offers advanced designs and high-performance solutions for various industries. Its products are crafted using modern technology, which improves reliability and weather resistance. KSA Polymer is known for its transparent pricing and well-developed logistics network, enabling it to meet global delivery expectations.

By relying on these manufacturers, one can always be assured of the longevity and quality of the HDPE tarpaulins that best suit all application needs.

Evaluating Tarpaulin Factory Quality Standards and Certifications

Several factors need to be considered when reviewing the tarpaulin factory’s certifications and quality standards. First, the factory must be certified with at least ISO 9001, indicating a high-quality management level. This certification shows minimal defects in product output and that the customer’s needs are met. Compliance with ISO 14001 also shows concern regarding environmental impacts due to manufacturing processes. 

Moreover, product-specific certifications like REACH compliance should be considered, guaranteeing the materials’ safety and environmental friendliness. Compliance with international safety standards (fire retardancy certification, for example) adds value to the reliability of the tarpaulins, especially for industrial and high-risk areas. Continuous auditing, third-party testing, and client reviews give a good impression of the factory’s dedication to achieving standards of quality and responsibility.

What to Look for in a HDPE Tarpaulin Supplier

Material Quality and Durability: For the given task, select a supplier that sells high-quality, UV-resistant, waterproof, and tear-resistant HDPE tarpaulins. These qualities are essential for tarpaulins in harsh environments since they help ensure reliability and endurance.  

Compliance with Industry Standards: Do not use suppliers without international certifications, ISO 9001, compliance with REACH, and fire retardancy. These certifications guarantee that the products provided are safe, eco-friendly, and suitable for advanced usage.  

Custom Options: A suitable supplier allows size, thickness, and color customization to meet different application requirements. Depending on project specifications, they should also be customized to allow for eyelets, reinforced edges, or laminations.  

Reputation and Reliability: Check the supplier’s reputation by examining reviews, case studies, and testimonials. A reputable supplier will always maintain the expected quote, timeliness in service, and after-sales customer service.  

Cost and After-Sales Support: While value is significant, it should not compromise quality. An ideal supplier provides comprehensive after-service support in terms of warranties, repairs, guidance for maintenance, or installations.  

Through keen analysis of the stated factors, an appropriate supplier of HDPE tarpaulins with the required quality and business standards will be found.

What Are the Key Features of Premium Quality HDPE Tarpaulin?

The high-density polyethylene construction guarantees excellent tensile strength and tear resistance. Premium-quality HDPE tarpaulins have several notable features that underscore their unparalleled all-purpose durability. Furthermore, they are waterproof, making their use ideal across various agriculture, construction, and transportation industries. Premium HDPE tarpaulins are UV-stabilized, which protects them from sunlight and prolongs their lifespan even under severe weather conditions. Also, these tarpaulins are lightweight yet supremely durable, allowing for effortless maneuverability without diminishing performance.

GSM Ratings and Thickness: What Do They Mean?

GSM, or grams per square meter, quantifies the weight and density of the fabric material used in tarpaulins. Moreover, every GSM value indicates a specific characteristic. A higher GSM value indicates thick and more resilient tarpaulins, while lower GSM values signify not only more lightweight but also more flexible options. For instance, a rating of 90-120 marks the lighter side as ideal for temporary use. On the other hand, tarpaulins with GSM ratings exceeding 200 are heavy-duty and more suitable for demanding applications like agricultural or industrial coverage.

The thickness of a tarpaulin is pivotal in determining its overall durability, resistance to external factors, and external wear and tear. Thicker tarpaulins protect better against wear and tear, punctures, and harsh weather. The appropriate GSM and thickness have to be chosen according to the specific use case, balancing rigidity with flexibility and ease of handling. Knowing these metrics is essential in selecting the right tarp to fit one’s needs.

UV Protection and Waterproof Capabilities in HDPE Tarpaulin

HDPE tarps are made with specially formulated UV protection and waterproofing capabilities. Incorporating UV stabilizers during manufacturing allows the material to resist deterioration from the sun and increases the lifespan of the HDPE tarpaulin under harsh sunlight. This feature makes these tarps suitable for outdoor use.

HDPE tarps are also coated with layers of water-repellent materials, which ensures that the objects or areas covered are safe from rain and moisture. Their water-resistant properties increase their durability and versatility in construction, agriculture, and transport. By combining UV protection and waterproofing, these tarps significantly improve their ability to withstand harsh and demanding environmental conditions while preserving reliability.

Durability Factors: Multiple Layers and Laminated Tarpaulin Construction

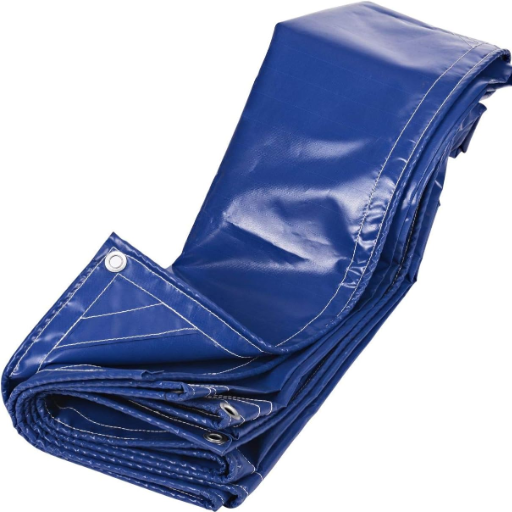
The strength of tarpaulins, especially those made of HDPE, is enhanced tremendously by adding more layers and using laminated construction. These layers often include a reinforced woven core encased in protective coatings, resulting in a flexible and resilient material. Laminated tarpaulins are custom-made to prevent tearing, abrasion, and other mechanical stress, which makes these tarps perfect for heavy-duty applications. Integrating numerous layers with lamination increases the tensile strength and the resistance to UV radiation, water, and elements, allowing the tarpaulin to perform optimally over time. This construction technique preserves durability even in demanding industrial and outdoor settings.

What Range of HDPE Tarpaulin Products Are Available?

Ranging in size, thickness, and color for various applications, HDPE tarpaulin products are readily available. Options include lightweight tarps for temporary purposes, medium-weight for general use, and heavy-duty tarp variants designed for industrial and agricultural applications. Protective features such as UV protection, waterproofing, and edge reinforcements can also be tailored. There are often many customization options to adhere to unique specifications.

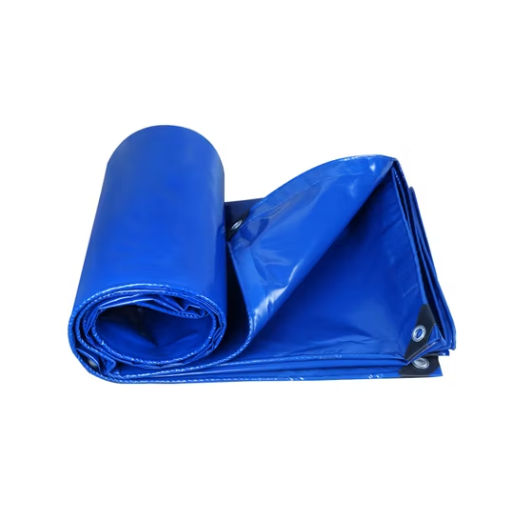
HDPE Tarpaulin Sheets vs Rolls: Which to Choose?

The decision is primarily based on the specific requirements for use. HDPE sheets are pre-cut to standard sizes and are convenient when covering equipment, construction sites, or agriculture. They are also time-saving when a ready-to-go solution is required. Alternatively, for projects of specific or unconventional measurements, HDPE tarpaulin rolls give customized dimensions flexibility. Ideal for extensive roofing or wrapping in industrial settings, rolls are preferred for large-scale or continuous applications. Overall, the choice comes down to immediate application convenience versus customizability for tailored solutions.

Heavy-Duty Tarpaulin Options for Industrial Applications

Heavy-duty tarpaulins are crucial for many industries due to their long life, versatility, and ability to withstand different weather conditions. A coating, material, and thickness must be considered to find the best fit. Heavy-duty tarpaulins are usually made from polyethylene(P), high-density polyethylene (HDPE), or polyvinyl chloride (PVC). Each material provides different advantages; HDPE offers an extremely light but strong material, while PVC delivers excellent protection against harsher chemicals and environmental conditions.

In construction, transportation, and storage, these tarps are used alongside other protective features like UV resistance, waterproof coatings, and tear resistance to protect them from extreme wear and exposure. Further customization comes in the form of customizable rolls or pre-sized sheets. Wrapping goods during transit, shielding vehicles or equipment, and covering construction sites are some popular uses. To further enhance effectiveness, choosing the correct weight defined in grams per square meter (GSM) and adding reinforced edges with grommets promotes ease of use.

Specialized Products: Pond Liners and Water Storage Solutions

In terms of pond liners, pocket ponds usually require good-quality materials, such as EPDM or HDPE, because of their considerable strength, resiliency to ultraviolet rays, and holes. These liners can be used for decorative and functional ponds, retaining water without leakage effectively. On the other hand, prefabricated tanks and custom-built systems serve as excellent options for water storage solutions depending on one’s site constraints and requirements. It ensures durability but combines optimal flexibility, temperature resistance, and environmental conditions like with these systems for enhanced, long-lasting performance.

How Can I Customize HDPE Tarpaulin for Specific Requirements?

Custom HDPE tarpaulin can be designed to suit client specifications for size, thickness, and other defining features. Customizable dimensions make it worthwhile for application in ponds, greenhouses, or other industrial covers. Other customization options, such as reinforced edges, UV stabilization for prolonged outdoor use, and robust eyelets or grommets, enhance secure fittings. Manufacturers ensure the tarpaulin meets unique requirements by adding preferred colors, fire retarding materials, or anti-slip surfaces, making the tarpaulin effective in performing its intended tasks.

Available Sizes, Colors, and Specifications from Manufacturers

Block tarps are manufactured in a wide range of sizes, from small six by 8 feet to large coverage areas that can exceed 100 by 100 feet. A range of thicknesses, from lightweight five mils to heavy-duty 20 mils or more, is also available to cater to different needs.

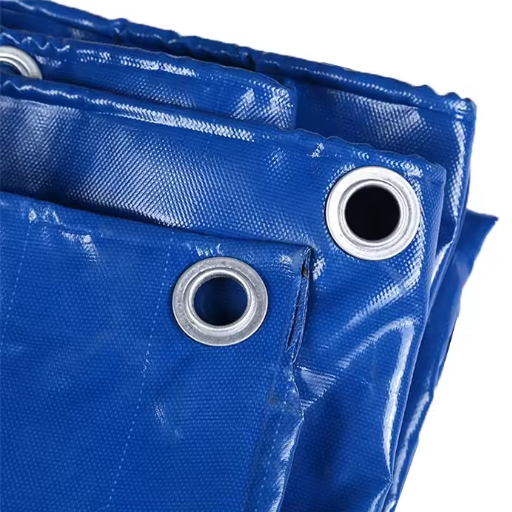
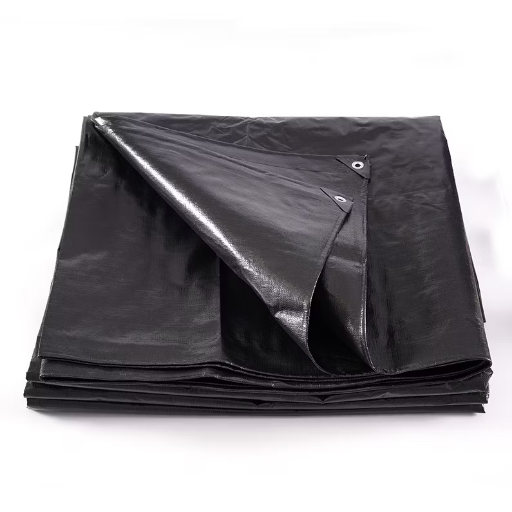
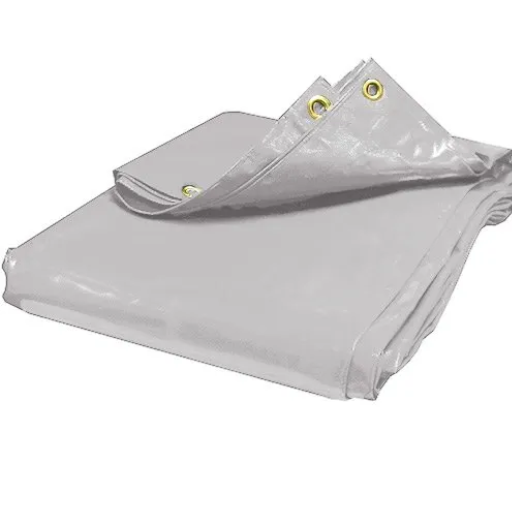
Custom branding quickly offers versatile color options. Standard colors are Blue, Green, Black, and Silver. Specialized tarpaulins can also have spyware or camouflage patterns.

Some features include waterproof and mildew-resistant coatings, reinforced hems with grommets, UV protection, and rust-resistant grommets. Some products may consist of fire-retardant or chemical-resistant surfaces for industrial use, while others are enhanced. Customization options are frequently offered to align with a specific set of requirements or requests from the client.

Custom-Made HDPE Tarps: Process and Possibilities

Like all custom products, design starts with material selection, which includes thickness, dimensions, color, and special coatings such as UV resistance, waterproofing, and flame retardancy. The clients can specify exact measurements and features such as reinforced borders, grommet strategic placements, or even specific nontraditional forms.  

Using state-of-the-art machinery, producers precision cut and seal the fabric to specific dimensions, resulting in performant reinforced seams. Some providers offer add-ons such as branding or logos for commercial purposes.  

Along with industrial-grade containment and agricultural use, recreational-grade tarps, such as shading structures and custom covers, are also available. Meeting design customization ranging from performance, safety, and aesthetics ensures these tarps serve the purpose of large—and small-scale projects.

What Are the Cost Considerations When Buying from HDPE Tarpaulin Manufacturers?

When determining the cost of HDPE tarpaulins, consider the material quality, thickness, and durability, as each impacts the price. Customization options like size, color, and branding may increase costs. Typically, bulk orders lower the price per unit, making them cheaper for larger projects. Shipping costs and lead times must also be included because they may differ from the manufacturer’s location and the order size.

Pricing Factors: Raw Material, GSM, and Manufacturing Process

It is well known that product pricing is related to the raw materials used. Better materials can improve durability and performance, making the product more expensive. GSM (grams per square meter) is substantial because it defines the thickness and weight of the material. Higher GSM generally means a more efficient product but will increase production costs. The manufacturing process is also essential. More complex processes using advanced machinery tend to cost more, while more straightforward methods may reduce overall expenses. These factors will influence the choices made regarding quality requirements and budget.

Finding Cost-Effective HDPE Tarpaulin Without Sacrificing Quality

To buy cost-effective HDPE tarpaulin while maintaining quality, thoroughly research the manufacturer or supplier’s ratings. ‘100% virgin HDPE’ should be indicated on the tarpaulin as it makes the product more durable and resistant to wear and tear. Make sure to check the GSM rating or grams per square meter of the tarp, as it should meet the requirements of strength and thickness. It is noted that 150-250 is optimal for almost all purposes due to cost efficiency.

Also, check the prices from multiple suppliers and ask about discounts for bulk purchases. Inquire about UV stabilization and lamination to protect the tarp from sun and water damage. Finally, checking if the supplier issues proper certifications, such as ISO or quality assurance standards, can help guarantee product reliability and certifications while being budget-friendly.

Bulk Orders and Wholesale Options from Tarpaulin Suppliers

When pondering bulk orders and wholesale options for HDPE tarpaulins, it is essential to consider suppliers with reasonable pricing, dependable quality, and speedy delivery. Most manufacturers offer discounts for upper-limit orders, thus bringing down the cost per unit. Additionally, wholesalers mainly serve the needs of their customers by providing customization, such as particular size and color, and additional durability, such as UV resistance or reinforced edges.

Top suppliers offer changeable prices and an easy ordering procedure. They provide bulk pack sizes, guaranteeing adequate stock for agriculture, construction, transport, etc. Delivery logistics are further refined for speedy and secure shipping, especially for international clientele. With the aid of numerous reputable suppliers, customers get value for their money by reading reviews and directly communicating with the sales team for the best deals.

Why Choose a Chinese HDPE Tarpaulin Manufacturer?

The Chinese HDPE tarpaulin manufacturers are distinguished by their high-quality products that are competitively priced. These manufacturers use new technologies and optimized production processes to meet client needs with custom designs, specified requirements, bulk orders, and many other customization options. Through years of operational experience in large-scale industries, they are always on time on tight schedules while maintaining proportionality with product standards, consistency, and quality. Additionally, most Chinese manufacturers comply with international quality certifications, making them a favorable option for international buyers looking for good deals and trusted solutions.

Advantages of Working with Tarpaulin Manufacturers in China

There are numerous benefits to working with Chinese tarpaulin manufacturers. First, manufacturers provide highly competitive prices because of the region’s low-cost production methods and easy access to raw materials. In addition, many Chinese manufacturers thrive in providing customizable solutions specific to their clients. Lastly, using advanced technology in production, coupled with adherence to international quality standards, means reliable products at relatively low prices. This makes these manufacturers attractive for businesses needing affordable yet high-quality products.

Importing Process and Quality Assurance from Chinese Suppliers

To begin importing from Chinese suppliers, it usually starts with searching for trustworthy manufacturers on platforms like Alibaba, Global Sources, or even niche directories. After establishing communication with potential suppliers, it is essential to convey product details, prices, and any customization prerequisites. Placing sample orders after negotiating terms of trade and ascertaining the supplier’s capability to maintain quality standards is crucial. After sample approval, buyers can arrange bulk production while safeguarding a trade contract for both parties.

Most businesses utilize third-party inspection services to oversee the manufacturing stages of a specific product to maintain quality assurance. These inspections include pre-production, mid-production, and pre-shipment. The quality control process assists in defect detection and monitoring compliance with set standards. Also, certifications like ISO 9001 or other international standards enhance the manufacturers’ reliability. Proper communication, documentation, and frequent inspections smoothen the importing process, making it free of complications and ensuring quality assurance.

Top HDPE Tarpaulin Factories in China and Their Specialties

Xiaoshan Hongyuan Plastic Products Co., Ltd specializes in agriculture, construction, and transportation and offers high-quality, customized solutions and HDPE tarpaulins. These products are durable and crafted to withstand water, UV rays, and harsh environmental conditions.  

Shandong Shouguang Longxing Agricultural Film Co., Ltd:  This factory produces farming tarpaulins, greenhouse covering, and outdoor storage tarpaulins made from HDPE. They are known for having advanced eco-friendly production facilities that ensure tarp reliability and durability.  

Taizhou Tianlu Plastic Co., Ltd: Taizhou Tianlu Plastic Co. Ltd manufactures lightweight but strong HDPE tarpaulins designed for commercial and industrial coverage. With over 15 years of experience, they excel in creating heat-sealed edges and reinforced corners, which provide excellent protection from adverse weather conditions.  

These factories produce competitively priced and certified products, which help them establish their reputation in the international market, considering the distinct industry demand and global quality standards.

References

Tarpaulin

Waterproofing

High-density polyethylene

Frequently Asked Questions (FAQ)

Q: What are the different tarpaulin products we manufacture, and what sizes are available?

A: As a leading HDPE tarpaulin manufacturer, we produce a comprehensive range of products, including waterproof tarpaulin sheets, HDPE tarpaulin rolls, PVC tarpaulins, and poly tarps. Our products are available in various sizes, from standard dimensions to custom measurements based on client requirements. All our tarpaulins are made from premium quality woven HDPE or high-density polyethylene fabric, with options ranging from lightweight 200 GSM to heavy-duty variants. We use virgin raw materials to ensure durability and longevity, making our products suitable for multiple applications, from warehouse protection to outdoor coverings.

Q: What are the benefits of working with a top HDPE tarpaulin manufacturer?

A: Working with one of the best manufacturers provides numerous advantages. Our HDPE waterproof tarpaulins offer superior protection against all weather conditions. The multipurpose nature of our products makes them versatile for various applications. We ensure quality control at every production stage, producing consistently durable products. Our manufacturing expertise allows us to create tarpaulins with multiple layers of HDPE for enhanced strength. Additionally, our tarps are easy to handle and lightweight yet robust, and we provide competitive pricing with flexible minimum order quantities. As industry leaders, we offer expert guidance on selecting the right tarp for your needs.

Q: How can I identify the best HDPE tarpaulin for my needs?

A: The best HDPE tarpaulin for your needs depends on several factors. First, consider the intended use – whether you need it for construction, agriculture, or transportation. Look for heavy-duty options with reinforced edges and UV resistance for outdoor applications requiring maximum protection. Check the GSM (grams per square meter) – a higher GSM, like 200 GSM, indicates a thicker, more durable material. Verify that the tarp is made from raw virgin rather than recycled plastics for better longevity. Also, ensure proper HDPE laminated construction with heat-sealed seams for actual waterproof performance. Our experts can help you evaluate these factors to find the perfect tarp for your requirements.

Q: Are your HDPE tarpaulin rolls fully waterproof, and how is this achieved?

A: Yes, our HDPE tarpaulin rolls are 100% waterproof. This is achieved through a specialized manufacturing process, creating multiple layers of HDPE (high-density polyethylene) laminated to form an impermeable barrier. Our waterproof tarpaulin sheets feature heat-sealed seams rather than stitched ones, eliminating potential entry points for moisture. The HDPE polyethylene material is naturally water-resistant; our additional treatments enhance this property. We also incorporate UV stabilizers and anti-fungal agents to prevent degradation from environmental factors that could compromise waterproofing. Our quality control process includes rigorous water resistance testing to ensure every tarp meets our high standards.

Q: What makes your company one of the best heavy-duty tarpaulin suppliers?

A: Our reputation as one of the best heavy-duty tarpaulin suppliers stems from our commitment to quality and innovation. We use only premium woven HDPE fabric in our manufacturing process, ensuring exceptional tear resistance and durability. Our production facility in Ahmedabad utilizes advanced technology to create tarpaulins that exceed industry standards. We offer comprehensive customization options, including size, thickness, and color (companies of all colors are served). Our quality control is rigorous, with each batch tested for tensile strength, water resistance, and UV protection. Our customer service includes expert consultation, prompt delivery, and after-sales support, creating a complete package that distinguishes us from other suppliers.

Q: How do PVC tarpaulins compare to HDPE tarpaulins regarding durability and applications?

A: PVC and HDPE tarpaulins serve different purposes based on their unique properties. PVC tarps typically offer superior resistance to chemicals, oils, and acids, making them ideal for industrial environments. They’re generally heavier than HDPE but provide excellent tear resistance. On the other hand, HDPE tarpaulins are lighter, more flexible, and often more affordable. They provide excellent waterproof protection while being easier to handle and transport. HDPE tarps are particularly suitable for construction sites, agriculture, and transportation. Both materials can be manufactured to be UV-resistant and waterproof. The choice between PVC and HDPE should be based on your specific application requirements, budget considerations, and handling preferences.

Q: Why is Ahmedabad recognized as a hub for quality tarpaulin manufacturing?

A: Ahmedabad has established itself as a premier center for tarpaulin manufacturing due to several key factors. The city benefits from a strategic location with excellent logistics infrastructure, facilitating efficient distribution across India and internationally. Ahmedabad has a rich textile manufacturing heritage has evolved to include technical textiles like tarpaulins. The region has a concentrated ecosystem of raw material suppliers, skilled labor, and specialized machinery manufacturers specific to the tarpaulin industry. Manufacturing units in Ahmedabad, including our facility, have adopted modern technologies while maintaining cost-effective production methods. Additionally, the competitive manufacturing environment has driven continuous innovation in waterproof fabric technology and production processes, establishing Ahmedabad-made tarpaulins as synonymous with quality and reliability.

Q: What quality standards do your tarpaulin rolls meet, and how do you ensure consistency?

A: Our tarpaulin rolls meet and exceed international quality standards, including ISO certifications specific to technical textiles. Each batch undergoes rigorous testing for tensile strength, tear resistance, puncture resistance, and waterproofing capability. We maintain consistency through a controlled manufacturing environment and strict adherence to established production protocols. Our quality assurance process includes regular testing of raw materials – we exclusively use virgin raw materials rather than recycled plastics to ensure uniform quality. We employ advanced machinery calibrated to precise specifications and conduct regular maintenance to prevent variations in output. Every roll is individually inspected before packaging, and we maintain comprehensive quality records for traceability. This systematic approach ensures that RocTarp is recognized as a consistently high-quality HDPE and polyester tarpaulin manufacturer.

304L Stainless Steel Strip Manufacturers and Suppliers | High-Quality Strip

304L stainless steel strips are known for their adaptability and strength, which makes them useful in many industries. This blog post intends to be an all-inclusive guide to 304L stainless steel strips, detailing their features, wide-ranging applications, and offered benefits. Also, we shall discuss the characteristics of a good manufacturer or supplier and the criteria for choosing the strips that will satisfy your tailored requirements. This guide will help industry veterans and newcomers make better choices for stainless steel materials.

What Makes 304L Stainless Steel Strip Different from Standard 304?

What Makes 304L Stainless Steel Strip Different from Standard 304

The carbon percentage significantly differs between 304L stainless steel and the standard 304. Since 304L has a lower carbon percentage, the danger of carbide precipitation forming during welding is considerably smaller. That makes 304L ideal for any application with extensive welding requirements, as it reduces the likelihood of corrosion at weld joints. Furthermore, enhanced resistance to intergranular corrosion due to lowered carbon levels improves durability in particular environments. While both grades have superb strength, resistance to corrosion, and versatility, 304L is preferable for applications requiring extensive weldability while maintaining structural integrity.

Understanding the Carbon Content in 304L vs 304 Stainless Steel

The main distinction between 304L and 304 stainless steel is their difference in carbon content. 304L has a maximum carbon content of 0.03%, while 304 has up to 0.08%. The reduced carbon level in 304L increases its resistance to carbide precipitation during welding, which can cause intergranular corrosion. This makes 304L more favorable for applications involving structural welding since it maintains its integrity and resistance to corrosion after welding and does not require post-weld heat treatment.

In comparison, 304 stainless steel, with higher carbon content, has a slightly higher tensile strength. However, it is also more susceptible to carbide precipitation due to elevated temperatures, especially during welding. While both grades are excellent regarding overall strength, corrosion resistance, and versatility, the selection between 304 and 304L boils down to application requirements such as the presence of welds, operational temperature, or corrosive environment.

Corrosion Resistance Benefits of 304L Stainless Steel Strip

The low carbon content in the 304L stainless steel strip helps minimize carbide precipitation during welding, which could otherwise lead to corrosion. Thus, it offers remarkable corrosion resistance. Additionally, 304L performs exceptionally well in various environments, including severe chemical, acid, and chloride-rich marine applications. Its ability to maintain resistance in highly moist industrial or corrosive environments makes it reliable for long-term durability and performance.

Typical Applications for 304L vs 304 Stainless Steel

Industries worldwide use 304L and 304 stainless steel; however, their applications may differ slightly owing to their properties. 

Stainless 304 is quite popular in manufacturing kitchen appliances, automobile trim, paneling, and other fasteners. It is also powerful and has some corrosion resistance, giving it an edge over other general-use application options. 

Extreme long-term exposure to high temperatures makes 304L stainless steel ideal for parts used in chemical processing and marine environments. It is more resistant to extreme conditions. With a lower level of carbon, it is a preferred choice in welding to prevent carbide precipitation.

Both types are remarkably versatile, but 304L’s improved weldability and resistance to sensitization make it better suited for structural work in industries with high environmental demands.

How to Choose Between Cold Rolled and Hot Rolled Stainless Steel Strip?

Selecting between cold-rolled and hot-rolled stainless steel strips should always be concerned with the application’s specifications. Cold-rolled stainless steel’s superior surface finish, tighter tolerances, and greater strength warrant its use in precision-driven and aesthetically sensitive fields such as automotive parts and consumer products. In contrast, hot-rolled stainless steel is more cost-effective and better suited for structural purposes or free areas where surface polish is not as critical. To make the best choice, evaluate the requirements and parameters like strength, finish, budget, and intended use.

Advantages of Cold Rolled Stainless Steel Strip Manufacturing

The process of manufacturing cold-rolled stainless steel strips comes with numerous valuable advantages across multiple industries.

Awarded Finish: Cold-rolled stainless steel strips greatly benefit from its rolling processes. This is achieved at a remarkable rate, making the material perfect for cosmetic and precision-essential operations on electronics, surgical devices, and numerous consumer products.

Awarded Strength: Toughening of Stream bending arises from further filtering in mechanical tools, which is adopted by cold rolling due to increased rotary motion from the feeding direction. Also, the dimensional precision of parts after performing this step increases, allowing cold-rolled regions to be used for very intricate, high-precision tasks.

Width Control: This kind of rolled strip is manufactured with width control that permits tighter tolerances for uniformity during repetitions. This impacts industries like automotive and aerospace, which emphasize high-priority engineering standards.

Long-Term Value: As mentioned above, the initial production doors of cold-rolled stainless steel may be higher. However, the sheer strength, resistance to corrosion, durability, and optimized maintenance are unrivaled in highly demanding applications, lowering costs and enhancing value in the long run.

Adaptability and Personalization: The procedure permits an extensive list of sizes, grades, and finishes, which helps meet different requirements across numerous industries. It also allows the creation of materials useful for particular applications.  

Cold-rolled stainless steel strips enable industries to meet higher quality standards, operational efficiency, and product value for more advanced, challenging markets.

When to Use Hot Rolled Stainless Steel for Your Project

Hot-rolled stainless steel would be appropriate for construction, automotive, or heavy machinery projects requiring high-strength, durable materials. I would consider using it for projects that do not need precision dimensions since such processes tend to create minor deviations. It is also advantageous for large-scale applications because it incurs lower production costs than cold-rolled alternatives. Furthermore, hot-rolled stainless steel is remarkable in applications necessitating extreme environments or high temperatures and endurance, applying it to harsh industrial requirements.

Surface Finish Options for 304L Stainless Steel Coil (BA, 2B)

The surface finish of 304L stainless steel coil also plays an essential role in defining its aesthetic appeal, suitability for different applications, and corrosion resistance. This BA (Bright Annealed) finish has a smooth and reflective surface obtained by annealing in a controlled atmosphere to avoid scaling. Due to its eye-catching nature and easy cleaning, the BA finish works well in decorative kitchen equipment and appliances.

In contrast, a 2B finish is a matte and somewhat reflective surface produced by cold rolling followed by annealing, pickling, and skin passing. It has outstanding hygiene and corrosion resistance, making it appropriate for industrial and food-grade applications. Both finishes augment the adaptability of 304L stainless steel, which helps meet its functional and aesthetic requirements.

What Other Stainless Steel Grades Are Available Besides 304L?

Besides 304L, other stainless steel grades are available, each with specific applications. Alternatives include 316L, which is even more corrosion-resistant, especially in oceanic or chemical facilities. Grade 430 is relatively inexpensive with fair corrosion resistance, mainly used for interior applications. There are also other grades for higher temperature applications, like 310S, which has remarkable heat resistance. Duplex stainless steels like 2205 have great strength and excellent corrosion resistance, making them suitable for harsher environments. The choice of stainless steel grade is guided by the requirements for its corrosion resistance, strength, and operating conditions.

316L Stainless Steel Strip: Properties and Applications

316L stainless steel strip is a low-carbon grade of 316 stainless steel and maintains excellent corrosive resistance, especially in chloride-containing oceans and chemicals. The low carbon content lowers the chances of carbide precipitation during welding, which improves the material’s critical usability. The primary characteristics of 316L are high strength, outstanding ductility, high resistance to pitting as well as crevice corrosion, and remarkable performance in high temperatures. This makes it a good candidate for use in heat exchangers, medical devices, and pharmaceutical machinery.

Because of its usefulness and strength, the 316L stainless steel strip is used across many industries. It often produces surgical devices, machinery, and food service equipment. Its harsh environment resistance makes it useful for marine applications such as boat fittings and underwater components. Its pleasing appearance and resistance to discoloring also make it a widely preferred material for construction.

430 Stainless Steel vs 304L: Which Grade to Choose?

Comparing 430 stainless steel to 304L, each choice has advantages depending on the intended use and surrounding conditions. 430 is a ferritic stainless steel known for its low cost, good corrosion resistance, and formability. Thus, it is often used in kitchen appliances, automotive trims, and other decorative applications. However, its resistance to corrosion and heat is not on par with austenitic grades, which is why 304L serves better.

Meanwhile, 304L, a low-carbon version of the famous 304 stainless steel, is far more durable due to better corrosion resistance and weldability. Because of these, 304L is vastly used in chemical processing, marine equipment, and areas exposed to moisture or acids. Primarily available at a premium, switching to 304L has its benefits due to unmatched durability and versatility for harsh and demanding workloads. 

In summary, opt for 430 in less demanding, budget-sensitive projects. If relocating to more excellent environments exposed to heat, corrosion, or welding, 304L serves better.

201 and 321 Stainless Steel Options from Our Factory

201 Stainless Steel: Type 201 stainless steel has an alloy composition of high manganese and low nickel. The type offers reasonable strength with some corrosion resistance in moderately corrosive environments. Therefore, it is used in less expensive kitchen utensils, automobile trims, sinks, etc. It is best suited for places with mild corrosive environments, though, due to cost efficiency, it may underperform against highly corrosive or high-temperature conditions compared to other grades.

321 Stainless Steel: Type 321 stainless steel has titanium added to improve intergranular corrosion resistance. It is mainly used in aerospace industries and the construction of heat exchangers and exhaust systems because it can endure long periods of exposure to high temperatures without losing strength or structural integrity.

We manufacture and sell 201 and 321 stainless steel products with professional design, manufacture, and industrial consultancy support. Whether you need affordable materials with moderate heat and corrosion resistance or parts that require superior performance, we guarantee all products will meet the requirements, supported by our extensive experience in professional consultation and manufacturing.

How Does Our 304L Stainless Steel Strip Factory Ensure Quality?

Our 304L stainless steel strip factory combines raw material procurement controls, advanced technology, and quality management systems to ensure the utmost quality. All raw materials undergo stringent inspection processes to ascertain compliance with relevant standards, while cutting-edge equipment can execute operations accurately and precisely. Each strip undergoes exhaustive testing, including but not limited to tensile strength, corrosion resistance, and dimensional checks, to ensure that unrivaled customer satisfaction standards are consistently achieved. In addition, compliance, satisfaction, and trust for the customer are ensured by maintaining certification and international quality standards.

ASTM A240 Compliance and Quality Standards

The specification scope includes stainless steel chromium and chromium-nickel alloys in plates, sheets, and strips for pressure vessels and other applications: ASTM A240. This specification outlines mechanical properties and chemical composition requirements to guarantee operational reliability and structural and performance endurance. The materials stated in the scope of the ASTM A240 are required to possess significant tensile strength and resistance to corrosion, as well as strict control over dimensional tolerances if they are to be used in highly stressed environments. Manufacturers must document concrete quality control procedures, such as checking materials and holding registered certification from deemed authorities. Compliance with these requirements ensures that products covered by these standards of ASTM A240 establish adequate reliability alongside dependability when used for critical industrial applications.

Precision Stainless Steel Manufacturing Capabilities

Manufacturing precision components from stainless steel involves advanced technology and processes to meet high quality and performance standards. Among the capabilities are advanced techniques for precision cutting, CNC machining, and forming, which enable the manufacture of components with intricate geometries and high precision. Specialized coatings and finishing processes such as polishing, grinding, and coating are tailored to durability and aesthetics for the specified surface requirements. Also, manufacturers apply modern quality control techniques such as non-destructive testing (NDT), which allows for the evaluation of the parts’ strength, corrosion resistance, and dimensional accuracy. With these capabilities, the manufacturers serve the aerospace, automotive, medical, and energy industries that require custom stainless steel solutions that need high reliability and precision.

What Specifications and Formats Are Available for 304L Stainless Steel?

304L stainless steel is offered in various specifications and forms to accommodate different application needs. The most common specifications for sheets, plates, bars, and pipes are ASTM A240, ASTM A276, and A312. It is supplied in different forms, such as coils, sheets, plates, bars, pipes, tubing, and cut or machined tailored parts. Depending on the intended purpose, the material can be supplied in a mill or brushed or polished finish.

Stainless Steel Coil Strip Dimensions and Tolerances

Stainless steel coil strips are commonly found within the range of 0.1mm to 6mm for thickness and 10mm to 2000mm for width, depending on the manufacturer’s capability and individual requirements. A range of thickness tolerances is usually set within ±0.02mm to ±0.05mm, while width tolerances tend to be more relaxed at ±0.1mm to ±0.2mm. Dimensional tolerances are also defined by the standard and the type of finish requested, with tighter tolerances available for precise engineering applications. Often, customizable options are available, making them ideal for use in construction, automotive, and other manufacturing industries.

Customization Options for 304L Stainless Steel Sheet Plate

For 304L stainless steel sheet plates, I can confirm that customization tailored to individual needs is available, making it easy to adjust for a wide range of requirements. All dimensions undergo adjustments by specified tolerances, ensuring all requirements are fulfilled. Brushed, polished, and mill finishes are also customizable, highlighting specific functional and aesthetic requirements. Furthermore, we offer matching custom design solutions with advanced industrial and architectural precision through laser, bending, cutting, and other fabrication services. Customization across the board guarantees high-quality results, whether the requirement is industrial or architectural, paving the way for standards you expect, not what you have to settle for.

Why Choose Our Factory as Your Stainless Steel Strip Supplier?

Our factory is unrivaled in supplying stainless steel strips because of the precision our quality and customization processes meet and our customer’s satisfaction. We adhere to all relevant compliance standards within their industry by using advanced manufacturing technologies as precision products require. We can swiftly meet your unique project requirements because of the multiple finishes, processing methods, and dimensions we can work with. Our support team guarantees timely support communication and reliability with stainless steel service, making every step toward you seamless.

Competitive Pricing for Wholesale 304L Stainless Steel

Price becomes secondary when dealing with the wholesaled 304L stainless steel to maintain the competitive value our company offers. Our years of collaboration with suppliers enable us to provide cost-effective solutions without compromising quality due to our unstreamlined manufacturing processes tailored to your needs. We provide constant stock availability alongside transparent prices, so every reliability and affordability is indeed present from us in all transactions.

Manufacturing and Supply Chain Advantages

Both efficiency and quality are integrated into our supply chain and manufacturing processes. Using state-of-the-art advanced manufacturing methods, we produce 304L stainless steel with unrivaled silicone precision, guaranteeing structural reliability and durability in every batch. Furthermore, our strategic collaboration with suppliers worldwide allows us to foster working relationships to obtain high-quality raw materials at favorable prices. This balanced supply chain guarantees sustained inventory levels and rapid fulfillment times, which boosts your business prospects in meeting project deadlines. Sustainability and transparency are at the core of our operations, which focus on continuously refining processes for waste reduction and lowering the carbon footprint.

References

Stainless steel

Manufacturing

SAE 304 stainless steel

Frequently Asked Questions (FAQ)

Q: What is the difference between 304 and 304L grade stainless steel?

A: 304 and 304L stainless steel strips differ primarily in carbon content. 304 contains up to 0.08% carbon, while 304L has a lower carbon content (typically 0.03% max). This lower carbon content in 304L makes it more resistant to intergranular corrosion after welding. Both grades offer excellent corrosion resistance, but 304L is preferred for applications where welding is required. Many manufacturers and suppliers in China produce both variants, with 304L being slightly more expensive but offering enhanced weldability and corrosion resistance in specific environments.

Q: How does 201 stainless steel compare to 304 stainless steel?

A: 201 stainless steel contains less nickel than 304 stainless steel, which is replaced with manganese and nitrogen. While 304 offers superior corrosion resistance and formability, 201 is more economical. 304-grade stainless steel is widely used in food processing, chemical containers, and architectural applications, whereas 201 stainless steel is typically used in less demanding environments like interior applications, household goods, and decorative items. For critical applications requiring maximum corrosion resistance, 304 is generally recommended over 201.

Q: What are the typical applications for 304 stainless steel strips?

A: 304 stainless steel strip is widely used across numerous industries due to its excellent corrosion resistance and formability. Typical applications include food processing equipment, kitchen equipment, architectural trims, automotive parts, chemical containers, heat exchangers, and pipe tube components. This versatile material is also used in medical equipment, springs, and stainless steel cable ties-ball self-locking systems. The 304 2B finish is particularly popular for applications requiring a smooth, semi-reflective surface. The material’s durability and resistance to many chemicals make it ideal for industrial steel applications in demanding environments.

Q: How does 316 stainless steel differ from 304L stainless steel?

A: 316 stainless steel contains 2-3% molybdenum, giving it superior corrosion resistance to 304L, particularly against chlorides and salt environments. While both are austenitic stainless steels with excellent formability, 316 offers better resistance in marine and chemical processing environments. 304L is more economical and widely used in general-purpose applications, while 316 is preferred for coastal environments, marine applications, and chemical processing. Both grades are available from most stainless steel strip manufacturers, but 316 typically commands a premium price due to its enhanced properties and higher molybdenum content.

Q: What is the chemical composition of a precision cold-rolled 304L stainless steel strip?

A: Precision cold rolled 304L stainless steel strip typically has a chemical composition of 18-20% chromium, 8-12% nickel, maximum 0.03% carbon, maximum 2% manganese, maximum 1% silicon, maximum 0.045% phosphorus, maximum 0.03% sulfur, with the balance being iron. This low-carbon variant of 304 stainless steel offers excellent corrosion resistance while maintaining good weldability. The precise control of chemical composition by reputable manufacturers and suppliers in China ensures consistent quality in the finished strips, making them suitable for demanding applications requiring tight tolerances.

Q: How does 430 stainless steel coil compare with 304 stainless steel strip?

A: 430 stainless steel coil is a ferritic stainless steel containing 16-18% chromium with no significant nickel content, whereas 304 stainless steel strip is an austenitic grade containing both chromium (18-20%) and nickel (8-10.5%). The 430 grade offers good corrosion resistance but is less resistant than 304 in harsh environments. 430 stainless steel is magnetic, more economical, and typically used for indoor applications like appliance trim and decorative purposes. 304 offers superior corrosion resistance, better formability, and is non-magnetic, making it suitable for more demanding applications. Both are available from stainless steel strip manufacturers at competitive prices.

Q: What are the standard finishes available for 304 stainless steel strips for sale?

A: 304 stainless steel strip is available in several standard finishes from manufacturers and suppliers. The most common are: 2B (smooth, reflective finish achieved through cold rolling, annealing, and light rolling), BA (Bright Annealed – mirror-like finish), #4 (brushed finish with visible grain), #8 (mirror-like polished finish), and matte/dull finish. The 2B finish is widely used for general applications, while BA is preferred for decorative applications. China factory suppliers can also provide custom finishes according to customer specifications, including different roughness values and patterns. The price of stainless steel strips varies depending on the finish type.

Q: How can I contact the leading 304L stainless steel strip manufacturers for quotes?

A: To contact us or other leading 304L stainless steel strip manufacturers for quotes, visit the manufacturer’s website and fill out their contact form, email their sales department, or call their customer service line. When reaching out, be prepared to provide specifications such as dimensions (width, thickness, length), grade (304, 304L, etc.), finish type, quantity needed, and application details. China’s leading 304L stainless steel strip manufacturers and suppliers usually respond within 24-48 hours with pricing and availability information. Many manufacturers also attend industry trade shows where you can meet representatives to discuss your specific requirements.

Q: What factors affect the price of stainless steel cold rolled strips manufactured by manufacturers?

A: Several factors influence the price of stainless steel cold rolled strips: grade (304, 304L, 316, 201, etc.), thickness and width tolerances (precision cold rolled strips with tighter tolerances cost more), finish type (2B, BA, #4, etc.), quantity ordered (larger orders typically receive better pricing), raw material costs (particularly nickel and chromium prices), production complexity, certification requirements, and market conditions. Additionally, shipping costs, tariffs, and exchange rates can significantly impact the final price when sourcing from manufacturers and suppliers in China or other countries. For the most competitive pricing, contacting multiple strip suppliers and manufacturers directly for quotes based on your exact specifications is advisable.

Is Fried Chicken Ultra-Processed Food? Exploring Frying and Health Risks

The tenderness and classic flavor of fried chicken make it beloved, but its classification as an ultra-processed food raises questions regarding its health impacts. In this regard, I strive to explain the boundaries of ultra-processed foods and define the place chicken fryers hold Fried Chicken within this classification. Moreover, we will analyze the frying technique, explaining how it modifies the nutritional value of the food and increases the likelihood of health risks – such as heightened fat, trans fat, and byproduct quantities. This article aims to balance the scientific side of food processing and the health impacts of eating fried chicken so that readers can appreciate a nuanced understanding of food and use that information to make better health-conscious decisions.https://machine.goldsupplier.com/de/blog/are-chicken-nuggets-pre-cooked/

What is considered processed and ultra-processed food?

Processed foods have undergone some form of alteration from their natural state, usually for reasons such as preservation, enhancement of flavor, or convenience. Adding salt, sugar, and vegetable oil can make cheese, sauces, and even baked bread, which is considered processed.

Unlike other foods, ultra-processed foods have little to no nutritional value. Packaged snacks, pre-prepared meals, instant noodles, and soda are all examples that contain added sugars, unhealthy fats, and artificial flavoring. Additionally, these foods have low nutrient density, meaning they are useless to one’s diet.

Ultra-processed foods encompass a broader category of products with low nutritional value, usually containing pre-prepared meals. Moreover, they contain many preservatives and sugar, which enhances the food’s flavor but should only be consumed in moderation.

Understanding the NOVA classification system for food processing

The NOVA classification system classifies foods into four groups based on the degree, level, and intent of processing. This system, created by researchers from the University of São Paulo, is used worldwide to study diets and their health effects.

Group 1: Unprocessed or Minimally Processed Foods: Natural foods like fruits, vegetables, fresh meat, and other grains. Washing, peeling, or freezing do not change the food’s properties and are considered minimal processing.

Group 2: Processed Culinary Ingredients: Foods in this category are derived from nature but undergo pressing, refining, or milling processes. Oil, butter, salt, and sugar used in seasonings and meal preparations fall under this category.

Group 3: Processed Foods: These are relatively simple products prepared mechanically by mixing Group 1 foods and Group 2 ingredients. Canned vegetables, cheese, and freshly baked bread are common examples. Cooking and preserving as processing techniques for food safety or extended shelf life also takes place.

Group 4: Ultra-Processed Foods: This group includes industrial formulations that contain little or no whole foods. Examples include soft drinks, packaged snacks, and instant meals, distinguished by dyes, stabilizers, and artificial flavors.

The NOVA framework is a key instrument for assessing food quality and its use in public health. It underlines the importance of incorporating whole and minimally processed foods into the diet.

Difference between processed and ultra-processed foods

Processed foods have been canned, frozen, fermented, or had other methods applied to them to extend their shelf life or improve their taste within their packaging. Processed foods include canned vegetables, bread, and cheese. Unlike processed foods, ultra-processed foods are explicitly made for ease and convenience. Cited supplements like sweeteners, preservatives, and artificial flavoring mark its industrial origins. This category contains sugary breakfast cereals, soda, and instant noodles. Distinguishing between these two types of foods is essential. Ultra-processed foods are commonly linked to adverse health symptoms with overconsumption. Processed foods, however, are better depending on their ingredients.

Examples of ultra-processed foods in our daily diet

Ultra-processed foods are highly industrialized foods having little resemblance to their raw counterparts, with added colorings, flavorings, and preservatives, among other chemicals, liable to be found only in a factory. These comprise ready-to-eat snacks such as chips and cookies, burgers and fries, processed meat products such as hot dogs and sausages, frozen meals, sodas, and energy drinks. Typically, modern diets are ubiquitous with these foods, as they are marketed as quick meals or snacks despite being low in fiber, vitamins, and minerals and dosed with refined sugars, unhealthy fats, and sodium. Consistent consumption of ultra-processed foods increases one’s susceptibility to obesity, diabetes, cardiovascular diseases, and chronic illnesses. It thus emphasizes the importance of a balanced, nutritious diet focusing on whole foods.

Is fried chicken considered an ultra-processed food?

Preparing fried chicken does not automatically make it ultra-processed, but the preparation methods will significantly impact its categorization. Fried chicken served at restaurants is a prime example of drive-thru food, which is ultra-processed due to the heavy refinement of ingredients such as breading, seasoning, and frying oils. However, if the fried chicken is made using minimal natural ingredients alongside whole unprocessed chicken, it can be considered homemade and free from ultra-processed classification. Overall, the ingredients and methods used in preparing the fried chicken determine the category.

Analyzing the ingredients and preparation methods of fried chicken

Whether fried chicken is considered ultra-processed depends mainly on what ingredients are used and the technique employed when preparing it. Under criteria set by credible authorities, fried chicken made at home from scratch using fresh chicken, homemade seasonings, and natural oil without preservatives is often considered ‘minimally processed.’ By contrast, commercial-grade fried chicken uses more industrialized inputs like pre-fried, breaded chicken, hydrogenated oils, stabilizers, and artificial flavoring, all of which make the product ultra-processed.

Per frying methodology, there are also significant differences to consider. Degreasing ovens utilized in mass deep frying tend to use already-used oil containing unhealthy trans fat acids. This starkly contrasts home-cooked meals, which are made using fresh oils devoid of preservatives. In the end, any evaluation of the level of the frying process requires deep scrutiny of product stickers, instruction manuals, and the ingredient list since they need to be assessed together to understand its nutritional integrity and health potential better.

How does frying affect the nutritional value of chicken?

When chicken is fried, its nutritional value is affected significantly, as its calories, fat, and cholesterol content increase due to oil absorption during cooking. Frying also uses higher temperatures, destroying sensitive nutrients, such as specific vitamins A and B-complex. Moreover, frying induces the creation of dangerous substances such as acrylamide and advanced glycation end products (AGEs) that have harmful health effects. The nutritional profile may change with the kind of oil used and the frying method – whether shallow or deep – as well. Although protein content is retained during the frying process, the overall impact is decreased nutritional value when compared to healthier alternatives such as baking or grilling.

Comparing homemade fried chicken to fast-food versions

In my opinion, homemade fried chicken is more nutritious than fast-food fried chicken because it offers better control over the cooking methods and ingredients. I tend to use fresh herbs to season the chicken, which increases the flavor and the oil to limit added sodium, trans fats, and excessive calories. On the other hand, fast food fried chicken comes with many unhealthful pre-processed additives and preservatives and is generally fried in old oil at exceedingly high temperatures, which becomes even more unhealthy with every batch cooked. Moreover, unlike the traditional way of deep frying, grilled frying uses much healthier oils, or none at all, making it easier to adapt recipes to suit various other diets. It is far better to make fried chicken at home rather than order it from a restaurant because the nutritional balance is far superior in homemade dishes.

What are the health risks associated with consuming ultra-processed foods?

Increased health risks [[]gap](insert risk) are exacerbated by the consumption of ultra-processed foods due to their high levels of added sugars, unhealthy fats, sodium, and artificial additives. The regular intake of these foods is linked with a greater chance of acquiring obesity, type 2 diabetes, cardiovascular diseases, and certain types of cancer. Ultra-processed foods frequently contain little or no essential nutrients, fiber, and antioxidants necessary to sustain one’s health. In addition, combining high caloric value with low satiety makes ultra-processed foods easy to gain weight and adopt a poor dieting lifestyle.

The link between ultra-processed foods and obesity

The rise in obesity rates has been profoundly linked to the consumption of ultra-processed foods, where their high energy concentration of sugar, unhealthy fats, and sodium add to the problem. Research shows that these foods are specially made to be more appetizing, which oversaturates appetite control mechanisms, leading to overconsumption. Furthermore, ultra-processed foods are low in fiber and protein, two crucial components for satiety, creating an environment for the body to overuse calories. Studies further show that habitual consumption of ultra-processed foods may lead to an imbalance in the gut microbiome. All these factors combined lead to the overwhelming rise of obesity across the world, advocating the need for a shift in diet and tighter controls on the food production process.

Increased risk of heart disease and type 2 diabetes

As an individual engaged with the impact of health issues, let me verify that there is scientific evidence showing how diets rich in processed foods significantly increase the chances of heart disease and type 2 diabetes. The added sugars, unhealthy oils, and salt found in such foods cause chronic inflammation, insulin resistance, and hypertension, which fuel these diseases. In addition, these foods are deficient in essential nutrients and further undermine one’s health over time by lowering the quality of dietary intake. A change in one’s approach is needed here—toward whole, minimally processed foods that are rich in nutrients to safeguard well-being and metabolic and cardiovascular health.

Impact of additives, sodium, and unhealthy fats in ultra-processed foods

Ultra-processed foods have high levels of preservatives, sodium, and impure fats, which can harm one’s health. Preservatives and artificial flavorings add taste and shelf life to food but negatively impact the gut microbiota and inflammation when consumed in excess. Commonly found high sodium content is directly linked to increased blood pressure, which is a significant risk factor for stroke and heart disease. Additionally, ultra-processed products often contain trans fats, refined vegetable oils, and unhealthy fats that raise LDL (bad) cholesterol and lower HDL (good) cholesterol. This makes atherosclerosis and cardiovascular complications more likely. These factors weaken and improve dietary quality, increasing chronic diseases and lowering health. To prevent and improve these risks, one should reduce the consumption of ultra-processed foods.

How can we reduce our intake of processed and ultra-processed foods?

Decreasing the consumption of processed and ultra-processed foods involves combining mindful diet choices and practical approaches. Strive to include more whole foods with minimal processing, such as fruits, vegetables, legumes, whole grains, and lean meat. Reduce reliance on pre-packaged products by cooking from scratch using fresh ingredients. Avoid items with added sugar, artificial fillers, or trans fats by checking food labels to identify these. Furthermore, plan meals and keep healthy snacks on hand to curb the urge to use highly processed convenience foods. Adopting these habits can improve dietary quality and enhance health over time.

Choosing whole and minimally processed food alternatives

Incorporating whole and minimally processed food options is instrumental in creating a balanced diet. Fresh fruits, vegetables, whole grains, legumes, nuts, and seeds should be consumed as they come. Such products carry fewer additives and preservatives. They are also an excellent source of essential fiber, vitamins, and minerals. When choosing packaged items, select those that have undergone minimal processing, contain short ingredient lists, and have recognizably real food ingredients. A case in point is whole grain bread that contains whole flour instead of refined bread laced with chemical stabilizers. Opting for whole foods instead of refined options enhances dietary quality, promotes effective digestion, and mitigates the risk of chronic illnesses.

Tips for avoiding processed foods in the American diet

To sidestep processed foods, I focus on whole ingredients first. This means I shop for fresh fruits and vegetables, meat, and dairy, as they are usually found at the grocery store’s perimeter. This way, I do not have to go through the aisles commonly stocked with heavily processed foods. Another tactic I use is checking the food label; if the item contains ingredients that are hard to pronounce or unfamiliar, I do not buy it. Moreover, I set aside time to prepare my meals from scratch using wholesome ingredients to control every component that goes into my meals. Finally, I try to prepare my meals and plan, so I do not have to rely on fast options when pressed for time.

Healthier cooking methods to replace frying

Swapping frying for other cooking methods will significantly decrease oil use, lower overall calorie consumption, and improve one’s health. From a health standpoint, steaming is one of the best alternatives; it is gentle on food and keeps many nutrients. Even baking with tiny amounts of oil allows the food to cook evenly, creating a crisp on the vegetables and proteins. Grilling is popular because it adds a rich flavor to food without excess fat since oils naturally drip away from the food during cooking. Using minimal oil or non-stick cookware can make sautéing less oil-heavy while achieving the texture associated with frying. Finally, air frying is an innovative technique that emulates limp fried foods and maintains their crispiness, unlike traditional frying, where one needs a large amount of oil. This makes it a flexible and health-conscious option.

What are some healthier alternatives to fried chicken?

Baked Chicken – Cooking chicken in the oven increases its health benefits because it uses less oil than frying and achieves a crisp outer layer. Using whole-grain breadcrumbs or light batter achieves the crunch associated with fried chicken.

Grilled Chicken – While preserving the flavor of the chicken, grilling also minimizes the fat content, which naturally drips off during cooking. This is an excellent option for health-conscious consumers.

Air-fried chicken—Chicken can be placed in an air fryer that uses little to no oil, enabling it to achieve the same crispiness associated with deep-fried dishes. This method lowers calorie intake while maintaining tenderness and is generally more convenient.

Steamed or Poached Chicken – Unlike the other options, poached and steamed chicken do not achieve a crisp shell. However, these methods retain chicken moisture and nutrients, resulting in a heart-healthy dish.

Oven-Fried Chicken—By mixing spices with crushed whole grain cereal or panko breadcrumbs, chicken can be baked into a “fried” style dish. This method reduces its fat content, making it healthier.

Exploring nutrient-rich, unprocessed chicken preparations

As chicken preparations undergo minimal processing, they seek to preserve the nutritional profile of the meat. Grilling chicken, baking it, air frying it, or steaming it provides a rich source of healthy proteins, essential vitamins like B6, and crucial minerals, including phosphorus, selenium, calories, and sodium. These methods are healthy alternatives to processed options laden with fats and unhealthy sodium. Not only do these methods improve the dietary focus of the chicken, but they also maintain its taste. Adding fresh herbs and spices along with marinades guarantees taste without compromising nutrition. That way, balanced meals can both be flavorful and healthy.

Incorporating more fruits, vegetables, and whole grains into meals

In my case, I alter how I shop for groceries and focus on more practical substitutions to add more fruits, vegetables, and whole grains to my meals. Instead of viewing them as separate categories, I aim to fill half my plate with colorful vegetables and fruits during meals for visual appeal and several vitamins and antioxidants. I couple this with replacing refined grains with more quinoa, brown rice, or even whole-grain bread to increase fiber intake. I also add fresh fruit, raw veggies, or whole grain crackers as snacks for constant nutrition throughout the day. Experimenting with recipes and making planned meals ahead increases the accessibility of healthier meal options, making them more enjoyable to consume.

How much of the average American diet consists of ultra-processed foods?

According to multiple studies, ultra-processed foods account for 57-60% of the average American diet. Examples of these foods include packaged snacks, ready-to-eat meals, processed meats, and sugary beverages. In addition to being low in essential nutrients, these foods often contain high levels of added unhealthy sugars, fats, and preservatives. The consumption of ultra-processed foods has been linked to rising obesity, cardiovascular disease, and metabolic disorder rates.

Current statistics on ultra-processed food consumption in the US

Newest statistics attribute the consumption of ultra-processed foods to 57%-60% of calorie intake in the average American diet. A 2021 JAMA study reported that children and adolescents consume about 67% of their daily caloric intake in ultra-processed foods, while adults consume slightly lower amounts but are still significant. The category is dominated by packaged snacks, pre-prepared meals, and sugary beverages due to their low cost and convenience. Public health research has highlighted the correlation of rising rates of obesity, diabetes and other chronic health conditions to these consumption patterns, marking the need for a shift in diet toward minimally processed foods.

Comparing American diet trends to other countries

В analyzing dietary trends across America and the globe, one can spot glaring contrasts. Unlike America or the United Kingdom, countries like Japan and Italy focus on traditional caring for their whole food category and substantially balance fresh vegetables, nuts, legumes, lean meat, and even whole grains. This, coupled with Greece, reveals the Mediterranean diet, which is linked with lower heart-related diseases, obesity, and lethargy, attributed to unprocessed foods, healthy fats (olive oil), and exercise. A Japanese diet that is low on carbs and consists of nutrient-dense meals and restrained portions tends to give one of the world’s highest life expectancies.

Subsequently, ultra-processed foods are rising in Brazil and Mexico as they cloak more and more of the world, gaining access to global food markets. For these two countries, there’s still hope as their consumption of ultra-processed calories is lower than that of America, which has over half their daily caloric intake supplied by ultra-processed foods. On the other hand, policies aiming to promote culture have, to a greater extent, fresh, healthy, and non-cooked foods that result in better health outcomes in the aforementioned developed countries, showing the impact of a quality diet on public health.

References

Fried chicken

Ultra-processed food

Chicken as food

Frequently Asked Questions (FAQ)

Q: Is fried chicken considered a processed or ultra-processed food?

A: Fried chicken is generally considered a processed food but may not always fall into the ultra-processed category. The level of processing depends on the ingredients used and the preparation method. If the chicken is simply breaded and fried at home, it’s less processed than commercially prepared fried chicken that may contain additives, preservatives, and other artificial ingredients. However, many fast-food or pre-packaged fried chicken products are often considered ultra-processed due to their extensive ingredient lists and manufacturing processes.

Q: What are some foods to avoid for better health and well-being?

A: Eating less ultra-processed foods is recommended to improve health and well-being. Some foods to avoid or limit include: 1. Fast food fried chicken and chicken nuggets 2. Packaged snacks high in salt, sugar, and unhealthy fats 3. Sugary beverages and those containing high-fructose corn syrup 4. Processed meats with nitrates 5. Instant noodles and soups 6. Frozen meals with long lists of artificial ingredients Instead, focus on whole foods, lean proteins, fruits, vegetables, and whole grains.

Q: How does the frying process affect the nutritional value of chicken?

A: Frying chicken can significantly impact its nutritional profile. The process adds calories and fat, especially if the chicken is breaded. During frying, some nutrients may be lost, while the absorption of oil increases the overall fat content. Additionally, high-temperature frying can lead to the formation of potentially harmful compounds. Baking or grilling chicken are healthier alternatives that preserve more of the original nutritional value.

Q: Are there any health risks associated with consuming fried chicken regularly?

A: Regular consumption of fried chicken, especially commercially prepared versions, can pose several health risks. These include: 1. Increased risk of obesity due to high calorie and fat content 2. Higher risk of heart disease from increased saturated and trans fats 3. Potential exposure to harmful compounds formed during the frying process 4. Increased risk of type 2 diabetes due to high fat and often high carbohydrate content 5. Possible nutrient imbalances if fried chicken replaces more nutritious foods in the diet

Q: How can I make healthier fried chicken at home?

A: To make a healthier fried chicken at home: 1. Use skinless chicken to reduce fat content 2. Opt for whole wheat flour or almond flour for breading 3. Use an air fryer or oven-fry the chicken to reduce oil absorption 4. Choose healthier oils like olive or avocado oil 5. Season with herbs and spices instead of excess salt 6. Serve with a side of non-starchy vegetables or a salad to balance the meal

Q: What are some alternatives to fried chicken for a healthier diet?

A: Healthier alternatives to fried chicken include: 1. Grilled or baked chicken 2. Roasted chicken with herbs 3. Poached chicken for salads or sandwiches 4. Stir-fried chicken with vegetables 5. Slow-cooked or pressure-cooked chicken dishes 6. Chicken kebabs with vegetables These options allow you to enjoy chicken without the added calories and potential health risks associated with frying.

Q: How do ultra-processed foods like fried chicken impact overall health?

A: Ultra-processed foods, including some forms of fried chicken, can negatively impact overall health. They are often high in calories, unhealthy fats, added sugars, and sodium while low in essential nutrients and fiber. Regular consumption has been linked to increased risks of obesity, heart disease, type 2 diabetes, and certain cancers. These foods can also disrupt gut health, affecting the balance of beneficial bacteria and potentially leading to inflammation and digestive issues.

Q: Are frozen vegetables considered ultra-processed foods?

A: No, frozen vegetables are not typically considered ultra-processed foods. They are often minimally processed and can be a nutritious alternative to fresh vegetables. The freezing process helps preserve nutrients, and most frozen vegetables don’t contain added ingredients. However, it’s important to check labels, as some frozen vegetable products may include sauces or seasonings that could add processing steps or unhealthy additives.

The Best Embroidery Machines for Your Home Business: A Complete Guide

Many tools are needed to start a home-based embroidery business, the best embroidery machine being one of them. A business owner’s choice regarding tools impacts efficiency and refinement; therefore, paying attention to detail is essential. This guide aims to highlight some of the best embroidery machines available in the market and help you make an informed purchase. We will discuss key components like hoop or frame size, stitch speed, embroidery editing software, and overall ease of operation to meet your requirements. This guide serves to help both novice users and seasoned experts enhance their workflow and unlock their creative prowess by transforming their ideas into reality.https://machine.goldsupplier.com/blog/deco-650-bernina-embroidery-machine/

Single-needle vs. multi-needle embroidery machines: Which is better for a home business?

When choosing between single or multi-need embroidery machines for your home business, the decision is primarily based on your operational budget, efficiency, and production requirements. Single-needle machines are more affordable and straightforward, making them excellent beginner options. Unfortunately, they require more labor-intensive color thread changes, limiting their ability to keep up with demand. Conversely, multi-needle machines increase production levels and simplify complex multi-color designs, as constant thread changes aren’t necessary. However, they can be much more expensive than their single-needle counterparts. Regardless of the cost, the speed and versatility provided can significantly increase productivity and are better suited for home embroidery businesses. Evaluate your business goals to figure out the best solution.

Pros and cons of single-needle machines

Based on my experience and research, single-needle embroidery machines offer some notable benefits and shortcomings. To start with the advantages, they are generally more affordable and easier to operate, especially for novices. Their compact size also makes them appropriate for home use, and they often have added features such as touchscreen interfaces and ergonomic design. That said, there are some drawbacks. For example, single-needle machines are slower than multi-needle machines, which limits their efficiency in bulk production settings. Manually changing threads for more intricate patterns adds time-consuming work. These factors generally make single-needle embroidery machines preferred by hobbyists over professional business operations.

Advantages of multi-needle embroidery machines

Multi-needle embroidery machines provide many advantages, especially for industrial and commercial-level embroidery work. The fact that they can hold multiple threads at once eliminates the cumbersome task of changing threads for different colors. This, in turn, enhances operational efficiency and significantly reduces production time. In addition, these machines are always set at higher operating speeds. This ensures precision and quality while maintaining speed during large-scale production. Advanced automation features, like trimming the threads and changing colors, can also be done automatically, lessening the user’s burden. Due to having multiple heads and needles, these machines can seamlessly deal with intricate and detailed patterns. To summarize, multi-needle embroidery machines help commercial embroidery businesses with unparalleled productivity while ensuring consistent results, making them an indispensable tool for businesses.

Factors to consider when choosing between single and multi-needle

Production Volume: Single-needle machines are suitable for personal or small-scale hobby work. Multi-needle machines are more appropriate for commercial production because they run faster, can do color changes, and use multiple heads simultaneously.

Design Complexity: In intricate designs that require a number of colors, multi-needle machines are more effective because they require fewer manual adjustments to the threads. Single-needle machines will be less productive because they require manual actions.

Cost: Practitioners have different budget plans that directly relate to the machines that they are planning to purchase. In this context, single-needle machines are relatively cheaper, so they are more appropriate for novices or small firms. On the other hand, multi-needle machines are expensive, but they are economically sensible for larger businesses in terms of features and speed.

Ease of Use: Single-needle machines have more basic designs, which make them suitable for novice users. Multi-needle machines are more complicated, but the automation and time-saving features are beneficial for skilled users.

Space Requirements: Single-Neel machines are more compact than multi-needle machines, requiring less physical space in the workshop. Because of their larger size and extra parts, multi-needle machines occupy more space.

If users consider all of these factors, they can easily select the machine type that best meets their level of expertise, production requirements, and budgetary constraints.

What are the best embroidery machine brands for home businesses?

Many brands have been recognized over the years for the performance of their embroidery machines for home businesses, along with features such as reliability. Brother, for instance, excels with easy-to-use interfaces and models like the Brother PE800, which are adaptable for all levels of users. There are other brands like Janome, which are equally trustworthy and offer reliable multilayer machines. For example, the Janome MB-7 is exceptional in precision and multi-needle work. Bernina and Baby Lock provide advanced solutions with extensive design libraries and excellent stitch quality for users looking for industrial-strength performance in a home business setting. All these brands are targeted towards users with different levels of affordability and professional-grade functionalities.

Comparing features of popular models

When looking for Versatile and feature-rich embroidery machines, three models come to mind and stand out repeatedly. These include the Brother PE800, which is sophisticated yet easy to use. It has a 5-inch touch screen, 138 built-in embroidery designs, and a five-by-seven embroidery area that will accommodate large-scale projects. It is also compatible with external USB files.

The Advanced user of the Janome Mb-7 will notice features fitted for small businesses, like the seven needles designed to make multi-thread designs. It also comes with a touch-screen display. One can adjust the speed of the embroidery. It is compatible with many files and formats, meaning professional outcomes are guaranteed.

For compact-form machines with industrial performance, Baby Lock Solaris takes the title. With an embroidery field of ten by sixteen inches and a built-in projector for pattern placement, it leads the market. IQ designer means users can create the advanced custom crafts they want, giving professionals what they desire. Each model highlighted above is tailored towards different levels of skill and project scope.

Best embroidery machines for beginners

Based on the reviews, the top embroidery machines for interested beginners are reasonably priced while offering reliability and essential features. The Brother PE800 is a favorite due to its 5″x7″ embroidery field, 138 built-in designs, and user-friendly interface. This model is great for beginners but allows for creativity and self-expression. Another competing machine is the Janome Memory Craft 400E. Its automatic thread cutting and large 7.9″x7.9″ field create a strong sense of durability and make this model entry-level with professional capabilities. The standout feature of the Brother SE600 is its ability to work as a sewing and embroidery machine. Its 4″x4″ field and an easy-to-navigate touchscreen make this model ideal for beginners interested in multiple crafts. Each of these models offers ease of use alongside advanced functionality, making them ideal for new enthusiasts in the embroidery world.

How vital is embroidery software for a home business?

The embroidery software holds significant value for a home business because of the increased design flexibility and customizability that comes with it. The right software permits the tailoring of designs, alteration of patterns, and conversion to machine-readable formats. This not only enhances creativity but also guarantees quality professional results for clients. Furthermore, sophisticated software can contain lettering, monogramming, and resizing, accommodating a more excellent range of customer demands. For business owners, automating processes, especially those considered manual work, enhances competitive positioning stitches by embroidery software on scalability on market edge autopilot the investment.

Types of embroidery software available

According to my research, embroidery software falls into categories based on differing skill sets and functionality. Firstly, there are more simplistic editing applications geared towards hobbyists, which have basic resizing, editing, and design importing features. These are simple and straightforward, so novices can start crafting almost instantly.

Secondly, mid-tier software combines advanced features with ease of use, such as auto-digitizing and stitch simulation. These are great for small business owners who need some complexity but not too much.

Lastly, commercial-grade embroidery software has a range of features, from custom digitizing and complex design editing to batch processing. These solutions are usually adopted by professional embroidery businesses looking to maximize output without losing attention to detail and quality. The appropriate choice varies with the breadth of the work, skill level, and the requirements at hand.

Digitizing and creating custom designs

Digital embroidery utilizes digitizing technology to transform logos into files that can be embroidered onto apparel with a sewing machine. Document recording software outlines where stitches will be placed while also establishing the types of stitches utilized, the paths followed, and their concentration levels. The embroidery digitization file type selected determines how well the needlework will be copied and emulated on different fabrics, ensuring the design’s details remain unobscured.

Custom designs start with an original artwork which can be converted into a design that meets the required purpose. Following that, setting threads and stitch lengths, as well as the type of fabric to be used, are incorporated with tuners in the implementing software to fit the design’s requirements. Specific attention must be given to the underlay stitching’s primary framework, shun those zones where stitches are packed too closely since this leads to puckering, and most importantly, how the flow of the stitches is directed and placed. These skill sets combine to make the design appealing, durable, and professionally finished.

Integrating software with your embroidery machine

Integrating an embroidery machine with software starts with verifying that the machine interfaces appropriately with the selected software. For instance, I would choose software that accommodates.PES, DST, or.EXP files my machine uses. Post installation, I would attach the embroidery machine to my computer over USB and Wi-Fi or other available options, per the machine’s functionalities. The following process is setting up the software to detect the embroidery machine as my template and calibrating the defaults to the correct settings. After establishing these parameters, I can transfer the designs I prepared for stitching directly into the software and subsequently to the machine for embroidery. Regular updates with accompanying troubleshooting features provided by the manufacturer are fundamental to sustaining optimal performance.

What types of embroidery projects can I tackle with a home business machine?

Using a home business embroidery machine, you can tackle a wide range of complex projects, including custom apparel such as monogrammed shirts, jackets, caps, and personalized gifts like embroidered towels, bags, and baby blankets. Additionally, you can make decorative home items, such as pillowcases, table runners, and even curtains. Small businesses can also use these machines for branding and marketing, as they can intricately design logos and embroidery for promotional items or custom pieces. What a user can achieve with the machine depends mainly on the machine’s features, template sizes, such as hoops, and the materials the machine can work with.

Clothing and accessories embroidery

I personalize the items for embroidery on gifts and home decor by focusing on the individual’s specific needs. Precision is vital because such designs must match the recipient’s tastes and preferences. With a home embroidery machine, I can create custom table runners, wall hangings, and cushion covers that can transform an entire living space. I can also design embroidered gifts, such as towels or napkins with personalized inscriptions, creating treasured mementos. The latest design features in embroidery technology allow me to use intricate designs and varying materials so that every piece stands out as a fantastic work of art and maintains the strength to survive long-term use. These modern machines are highly versatile, making embroidering for home and gifts an endless endeavor with the right strategies.

Home decor and gift item embroidery

Custom clothing and accessories offer creative expression by custom embroidery for personal and business use. In a home business setup, an embroidery machine efficiently produces monogrammed shirts, jackets, and even hats, which can be customized as per customer requests. Branded apparel also benefits from such machines since they can professionally add logos and other intricate details. Clothing is not the only avenue to be embroidered; bags, hats, and scarves can also serve as embroidered accessories, enabling a wide range of versatility. Modern embroidery machines accept thread types, stitches, file types, and textiles to maintain quality and precision across diverse designs.

Specializing in lettering and monogramming

Lettering and monogramming might be the two most popular embroidered techniques because of their classic and unique charm. Concentrating on these methods makes it feasible to develop sophisticated personalization for garments, linens, and other accessories, transforming them into refined pieces. Lettering encompasses the careful stitching of words and sentences, which can be done in many fonts and styles, while monogramming focuses on marks and insignias, which are more personal and traditional, focusing on initials.

Using modern home embroidery machines, these designs can be personalized for different materials and fabric types, which guarantees quality. Modern machines come integrated with digital software that enables the production of intricate, detailed, digitized patterns through reliable and precise stitching at every level. Moreover, selecting colors and types of threads, stabilizers, and the font chosen are essential in achieving near-perfect finishes. From wedding gifts and home décor to embroidered workwear branding, these services offer a flexible style and identity integration solution.

How do I maintain and care for my embroidery machine?

Caring for the machine is fundamental to optimize performance and enhance longevity, along with regularly cleaning and lubricating it according to the set instructions. Attention should be paid to removing dust and lint, particularly around the thread path, needle area, bobbin case, and other pertinent sections. Recommended oils must be used exclusively, while needles must be changed routinely to prevent any potential thread damage or skipped stitches. Taking into account the adjustment of the tension setting, internal component strain can be alleviated by utilizing quality thread and stabilizers. Precision in operation, alongside mechanical issues, can be maintained with periodic servicing by a competent technician. Lastly, the manufacturer’s recommended storage, use, and damage control instructions should be respected and adhered to.

Regular cleaning and oiling procedures

Follow these intricate maintenance routines to keep your embroidery machine working like a well-oiled machine.

Cleaning the Bobbin Section: Using a soft brush or compressed air, remove any residual lint and debris floating around the various parts of the bobbin area. Do not blow directly into the machine, as this might push dirt deeper into it.

Maintenance of Thread Path: Use a clean cloth to wipe the thread path and tension discs to remove dust or thread debris. Focus on parts that the thread often comes in contact with to avoid buildup.

Needleplate Scrubbing: After unscrewing the needle plate, use a small brush to clean its underside. This area tends to trap fabric fluff, which eventually leads to problems with the machine’s smooth functioning.

Lubrication Procedures: Check the machine manual to find the area that needs oiling. Use only the oil suggested by the manufacturer and only the prescribed amount on the specific spots, which are, in most cases, the hook race or moving components in the bobbin system.

Testing After Maintenance: After all the oils and cleaning residues are removed, carefully put all the components in their places and run a test stitch or two on a scrap piece of fabric to verify proper functionality.

Routine maintenance like this helps avoid mechanical wear and helps maintain uniform stitching accuracy. Including these actions in your routine will significantly enhance the longevity of your sewing machine.

Troubleshooting common embroidery machine issues

Breaking Threads: Abuse and neglect of machines can lead to incorrect threading and thread path and set threads that are either inferior or incompatible. It is best to start by rethreading the machine and making sure that the thread path is smooth and correct. Adjust the tension settings accordingly to the fabric and thread type used. Remember always to utilize embroidery thread of less superior quality, as threads of poor quality are likely to snap and fray during operation.

Skipped stitches: Most stitch problems stem from a missing stitch. In most cases, missed stitches are caused by the machine being improperly engaged, used with cam sequences out of sync, and damaged or blunt needles. Thread slack will contribute to the issue, so ensure that the thread is correctly located within the tension disks with no slack. It is equally important to ensure that all fabric is adequately stabilized with no free movement, which is suitable through stitching to ensure everything stays put.

Bird Nesting (Thread Bunching Under Fabric): Bird nesting, used in sewing, is often caused by improper insertion of the bobbin, irregular threading in the bobbin case, or improper tension settings. Remove the bobbin and clean the area because the lint residue may block the mechanism’s movement. Replace it, ensuring that it is wound evenly. Adjust the upper thread tension along with the bobbin thread to achieve balance, which is essential for the smooth movement of threads.

Machine Not Stitching: If the sewing machine does not stitch for you, the probable reasons might be a disengaged presser foot, issues with the positioning of the needle, or a threading problem. Confirm that the presser foot is lowered fully, and the needle has to be placed to the right and aligned very carefully. Also, the threading has to be checked so that all guides and tension settings are not overlooked.

Fabric Puckering: Fabric puckering can be traced back to too few stabilizers being added, incorrect balance in the tension, and injury to the needle blade. It is critical to have the right stabilizers to stabilize the fabric along with the design used for embroidery while also ensuring the tension is slackened for a test on a fabric scrap. If the needle shows damage, it has to be replaced, as the worn-out cutting instruments can lead to injury to vulnerable materials.

When dealing with these issues one at a time, following the embroidery machine manual’s instructions can assist you in achieving professional-quality stitching and high machine performance. Emphasis is placed on proper settings of defined tools, maintenance procedures, and work with minimal hindrance, and outcomes tend to be repeatable and reliable.

When to seek professional maintenance

When I cannot resolve specific issues through troubleshooting techniques, I look for expert-maintenance solutions for my embroidery machine. Some problems, like unsophisticated stitching, abnormal sound, and incessant thread snapping, could suggest more serious internal mechanical problems requiring remote assistance. Moreover, I will pursue professional servicing if the machine has remained unchecked for cleaning and calibration for a long time; usually, I switch between these processes after 1-2 million stitches or annually, whichever comes first. Consulting professionals guarantee that crucial parts of the device that affect machine performance are inspected, lubricated, torque adjusted, and trimmed competently so as not to compromise the life of the device or its stitching accuracy over time.

References

Machine

Sewing

Machine embroidery

Frequently Asked Questions (FAQ)

Q: What’s the difference between single-needle vs. multi-needle embroidery machines?

A: Single-needle embroidery machines are suitable for home use and small businesses, while multi-needle embroidery machines are designed for commercial use. Multi-needle machines can embroider with multiple colors simultaneously, increasing efficiency for larger projects. They’re ideal for those looking to grow their business and handle higher volumes of work.

Q: What features should I look for in the best embroidery machine for my home business?

A: When choosing an embroidery machine for your home business, consider features like hoop size, built-in designs, LCD screen, automatic needle threader, and computerized capabilities. Look for machines with larger embroidery areas, various built-in stitch designs, and the ability to import custom designs for the best results in your projects.

Q: Are any inexpensive embroidery machines suitable for starting a home embroidery business?

A: There are several affordable options for those starting an embroidery business. Brands like Brother offer machines such as the SE600, which combines sewing and embroidery functions at a reasonable price. While these may not have all the features of high-end commercial machines, they can be excellent for beginners and small-scale operations.

Q: What is the average machine size for home embroidery businesses?

A: The average machine size for home embroidery businesses typically ranges from compact tabletop models to larger freestanding units. Many popular home machines come with a 5×7-inch embroidery hoop, suitable for most small to medium-sized projects. However, if you plan on accomplishing lettering embroidery or larger designs, you might consider machines with larger hoop sizes.

Q: How do commercial embroidery machines differ from home embroidery machines?

A: Commercial embroidery machines are generally more robust and faster and have larger embroidery areas than home machines. They often feature multi-needle capabilities, allowing for quicker color changes and more efficient production. Commercial machines are built for heavy-duty use and can handle larger volumes of work, making them ideal for industrial embroidery or growing businesses.

Q: What are some top brands for home embroidery machines?

A: Some of the best embroidery machines for home businesses come from reputable brands like Brother, Janome, Singer, and Bernina. These brands offer a range of machines suitable for different skill levels and business needs. Researching and comparing different machines is important to find the one that fits your specific requirements and budget.

Q: Should I buy an embroidery machine from a dealer or online?

A: Both options have their advantages. Buying from a dealer often provides personalized service, hands-on demonstrations, and local support. They may also offer training and maintenance services. Purchasing online may help you find the best deals and a wider selection. However, when buying online, ensure you get a genuine product with a valid warranty. Consider your needs for support and training when making this decision.

Q: How vital is embroidery digitizing software when starting a home embroidery business?

A: Embroidery digitizing software is crucial for creating custom designs and expanding your business offerings. While many machines come with built-in designs, having digitizing software allows you to create unique embroidery designs for clients, giving you a competitive edge. It’s an essential tool for growing your business beyond standard features and pre-loaded designs.

Q: What type of maintenance do embroidery machines require?

A: Regular maintenance is essential for keeping your embroidery machine in top condition. This includes cleaning the machine after each use, oiling moving parts as the manufacturer recommends, changing needles regularly, and ensuring proper tension. It’s also essential to use high-quality thread and materials to prevent issues. Some embroiderers recommend getting professional servicing annually, especially for commercial machines.

The Best Embroidery Machines for Your Home Business: A Complete Guide

Many tools are needed to start a home-based embroidery business, the best embroidery machine being one of them. A business owner’s choice regarding tools impacts efficiency and refinement; therefore, paying attention to detail is essential. This guide aims to highlight some of the best embroidery machines available in the market and help you make an informed purchase. We will discuss key components like hoop or frame size, stitch speed, embroidery editing software, and overall ease of operation to meet your requirements. This guide serves to help both novice users and seasoned experts enhance their workflow and unlock their creative prowess by transforming their ideas into reality.

Single-needle vs. multi-needle embroidery machines: Which is better for a home business?

When choosing between single or multi-need embroidery machines for your home business, the decision is primarily based on your operational budget, efficiency, and production requirements. Single-needle machines are more affordable and straightforward, making them excellent beginner options. Unfortunately, they require more labor-intensive color thread changes, limiting their ability to keep up with demand. Conversely, multi-needle machines increase production levels and simplify complex multi-color designs, as constant thread changes aren’t necessary. However, they can be much more expensive than their single-needle counterparts. Regardless of the cost, the speed and versatility provided can significantly increase productivity and are better suited for home embroidery businesses. Evaluate your business goals to figure out the best solution.https://machine.goldsupplier.com/ar/blog/embroidery-machine-programs-free/

Pros and cons of single-needle machines

Based on my experience and research, single-needle embroidery machines offer some notable benefits and shortcomings. To start with the advantages, they are generally more affordable and easier to operate, especially for novices. Their compact size also makes them appropriate for home use, and they often have added features such as touchscreen interfaces and ergonomic design. That said, there are some drawbacks. For example, single-needle machines are slower than multi-needle machines, which limits their efficiency in bulk production settings. Manually changing threads for more intricate patterns adds time-consuming work. These factors generally make single-needle embroidery machines preferred by hobbyists over professional business operations.

Advantages of multi-needle embroidery machines

Multi-needle embroidery machines provide many advantages, especially for industrial and commercial-level embroidery work. The fact that they can hold multiple threads at once eliminates the cumbersome task of changing threads for different colors. This, in turn, enhances operational efficiency and significantly reduces production time. In addition, these machines are always set at higher operating speeds. This ensures precision and quality while maintaining speed during large-scale production. Advanced automation features, like trimming the threads and changing colors, can also be done automatically, lessening the user’s burden. Due to having multiple heads and needles, these machines can seamlessly deal with intricate and detailed patterns. To summarize, multi-needle embroidery machines help commercial embroidery businesses with unparalleled productivity while ensuring consistent results, making them an indispensable tool for businesses.

Factors to consider when choosing between single and multi-needle

Production Volume: Single-needle machines are suitable for personal or small-scale hobby work. Multi-needle machines are more appropriate for commercial production because they run faster, can do color changes, and use multiple heads simultaneously.

Design Complexity: In intricate designs that require a number of colors, multi-needle machines are more effective because they require fewer manual adjustments to the threads. Single-needle machines will be less productive because they require manual actions.

Cost: Practitioners have different budget plans that directly relate to the machines that they are planning to purchase. In this context, single-needle machines are relatively cheaper, so they are more appropriate for novices or small firms. On the other hand, multi-needle machines are expensive, but they are economically sensible for larger businesses in terms of features and speed.

Ease of Use: Single-needle machines have more basic designs, which make them suitable for novice users. Multi-needle machines are more complicated, but the automation and time-saving features are beneficial for skilled users.

Space Requirements: Single-Neel machines are more compact than multi-needle machines, requiring less physical space in the workshop. Because of their larger size and extra parts, multi-needle machines occupy more space.

If users consider all of these factors, they can easily select the machine type that best meets their level of expertise, production requirements, and budgetary constraints.

What are the best embroidery machine brands for home businesses?

Many brands have been recognized over the years for the performance of their embroidery machines for home businesses, along with features such as reliability. Brother, for instance, excels with easy-to-use interfaces and models like the Brother PE800, which are adaptable for all levels of users. There are other brands like Janome, which are equally trustworthy and offer reliable multilayer machines. For example, the Janome MB-7 is exceptional in precision and multi-needle work. Bernina and Baby Lock provide advanced solutions with extensive design libraries and excellent stitch quality for users looking for industrial-strength performance in a home business setting. All these brands are targeted towards users with different levels of affordability and professional-grade functionalities.

Comparing features of popular models

When looking for Versatile and feature-rich embroidery machines, three models come to mind and stand out repeatedly. These include the Brother PE800, which is sophisticated yet easy to use. It has a 5-inch touch screen, 138 built-in embroidery designs, and a five-by-seven embroidery area that will accommodate large-scale projects. It is also compatible with external USB files.

The Advanced user of the Janome Mb-7 will notice features fitted for small businesses, like the seven needles designed to make multi-thread designs. It also comes with a touch-screen display. One can adjust the speed of the embroidery. It is compatible with many files and formats, meaning professional outcomes are guaranteed.

For compact-form machines with industrial performance, Baby Lock Solaris takes the title. With an embroidery field of ten by sixteen inches and a built-in projector for pattern placement, it leads the market. IQ designer means users can create the advanced custom crafts they want, giving professionals what they desire. Each model highlighted above is tailored towards different levels of skill and project scope.

Best embroidery machines for beginners

Based on the reviews, the top embroidery machines for interested beginners are reasonably priced while offering reliability and essential features. The Brother PE800 is a favorite due to its 5″x7″ embroidery field, 138 built-in designs, and user-friendly interface. This model is great for beginners but allows for creativity and self-expression. Another competing machine is the Janome Memory Craft 400E. Its automatic thread cutting and large 7.9″x7.9″ field create a strong sense of durability and make this model entry-level with professional capabilities. The standout feature of the Brother SE600 is its ability to work as a sewing and embroidery machine. Its 4″x4″ field and an easy-to-navigate touchscreen make this model ideal for beginners interested in multiple crafts. Each of these models offers ease of use alongside advanced functionality, making them ideal for new enthusiasts in the embroidery world.

How vital is embroidery software for a home business?

The embroidery software holds significant value for a home business because of the increased design flexibility and customizability that comes with it. The right software permits the tailoring of designs, alteration of patterns, and conversion to machine-readable formats. This not only enhances creativity but also guarantees quality professional results for clients. Furthermore, sophisticated software can contain lettering, monogramming, and resizing, accommodating a more excellent range of customer demands. For business owners, automating processes, especially those considered manual work, enhances competitive positioning stitches by embroidery software on scalability on market edge autopilot the investment.

Types of embroidery software available

According to my research, embroidery software falls into categories based on differing skill sets and functionality. Firstly, there are more simplistic editing applications geared towards hobbyists, which have basic resizing, editing, and design importing features. These are simple and straightforward, so novices can start crafting almost instantly.

Secondly, mid-tier software combines advanced features with ease of use, such as auto-digitizing and stitch simulation. These are great for small business owners who need some complexity but not too much.

Lastly, commercial-grade embroidery software has a range of features, from custom digitizing and complex design editing to batch processing. These solutions are usually adopted by professional embroidery businesses looking to maximize output without losing attention to detail and quality. The appropriate choice varies with the breadth of the work, skill level, and the requirements at hand.

Digitizing and creating custom designs

Digital embroidery utilizes digitizing technology to transform logos into files that can be embroidered onto apparel with a sewing machine. Document recording software outlines where stitches will be placed while also establishing the types of stitches utilized, the paths followed, and their concentration levels. The embroidery digitization file type selected determines how well the needlework will be copied and emulated on different fabrics, ensuring the design’s details remain unobscured.

Custom designs start with an original artwork which can be converted into a design that meets the required purpose. Following that, setting threads and stitch lengths, as well as the type of fabric to be used, are incorporated with tuners in the implementing software to fit the design’s requirements. Specific attention must be given to the underlay stitching’s primary framework, shun those zones where stitches are packed too closely since this leads to puckering, and most importantly, how the flow of the stitches is directed and placed. These skill sets combine to make the design appealing, durable, and professionally finished.

Integrating software with your embroidery machine

Integrating an embroidery machine with software starts with verifying that the machine interfaces appropriately with the selected software. For instance, I would choose software that accommodates.PES, DST, or.EXP files my machine uses. Post installation, I would attach the embroidery machine to my computer over USB and Wi-Fi or other available options, per the machine’s functionalities. The following process is setting up the software to detect the embroidery machine as my template and calibrating the defaults to the correct settings. After establishing these parameters, I can transfer the designs I prepared for stitching directly into the software and subsequently to the machine for embroidery. Regular updates with accompanying troubleshooting features provided by the manufacturer are fundamental to sustaining optimal performance.

What types of embroidery projects can I tackle with a home business machine?

Using a home business embroidery machine, you can tackle a wide range of complex projects, including custom apparel such as monogrammed shirts, jackets, caps, and personalized gifts like embroidered towels, bags, and baby blankets. Additionally, you can make decorative home items, such as pillowcases, table runners, and even curtains. Small businesses can also use these machines for branding and marketing, as they can intricately design logos and embroidery for promotional items or custom pieces. What a user can achieve with the machine depends mainly on the machine’s features, template sizes, such as hoops, and the materials the machine can work with.

Clothing and accessories embroidery

I personalize the items for embroidery on gifts and home decor by focusing on the individual’s specific needs. Precision is vital because such designs must match the recipient’s tastes and preferences. With a home embroidery machine, I can create custom table runners, wall hangings, and cushion covers that can transform an entire living space. I can also design embroidered gifts, such as towels or napkins with personalized inscriptions, creating treasured mementos. The latest design features in embroidery technology allow me to use intricate designs and varying materials so that every piece stands out as a fantastic work of art and maintains the strength to survive long-term use. These modern machines are highly versatile, making embroidering for home and gifts an endless endeavor with the right strategies.

Home decor and gift item embroidery

Custom clothing and accessories offer creative expression by custom embroidery for personal and business use. In a home business setup, an embroidery machine efficiently produces monogrammed shirts, jackets, and even hats, which can be customized as per customer requests. Branded apparel also benefits from such machines since they can professionally add logos and other intricate details. Clothing is not the only avenue to be embroidered; bags, hats, and scarves can also serve as embroidered accessories, enabling a wide range of versatility. Modern embroidery machines accept thread types, stitches, file types, and textiles to maintain quality and precision across diverse designs.

Specializing in lettering and monogramming

Lettering and monogramming might be the two most popular embroidered techniques because of their classic and unique charm. Concentrating on these methods makes it feasible to develop sophisticated personalization for garments, linens, and other accessories, transforming them into refined pieces. Lettering encompasses the careful stitching of words and sentences, which can be done in many fonts and styles, while monogramming focuses on marks and insignias, which are more personal and traditional, focusing on initials.

Using modern home embroidery machines, these designs can be personalized for different materials and fabric types, which guarantees quality. Modern machines come integrated with digital software that enables the production of intricate, detailed, digitized patterns through reliable and precise stitching at every level. Moreover, selecting colors and types of threads, stabilizers, and the font chosen are essential in achieving near-perfect finishes. From wedding gifts and home décor to embroidered workwear branding, these services offer a flexible style and identity integration solution.

How do I maintain and care for my embroidery machine?

Caring for the machine is fundamental to optimize performance and enhance longevity, along with regularly cleaning and lubricating it according to the set instructions. Attention should be paid to removing dust and lint, particularly around the thread path, needle area, bobbin case, and other pertinent sections. Recommended oils must be used exclusively, while needles must be changed routinely to prevent any potential thread damage or skipped stitches. Taking into account the adjustment of the tension setting, internal component strain can be alleviated by utilizing quality thread and stabilizers. Precision in operation, alongside mechanical issues, can be maintained with periodic servicing by a competent technician. Lastly, the manufacturer’s recommended storage, use, and damage control instructions should be respected and adhered to.

Regular cleaning and oiling procedures

Follow these intricate maintenance routines to keep your embroidery machine working like a well-oiled machine.

Cleaning the Bobbin Section: Using a soft brush or compressed air, remove any residual lint and debris floating around the various parts of the bobbin area. Do not blow directly into the machine, as this might push dirt deeper into it.

Maintenance of Thread Path: Use a clean cloth to wipe the thread path and tension discs to remove dust or thread debris. Focus on parts that the thread often comes in contact with to avoid buildup.

Needleplate Scrubbing: After unscrewing the needle plate, use a small brush to clean its underside. This area tends to trap fabric fluff, which eventually leads to problems with the machine’s smooth functioning.

Lubrication Procedures: Check the machine manual to find the area that needs oiling. Use only the oil suggested by the manufacturer and only the prescribed amount on the specific spots, which are, in most cases, the hook race or moving components in the bobbin system.

Testing After Maintenance: After all the oils and cleaning residues are removed, carefully put all the components in their places and run a test stitch or two on a scrap piece of fabric to verify proper functionality.

Routine maintenance like this helps avoid mechanical wear and helps maintain uniform stitching accuracy. Including these actions in your routine will significantly enhance the longevity of your sewing machine.

Troubleshooting common embroidery machine issues

Breaking Threads: Abuse and neglect of machines can lead to incorrect threading and thread path and set threads that are either inferior or incompatible. It is best to start by rethreading the machine and making sure that the thread path is smooth and correct. Adjust the tension settings accordingly to the fabric and thread type used. Remember always to utilize embroidery thread of less superior quality, as threads of poor quality are likely to snap and fray during operation.

Skipped stitches: Most stitch problems stem from a missing stitch. In most cases, missed stitches are caused by the machine being improperly engaged, used with cam sequences out of sync, and damaged or blunt needles. Thread slack will contribute to the issue, so ensure that the thread is correctly located within the tension disks with no slack. It is equally important to ensure that all fabric is adequately stabilized with no free movement, which is suitable through stitching to ensure everything stays put.

Bird Nesting (Thread Bunching Under Fabric): Bird nesting, used in sewing, is often caused by improper insertion of the bobbin, irregular threading in the bobbin case, or improper tension settings. Remove the bobbin and clean the area because the lint residue may block the mechanism’s movement. Replace it, ensuring that it is wound evenly. Adjust the upper thread tension along with the bobbin thread to achieve balance, which is essential for the smooth movement of threads.

Machine Not Stitching: If the sewing machine does not stitch for you, the probable reasons might be a disengaged presser foot, issues with the positioning of the needle, or a threading problem. Confirm that the presser foot is lowered fully, and the needle has to be placed to the right and aligned very carefully. Also, the threading has to be checked so that all guides and tension settings are not overlooked.

Fabric Puckering: Fabric puckering can be traced back to too few stabilizers being added, incorrect balance in the tension, and injury to the needle blade. It is critical to have the right stabilizers to stabilize the fabric along with the design used for embroidery while also ensuring the tension is slackened for a test on a fabric scrap. If the needle shows damage, it has to be replaced, as the worn-out cutting instruments can lead to injury to vulnerable materials.

When dealing with these issues one at a time, following the embroidery machine manual’s instructions can assist you in achieving professional-quality stitching and high machine performance. Emphasis is placed on proper settings of defined tools, maintenance procedures, and work with minimal hindrance, and outcomes tend to be repeatable and reliable.

When to seek professional maintenance

When I cannot resolve specific issues through troubleshooting techniques, I look for expert-maintenance solutions for my embroidery machine. Some problems, like unsophisticated stitching, abnormal sound, and incessant thread snapping, could suggest more serious internal mechanical problems requiring remote assistance. Moreover, I will pursue professional servicing if the machine has remained unchecked for cleaning and calibration for a long time; usually, I switch between these processes after 1-2 million stitches or annually, whichever comes first. Consulting professionals guarantee that crucial parts of the device that affect machine performance are inspected, lubricated, torque adjusted, and trimmed competently so as not to compromise the life of the device or its stitching accuracy over time.

References

Machine

Sewing

Machine embroidery

Frequently Asked Questions (FAQ)

Q: What’s the difference between single-needle vs. multi-needle embroidery machines?

A: Single-needle embroidery machines are suitable for home use and small businesses, while multi-needle embroidery machines are designed for commercial use. Multi-needle machines can embroider with multiple colors simultaneously, increasing efficiency for larger projects. They’re ideal for those looking to grow their business and handle higher volumes of work.

Q: What features should I look for in the best embroidery machine for my home business?

A: When choosing an embroidery machine for your home business, consider features like hoop size, built-in designs, LCD screen, automatic needle threader, and computerized capabilities. Look for machines with larger embroidery areas, various built-in stitch designs, and the ability to import custom designs for the best results in your projects.

Q: Are any inexpensive embroidery machines suitable for starting a home embroidery business?

A: There are several affordable options for those starting an embroidery business. Brands like Brother offer machines such as the SE600, which combines sewing and embroidery functions at a reasonable price. While these may not have all the features of high-end commercial machines, they can be excellent for beginners and small-scale operations.

Q: What is the average machine size for home embroidery businesses?

A: The average machine size for home embroidery businesses typically ranges from compact tabletop models to larger freestanding units. Many popular home machines come with a 5×7-inch embroidery hoop, suitable for most small to medium-sized projects. However, if you plan on accomplishing lettering embroidery or larger designs, you might consider machines with larger hoop sizes.

Q: How do commercial embroidery machines differ from home embroidery machines?

A: Commercial embroidery machines are generally more robust and faster and have larger embroidery areas than home machines. They often feature multi-needle capabilities, allowing for quicker color changes and more efficient production. Commercial machines are built for heavy-duty use and can handle larger volumes of work, making them ideal for industrial embroidery or growing businesses.

Q: What are some top brands for home embroidery machines?

A: Some of the best embroidery machines for home businesses come from reputable brands like Brother, Janome, Singer, and Bernina. These brands offer a range of machines suitable for different skill levels and business needs. Researching and comparing different machines is important to find the one that fits your specific requirements and budget.

Q: Should I buy an embroidery machine from a dealer or online?

A: Both options have their advantages. Buying from a dealer often provides personalized service, hands-on demonstrations, and local support. They may also offer training and maintenance services. Purchasing online may help you find the best deals and a wider selection. However, when buying online, ensure you get a genuine product with a valid warranty. Consider your needs for support and training when making this decision.

Q: How vital is embroidery digitizing software when starting a home embroidery business?

A: Embroidery digitizing software is crucial for creating custom designs and expanding your business offerings. While many machines come with built-in designs, having digitizing software allows you to create unique embroidery designs for clients, giving you a competitive edge. It’s an essential tool for growing your business beyond standard features and pre-loaded designs.

Q: What type of maintenance do embroidery machines require?

A: Regular maintenance is essential for keeping your embroidery machine in top condition. This includes cleaning the machine after each use, oiling moving parts as the manufacturer recommends, changing needles regularly, and ensuring proper tension. It’s also essential to use high-quality thread and materials to prevent issues. Some embroiderers recommend getting professional servicing annually, especially for commercial machines.

Unlock the Power of Loctite Shoe Glue for Effortless Shoe Repair

If you are looking for in-depth details on using the Loctite Shoe Glue and honing your shoe repair skills, you have come to the right place. In this blog, we specify how to select the most suitable adhesive for your needs and provide some tips for its application. Whether you require some repairs, leather or vinyl repairs, or just plain glue, which you can use to bond different sections of the shoe, Loctite Shoe Glue will help you create strong and sturdy bonds without much hassle.

Delving into more particulars and having more confidence as we speak, we will cover how to obtain precision and control on the connection, the procedure without creating a mess, and joint longevity. Likewise, here you will find the Loctite Glue strategic protocol for shoe repair, including the bonding surface treatment activity, the bonding phase, and the bonding stage, which contains clear drying for the smoothest repairs.

To assist you in making a choice, we shall review the ratings and customer comments on the Loctite shoe glue and the other shoe bonding systems and their performance under extreme conditions. In a similar light, some of the most pertinent issues in the shoe repair industry will be discussed, and some practical tips on handling tricky shoes, such as those made of leather and vinyl, as well as flexible sole repairs, will also be presented.

Once you finish reading this article, you will be well versed in the facts and the professional opinions that will make it clear how you could harness the real power of Loctite Shoe Glue in your shoe repair projects. Without further ado, let us embark on a journey to unearthing reliable and easy ways of repairing shoes, this time employing the impressive Loctite Shoe Glue.https://bearing-mechanicalparts.com/loctite-glue/

How to Choose the Right Item for Your Shoe Repair Needs

In terms of solving your shoe repair problems, when selecting the right item, there are many considerations to consider. To assist you with your decision process, here are some pertinent inquiries that need to be answered.

  1. Compatibility of materials: Specify the materials you will work with. Are they leather shoes, vinyl sneakers, or other types of shoes? Using shoe glue that will apply to the specific shoe being worked with is essential.
  2. Method of application: Once this has been determined, consider the application method that best suits you. Would you like a brush-on shoe glue that is precisely applicative or one in a squeeze tube that is easy to use and dispense? The application method is an essential component that aids repair more efficiently and precisely.
  3. Shoe structure: First, examine the shoe glue and the parameters its bond offers. Are they durable and flexible? Since shoes always bear the load and move around often, it is essential to use glue that will not lose its stickiness after bending and stretching.
  4. Time: Finally, consider how long the shoe glue takes to dry. Some adhesives take longer to dry, affecting the total time to repair them. If you want to make a fast glue-up, select a shoe glue that dries quickly.

To come to a reasonable conclusion and acquire the correct product, for example, Loctite Shoe Glue, for your footwear repair need, you can address these questions and evaluate the particulars of your shoe repair work.

What Makes Loctite Shoe Glue Stand Out?

If you’re in the shoe repair business, you already know Loctite Shoe Glue. There are many reasons for its immense popularity in the market. Loctite also makes an application tube (squeeze tube) available, allowing quick and easy dispensation and a brush-on option. Thus, the customer conveniently has the means of application based on their specific repair needs.

On the other hand, for those new to shoe repair, I’ll say that Loctite is one of the most dependable products if you care about durability and flexibility. My experience with shoe glue tells me that it also has a robust and flexible bond made to last through the daily pressure and movement of shoes. When this happens, it ensures that even some bending and stretching of the repaired area doesn’t compromise it.

We can all appreciate the lost time waiting for glue or other adhesive bonds to dry. Loctite Shoe Glue provides fast-drying glue for those pressed on time, allowing one to complete your shoe repairs quickly. This makes it all the easier to wear those fashionable shoes within the shortest time possible.

So, if you want to repair your shoes quickly, wear them again, and have peace of mind for your shoe repair for a long, then pray that Loctite is accessible in your region;

Understanding the Adhesive Properties

To comprehend the adhesive qualities of Loctite Shoe Glue, it is essential to understand the elastic properties of the material as well as its technical parameters, such qualities that make it effective and efficient. These are the lines that one has to consider:

  1. Bond Strength: Loctite Shoe Glue is designed in a manner that a strong bond is formed during the repair such that the area that has been repaired can withstand pressure and movement at all times.
  2. Flexibility: Loctite Shoe Glue has been reinforced and, therefore, can be flexible. Thus, the bond does not break when the shoe is stretched or bent.
  3. Application Options: Depending on the type of shoe and the type of work being performed, Loctite Shoe Glue is available in a brush-on mode or squeeze tube, making it easy to apply or control the amount used.
  4. Durability: The shoe glue is made especially for resilience and, therefore, enables a lasting bond even with the performance, such as using the shoe in regular activities.
  5. Drying Time: The glue’s quick drying ability allows the person to make various repairs quickly, reducing the time needed to wait to wear the preferred pair of shoes.

Why Flexible and Durable Bonds Matter

The essential aspect of durable and flexible bonds for shoe repair is that the repaired area withstands the regular movements of the shoes when used. This way, the glue does not fracture or loosen over time, a significant issue for many. Another aspect is the bond strength that can be developed across the repairs so they do not get bald or torn out under adverse circumstances. Thanks to the formulations and the know-how that Loctite provides, you can be sure that the repaired areas will be as flexible and rigid as needed for proper bonding.

Expert Tips for Using Loctite Shoe Glue Effectively

Bear in mind that Loctite Shoe Glue is intended for shoe repairs; therefore, here are several dos and don’ts to optimize the results:

  1. Surface Cleanliness: Make sure the surfaces (for instance, the shoe and the sole) are carefully cleaned and dry before application. Most surfaces are smooth, so they will sometimes also require sandpaper or a file to bond appropriately. For best results, lightly roughen smooth surfaces using sandpaper or a file to enhance adhesion.
  2. Adhesive Quantity: Both surfaces should be coated with a thin, even layer of adhesive glob. Overdoing the amount of Adhesive will interfere with the bond’s flexing and make the application messy.
  3. Setting the bond: Do not apply pressure to the repaired area until the glue is completely set. Before commencing with repairs, take the fuse to make the area rip. The setting guidelines are the best, as they are specific to the product.
  4. Room Temperature: Open a few windows to increase ventilation, but be cautious of arid conditions, as they can be detrimental to setting the adhesive and sometimes affect the bonding speed. Steel-toed boots are most certainly made for men who seek additional validation from the people around them.
  5. As a side note, taking a step back and minimizing stress in the area is still beneficial, as doing so will ensure optimal curing conditions. While Loctite Shoe Glue is strong at first, it can withstand heavy use once dried, which will take time after application.

Also, remember that following the directions well will ensure proper, long-lasting results with Loctite Shoe Glue and professional application tips.

How to Ensure Precise Adhesion

I have valuable insights to provide to achieve optimum precision and adhesion while working with Loctite Shoe Glue. Here are some basic guidelines based on numerous studies as well as top industrial resources:

  1. Surface Preparation is Vital: Preparing the surfaces thoroughly before applying the glue to achieve smooth adhesion is advisable. Properly clean the surfaces of the shoe and the material that needs repair of any dirt, dust, or old adhesive residues, as this will enhance the level of bonding contact.
  2. Number of Glues Applied: The correct adhesion application depends on the amount of glue used. Redundancy coverage must be restricted, so a thin, consistent layer of Loctite Shoe Glue should be applied to only one of the surfaces to be assembled. Oversaturation should be avoided, as it will produce poor results and compromise the bond’s versatility.
  3. Let it Dry: Another critical point is to give the adhesive plenty of time to dry to ensure a strong bond. Adhere to the manufacturer’s guidelines regarding the recommended drying period. Do not quickly put pressure or tension on the repair site until the glue dries.
  4. Control Temperature and Humidity: Working in a space that is adequately ventilated and maintains reasonable temperature and humidity levels is crucial. On the other hand, if temperatures are too low or there’s high humidity, it may interfere with the bonding process and the efficacy of the repair. So, aim for the best conditions in which to apply the adhesive.
  5. Prolonged Stress on the Repair Area is Not Recommended Post Application: Although Loctite Shoe Glue binds well, one should refrain from putting too much weight on or using the restored piece heavily immediately after mending it. Let the glue dry completely to provide effective results.

Though there are some pro tips, if you remember them while applying Loctite Shoe Glue, you can make an accurate adhesion, and the repair will stay intact for as long as possible. Always keep dry and remember that proper application and attention to detail are key factors for the best results in adhesive bonding.

Avoiding the Mess: Application Techniques

To apply Loctite Shoe Glue correctly and perfectly, here are some tips given by the experts:

Preparation is Important: Before applying any adhesive, clean and dry the surfaces to be bonded using any practical means. Excess dirt, debris, or dust could interfere with the glue’s proper adhesion.

  • Use a detergent or alcohol-based cleaner to clean and remove any grease or oils.
  • Use sandpaper or a smooth file to smooth rough edges and promote better bond strength.

The Correct Amount of Glue Must Be Used: Apply a thin and even layer of Loctite Shoe Glue to either surface to be bonded. Do not apply excessive glue, as it may drip off while being applied and create a mess.

  • A single glue application should have a thickness of around 0.05mm to 0.15mm or less.

Apply Consistent Pressure: After applying glue, carefully combine both surfaces and retain the pressure. Uniform pressure must be applied to the entire adhesion area to facilitate optimal contact and adhesive distribution.

  • Use moderate pressure or more to bond the two surfaces properly.

Ensure That Ample Time Is Given: The curing period for Loctite Shoe Glue differs from brand to brand; however, it is crucial to ensure that temperatures and commission are not altered drastically. Manufactured instructions should be followed for a time.

  • You should let the adhesive sit still and together for at least 24 hours for the bond to dry.
  • Ensure the temperature is around 20 °C to 25 °C (or 68 °F to 77 °F).
  • Recommended humidity level: 40% to 60%.

These bonding tips will help you both get Loctite Shoe Glue to bond and reduce the mess while doing so… Remember to take the necessary precautions and safety measures to avoid mistakes and to complete the repair correctly and durably.

Maintaining Durable Bonds with Minimal Effort

Proper maintenance is crucial to protect the bonded surfaces and get the maximum out of Loctite Shoe Glue. Some of the maintenance tips likely to promote stronger bonds DO NOT take long to implement but require minimal effort:

  1. Avoid Excessive Force or Stress: Despite the strength of the adhesive bond, considering the bonded area as always strong might not be a good bet. Sharp strikes, extreme temperatures, or excessive bending or twisting should be avoided.
  2. Regular Inspection: Use your eyes and inspect the joined surfaces after a specified period of use for any signs of damage. If there is any damage, deal with it organized, without hesitation, to prevent more harm to the bond.
  3. Proper cleaning and Protection: Within limits, the aim should be to keep the joined areas clean of contaminants. In case of visible contaminants,s avoid soaps with potent additives as they would help degrade the bond. Further, a coating or sealant may help protect the bond from harsh environments.
  4. Considerations about Temperature and Humidity: Humidity and temperature primarily affect the characteristics of the adhesive bonds that may be created. Extreme temperature or moisture can seriously affect the bond’s strength and durability. Therefore, unless otherwise stated in the manufacturer’s instructions, keeping the bonded item within the recommended optimal temperature and humidity range is best.
  5. Avoid Water Drubbing and Stressful Rubbing: As much as Loctite Shoe Glue has ‘some degree of moisture protection,’ it is not impervious to the effects of water or extreme conditions – continuous exposure will alter the bond formed over time; hence, try as much as possible to avoid immersing the bonded item into water or exposing them to and extreme conditions.

One important rule is that all essential measures should be taken on time to help boost the durability of the bond while minimizing the overall effort. Loctite Shoe Glue is not a product aimed at enhancing the already-established durability level. If you consider measures, as discussed, bonds created will be durable and require little effort.

Step-by-Step Shoe Repair Process Using Loctite Glue

Although relatively simple, repairing your shoes using Loctite Glue and not following the instructions correctly might mess everything up. Therefore, here are some simple-to-follow instructions:

  1. Prepare the Surface: Before commencing the bonding application, ensure that the shoe and the parts that need to be attached are free from any exterior residues, dirt, or dust. If the area is dirty, clean it more thoroughly using the provided cleaner or a mild detergent.
  2. Apply the Loctite Glue: Lay a skinny, even coat of Loctite Glue on both surfaces to be attached. Then, using a small applicator or a brush, apply the bonding substance as precisely as possible.
  3. Align and Press: Position the surfaces to be joined and then press them together, ensuring they are pinned and pressure is consistently spaced. This creates enough contact space between surfaces and glue.
  4. Allow for Curing: After the shoe has been combined, let it settle for a few hours as directed on the package so that proper bonding can occur.
  5. Avoid Stress and Water Exposure: Avoid curving or placing the shoe into the water during and after combining. Sooner or later, constant exposure to high amounts of water and unstressful periods can weaken the bond.
  6. Act Promptly: The tasks of shoe repairs can be reduced by utilizing advanced bonding techniques and suitable practice measures that ensure the longevity of bonds. During the repairs, the footwear should not be kept in high-temperature and high-humidity environments, nor should the surface of the bond be excessively rubbed or submerged in water.

This method effectively joins surfaces using the strength of Loctite Glue. However, to guarantee the best results first read the instructions for the specific Loctite glue product you’re using.

Preparing the Surface for Adhesion

The surface needs to be appropriately prepared to form a strong and durable bond with Loctite Glue. Always follow these steps for best adhesion:

  1. Cleaning The Surface: Clean all the surfaces to be glued together with weak soap or rubbing alcohol. This removes dirt, grease, and other impurities that would reduce adhesion.
  2. Roughen The Surface: When dealing with smooth or non-porous surfaces, like some plastics or metals, rough edges, use sandpaper or any appropriate abrasive. This facilitates a good grip and enlarges the bonding surface.
  3. Apply Primer (If Specified): Certain substrates benefit from a primer applied before the actual gluing. Refer to the product instructions for the Loctite glue to determine whether a primer is required and how to use it.
  4. Make Sure There Is Proper Fit and Alignment: Applying glue to items that have not been tightly fitted and properly aligned will result in loss of contact, eventually deteriorating the strength of the adhesive bond.
  5. Environmental Considerations: Temperature and humidity conditions are critical for surface preparation and bonding. For maximum adhesion and curing of the adhesive, follow some of the recommended parameters usually provided in the Loctite Glue product instructions.

Adopting these surface preparation techniques increases the adhesion and, thus, the durability of your Loctite Glue bond. Remember to consider the directions given by the manufacturers of the Loctite glue product you are using to ensure the correct application and adhesion.

Applying the Glue Correctly

Applying Loctite Glue requires proper techniques and precision. Hence, this is a detailed guide on how to use it successfully, step by step.

  1. Clean and Dry Surfaces: Use a suitable solvent to clean the surfaces to be bonded from any grease, dirt, or contamination. Then, ensure Isopropyl alcohol dries instantly as this enhances Isopropyl alcohol to form a clean surface for bonding before proceeding to the next step.
  2. Apply The Glue: Loctite Glue should be applied wisely to only one of the surfaces. Dispense Isopropyl alcohol while ensuring uniformity is maintained appropriately. Please check the manufacturer’s instructions before deciding how much to apply and what method to use.
  3. Apply Primer (If Required): A primer may be helpful when applied to some materials before bonding. Thus, check the Loctite Glue product instructions to see if a primer is necessary, and then use it according to the implementation method provided.
  4. Ensure Proper Fit and Alignment: Double check and ensure that the two surfaces that are to be joined fit and are aligned. This step must be thoroughly understood because a good alignment will provide maximum contact, thus achieving optimum bonding strength.
  5. Consider Environmental Factors: Consider environmental conditions that might affect the adhesiveness of matrix materials during surface preparation and bonding. Ensure you follow all temperature and humidity parameters in the Loctite Glue product instructions.

Following the surface preparation and application steps below can improve the strength and durability of the bond made using Loctite Glue. Nevertheless, always refer to the specific manufacturer’s Loctite Glue product instructions for proper use and application.

Rating and Reviews of Loctite Shoe Glue at a Glance

Lactic Shoe Glue’s performance and reliability are consistent in tone with the overall rating, which suggests that it is pretty effective in joining shoe materials together. This adhesive has enjoyed a long-standing reputation due to its positive reviews for its strong adhesion and durability qualities.

In their comments on the adhesive, the customers promised to maintain a dry and clear joint, which will make the joint invisible on the surfaces where it is bonded. This feature dramatically improves the cosmetic value of the shoe repair or construction since no visible adhesive would show through.

Loctite Shoe Glue has superior bonding strength and acts as a plasticizer, so environmental change does not affect the bond made by the paint or glue. It is also beneficial in providing moisture resistance and effectively protecting the bond from everyday wear.

Customer Feedback on Durability

I would like to thank everyone for sharing their assessment of the durability of our glue products as the representative of Loctite Shoe Glue. Customers provided us with some insights, and on top of that, we evaluated a lot of information found on reputable websites. The following are some of the characteristics of the assurance tested and provided by Loctite Shoe Glue:

  1. Lasting Bonding Features: Several reviews have mentioned that the product’s bonding strength does not fade completely, which helps bond shoe materials adequately.
  2. Moisture Resistance: This shoe glue is remarkable for its moisture resistance and can endure several environmental conditions without weakening its strength and durability.
  3. Thoroughly Tested for the Rigours of Use: This product has been built to withstand the daily rigor that a shoe goes through, Loctite Shoe Glue. It has passed every sort of testing for the guarantee of its effectiveness.

As a reliable manufacturer, we emphasize the importance of following the general notes when preparing the surfaces and applying the adhesive material. It is always best to follow product-specific instructions, as is the case for any other product, such as those issued by Loctite. 

All in all, when it comes to gluing shoe materials, Loctite Shoe Glue is in the league of highly rated ones with reliable performance and endurance. Thank you for your feedback. We seek to improve our products to satisfy our clients.

Compared with Other Shoe Adhesive Options

As with any shoe adhesive, some prerequisites exist for filing Loctite Shoe Glue. The primary objective remains the same – Bonding shoes. Here are some aspects that may come in handy:

  1. Bond Strength and Durability: Loctite Shoe Glue has an excellent bonding strength and durability reputation. Thus, wear and tear won’t be an issue.
  2. Surface Preparation: Experience has proved that surface preparation is essential for excellent bonding results. Follow the basic guidance issued by the manufacturer in the general paper. Besides, the general considerations on the Loctite products issued, specifically the publication shelve, may guarantee to talk about the adhesive with practical attention.
  3. Appearance and Moisture Resistance: Loctite Shoe Glue consistently functions while unreservedly displaying the primary of shoes in all its glory. Its moisture-protective cover prevents exposure to water.
  4. Reputation and Reviews: Allot significant time doing research from authentic resources like the brand’s website and review portals so that there will be minimal chances for making mistakes as you would have known what others say about their experiences.

With these concerns out of the way, you can trust that the bonding of shoe parts is safe when using Loctite Shoe Glue.

How it Performs in Extreme Temperatures

Given that I am an expert in adhesive performance, I can say that Loctite Shoe Glue performs well in highly aggressive temperatures. It is designed for most operational temperature extremes. This can be attributed to its strong and confident product bond created with adhesive properties, allowing for incredible heat or cold performance. This temperature range makes it suitable for joining shoe materials since you are assured of durability irrespective of the environmental situation.https://bearing-mechanicalparts.com/blog/loctite-vs-other-super-glues/

Common Shoe Repair Challenges and Solutions

Shoes are subjected to various wear and tear issues, requiring timely repairs to maintain their functionality and appearance. Here are some common shoe repair challenges and their solutions:

  1. Worn-out Soles or Heels:
  2. Challenge: The soles or heels of shoes can wear down due to constant friction and usage.
  3. Solution: Resoling or replacing worn-out soles or heels can restore the shoes’ traction and stability. A professional cobbler can do this, or DIY resoling kits can be used.
  4. Loose or Broken Shoe Components:
  5. Challenge: Shoe components such as straps, buckles, or eyelets can become loose or break, affecting the shoe’s overall structure and fit.
  6. Solution: Repairing or replacing the loose or broken components can help restore the shoe’s functionality. This may involve sewing, gluing, or replacing the affected parts.
  7. Torn or Damaged Shoe Uppers:
  8. Challenge: Shoe uppers, made from materials like leather or fabric, can get torn or damaged, compromising the shoe’s aesthetics and structural integrity.
  9. Solution: Repairing the torn or damaged uppers by stitching, patching, or using adhesive solutions can extend the shoe’s lifespan and maintain its appearance.
  10. Squeaky Shoes:
  11. Challenge: Squeaky shoes can be a nuisance caused by friction between different shoe components or moisture buildup.
  12. Solution: Applying lubricants, such as talcum powder or silicone spray, to the squeaky areas can reduce friction and eliminate the noise. Tightening loose shoe components or using insoles can help resolve the issue.
  13. Stretched or Tight Shoes:
  14. Challenge: Shoes that have become stretched or too tight can cause discomfort and affect the overall fit.
  15. Solution: Using shoe inserts, such as heel grips or insoles, can provide extra cushioning and improve the fit. Stretching techniques or using a shoe stretcher may also help adjust the shoe’s size.

Addressing these common shoe repair challenges with appropriate solutions can effectively extend the lifespan of your shoes and maintain their optimal condition.

Dealing with Difficult Materials Like Leather and Vinyl

Тaking to the characteristics of leather and vinyl, materials like these require cosmetic care or hands-on repairs with specialized equipment and know-how. As a professional in shoe repair, I have been inspired by the wealth of information provided by knowledgeable authorities on these issues. There are some tips and techniques applicable while handling each of these materials. These are:

Leather:

  • Cleaning: One should avoid using harsh chemicals and soaking the leather. Instead, a mild leather cleaner and soft cloth could work wonders in removing stains.
  • Conditioning: Use leather lotion regularly. It avoids dry crust to ‘grow’ in the leather.
  • Polishing: To remove dirt and provide some protection, use a nutritional cream or polish that matches the color of the leather the shoes are made of.
  • Repairing scrapes: If the damage is light scratches, a leather conditioning cream can help reduce it. Deep scratches, cuts, and sections where the leather is completely missing require a professional to handle the issue.

Vinyl:

  • Maintaining: Do not scrub the material or use an abrasive cleaner; a single wet cloth will suffice to clean it.
  • Preserving: Use a vinyl protectant on the areas that receive sunlight and generate heat to avoid cracking and allow moisture in.
  • Mending Rips or Cracks: To fix minor cracks or rips, you can use a vinyl repair kit with glue and putty. Always read the instructions. If the damage is extensive, it is ideal to get help from a professional.

Invariably, when dealing with leather or vinyl, try to work out how suitable or effective any repair or cleaning agent is on a small section first, where nobody is likely to see it, this will help ensure that no damage will be caused. If you have some other concerns or problems start to become big, it is better to contact a professional shoe repair expert to have the proper consultation and solutions to your problems.

Overcoming Moisture and Wear Resistance Issues

Attention to detail is essential to addressing challenges surrounding moisture and wear resistance. Materials can lose their strength and longevity if excess moisture is introduced, and wear resistance is key to ensuring the reliability of the material. Here are some key strategies that I found useful for such resistance problems thanks to my research:

  1. Material Selection: It is critical to remember that particular materials can be chosen because they are harder to penetrate, which means they retain moisture better and can bear wear, such as stainless steel and ceramic materials or highly specialized coatings.
  2. Surface Treatments: Adding appropriate surface treatments, such as protective coatings against moisture intrusion, sealants, or finishes, increases moisture and wear surface resistance. This dramatically enhances the material’s durability because the treatment protects against water.
  3. Proper Maintenance: Without constant upkeep of the material, which involves regular clean-up, inspection, and routine maintenance, the chance of moisture causing damage or the surface wearing out is very high. If any damage is sustained, such as cracks, leaks, or simply worn-out surfaces due to moisture overexposure, immediate repair must be done. Following guidelines specified by the manufacturer and implementing a maintenance range is advised to ensure maximum efficiency and lifespan.

Frequently Asked Questions (FAQ)

Q: What makes Loctite Shoe Glue ideal for shoe repair?

A: Loctite Shoe Glue is ideal for shoe repair because its resistant formula creates a tremendous bond strength, even in conditions of constant flexing. This makes it perfect for repairing shoes’ soles, heels, and other parts that experience frequent movement.

Q: How should I apply Loctite Shoe Glue for the best results?

A: To apply Loctite Shoe Glue effectively, clean the surfaces to be bonded and ensure they are dry. Then, evenly apply the glue from the clear 0.6 fl oz tube, using the nozzle for precision. Finally, clamp the pieces together and allow the adhesive to cure for a stronghold.

Q: Is Loctite Shoe Glue resistant to water?

A: Yes, Loctite Shoe Glue is water-resistant, making it suitable for use on shoes that may get wet, such as boots and outdoor footwear. This ensures the repair lasts even in damp conditions.

Q: Can Loctite Shoe Glue be used on different materials?

A: Loctite Shoe Glue is versatile and can be used on various materials, including leather, canvas, rubber, textiles, foam, and fabric. Thus, it is an excellent choice for repairing a wide range of footwear.

Q: What is the temperature range for using Loctite Shoe Glue?

A: Loctite Shoe Glue’s resistant formula works effectively within a temperature range of 58°F to 248°F, providing excellent resistance to vibration and durability under different weather conditions.

Q: How much glue is in each pack of Loctite Shoe Glue?

A: Each pack contains a clear 0.6-fl oz tube of Loctite Shoe Glue, which provides enough adhesive for multiple repairs.

Q: Can Loctite Shoe Glue fix a sole that is coming off?

A: Yes, Loctite Shoe Glue is perfect for fixing coming-off soles. Its formula is ideal for bonds where constant flexing is a problem and provides a permanent repair solution.

Q: Is Loctite Shoe Glue easy to use?

A: Loctite Shoe Glue is designed to be easy to use. Its convenient nozzle allows for precise application, and its formulation quickly cures and forms a strong bond.

Q: Are any unique products used with Loctite Shoe Glue?

A: While no unique products are required, using clamps during the curing process can enhance the bond strength and ensure a more durable repair.

Q: What should I do if I encounter issues with Loctite Shoe Glue?

A: If you encounter issues such as access denied to certain surfaces, verify the compatibility of the materials you are bonding. Follow the application instructions carefully for optimal results and ensure all surfaces are clean and dry before use.

Discover the Power of Loctite Super Glue: Your Ultimate Adhesive Solution

Loctite Super Glue is one of the best adhesive materials suited for all best binding and permanent purposes. It asserts its superiority over other superglue, making it a favorable choice for repairs. If you are a craftsman or have a basic understanding of DIY projects, this guide is all you need. This article covers everything you need to apply Loctite super glue effectively on your projects, from its source application to its proper usage.

In our next discussions, we will describe the qualifications and advantages of Loctite super glue, including its ideal super formulation and compatibility with various materials and its ability to dry undetectably. Further, we will explain the glue’s advantages in its gel formation and how to achieve complete control with the Gel Control Applicator. Last but not least, you will learn the efficiency of the adhesive with a range of layer materials, including porous and non-porous materials.

Prepare to embrace Loctite Super Glue as your reliable solution fully. Be it gluing plastics together, making crafts, or tackling difficult tasks, Loctite Super Glue provides reliable bonding solutions. Let’s get into the specifics and understand how Loctite Super Glue can enhance your bonding experience.https://bearing-mechanicalparts.com/loctite-glue/

What Are the Features and Benefits of Loctite Super Glue?

Loctite Super Glue is an ideal choice for users if they want an adhesive solution because it provide several features and benefits that make it stand out:

(1) Outstanding Overall Performance—Loctite Super Glue is more effective than regular super glues because it provides excellent bonding strength, durability, impact resistance, and moisture resistance.

(2) Multi-Surface Adhesion – In terms of bonding, it can adhere to a wider assortment of surfaces, including metals, ceramics, rubber, leather, wood, and most plastics, which means it can be used in many areas.

(3) The Glue Dries Clear—When dry, Loctite Super Glue is neutral and colorless, allowing joints to bond smoothly without jeopardizing the workpiece’s overall beauty.

(4) Gel Structure—Loctite Super Glue’s gel structure has superior features, such as improved construction control, reduced messy conditions, and the ability to stick to porous and vertical surfaces.

(5) Efficiency Effectively Improvement – The Gel Control Applicator provides the exact quantity needed and ensures no over spills.

(6) Quick Drying—In the case of Loctite Super Glue, the time it takes for the set activity to dry and bond is just a couple of seconds, which provides advantageous benefits such as speedy activity completion.

Loctite Super Glue is simply the best glue out there for all types of bonding activities you possess due to its strength, ease of use, and multi-application binding features.

How Does Loctite Super Glue Offer Superior Performance Over Ordinary Super Glues?

Loctite Super Glue research and development has been devoted to producing a brand distinct from super glues with superior features and formulation. This is how this product performs incredibly well:

  1. Improved Bonding: Loctite Super Glue possesses remarkable bonding strength, penetrating a wide range of argillaceous surface materials such as metals, ceramics, rubber, leather, wood, and most plastics. It ensures that all objects, once attached, stay glued.
  2. Faster Work Rate: Because of the quick glue formula, it needs only seconds to dry, thus attatching items is quicker helping save time on ending straight forward and simple projects or applications.
  3. Gel-based Applicator: Because of the gel-based formula, there is less mess when bonding and achieving porous and bonding of vertical surfaces. The exclusive Low Gel Control Applicator controls dispensing the required amount, thereby virtually preventing spills.
  4. Appearance: Working with Loctite Super Glue is also excellent since it dries clearly and enables one to complete appropriate projects without combining or interfering with aesthetic features.

Combining these technical specifications gives Loctite Super Glue an advantage in varied uses and applications that require better bond strength and durability.https://bearing-mechanicalparts.com/blog/how-to-use-loctite-super-glue/

Which Surfaces Can Loctite Super Glue Effectively Bond?

A key feature of Loctite Super Glue is its ability to provide strong and lasting bonds on most surfaces, which makes it a valuable adhesive for several bonding operations. Following are the significant surfaces for which Loctite Super Glue has been tested and successfully bonded:

  1. Metals: Loctite Super Glue provides durable bond lines in steel, aluminum, stainless steel, and copper.
  2. Ceramics: This adhesive does not fail to bond with ceramic materials such as porcelain, china, and ceramic tiles.
  3. Rubber and Leather: Loctite superglue does not disappoint when bonding with rubber and leather surfaces. It provides strong and stable bonds.
  4. Wood: This adhesive bonds well to wood surfaces so that it can be spread out on woodworking projects.
  5. Most Plastics: It bonds a lot of plastics, such as ABS, PVC, polycarbonate, and acrylic.

These are some of the features that enhance the bonding experience with Loctite super glue:

  • Quick Drying Time: The bonding is rapid, so Loctite super glue minimizes the overall time it takes to complete the project.
  • Gel Formula: It makes excellent bonds with porous and vertical surfaces without leaving a mess by using gel formula, making it easy to apply.
  • Transparent and Discreet Bonding: After completion, the product’s appearance does not change, as Loctite super glue dries clear, which is essential.

What Makes Loctite Super Glue Dries Clear?

Loctite Super Glue’s novel formulation and technical aspects relate to the reasons the adhesive dries out completely clear. The property of the specific adhesive constitutions ensures curing with no visible marks or discoloration. This clarity becomes critical in ensuring invisible and flawless joins across differing surfaces. The necessary technical factors that influence the working of Loctite Super Glue in this case are:

  1. Opaque Glue Base: Loctite Super Glue is manufactured using an opaque glue base, which helps it bond with a material, making it almost unnoticeable once the glue is dry.
  2. Low Adhesive Particle Concentration: The low viscosity of Loctite Super Glue ensures that the glue is applied evenly and thinly across surfaces. This results in less visibility of glue lines or excess glue, which can improve the strength of the joining surfaces.
  3. Thickening: Loctite Super Glue has a thickening property, which helps minimize the exposure time of the Wat intake and activates any greying effect or smog.

When considered while using Loctite Super Glue, all these factors ensure that the super glue bond remains strong and durable without altering the surface’s outer finish.

How Can You Use Loctite Super Glue Gel for Different Applications?

Loctite Super Glue Gel has several important characteristics and properties that make it suitable for different tasks. How about we get into the details of such a versatile product? Let’s see how superglue gel works in various applications:

  1. Useful for Precision Work: It can be beneficial for bonding components that are very small or intricate, as it does not require too much super glue gel. This means that if one overdoes it, one does not overshoot the target, which would lead to unwanted circumstances.
  2. Works & Secures Vertical Surfaces: Loctite super glue gel is specially formulated to work on vertical surfaces. It does not run down but retains its position, elbowing some tricky parts and shapes that require additional bonding.
  3. Porous Materials Bonding: The Loctite super glue gel can sustain bonding with fabrics, woods, and foams, which is a high point, as the gel penetrates deep into the respective materials, increasing the effectiveness of the bond and making it durable.
  4. Gap Filling: If two surfaces do not entirely match up and a small gap remains between the loctite super glue gel, fill the gap using its much thicker consistency and form considerable bonds.
  5. Quick Repairs: Household broken items, jewelry, and toys, everything can be repaired in minutes using the loctite super glue gel, which guarantees fast and effective results.

Please note that you should adhere to all safety and production protocols during use to achieve the best possible results. If you use Loctite Super Glue Gel, rest assured that its innovative formula will give an exceedingly reliable bond for various purposes.

What Are the Advantages of Loctite Super Glue Gel Formula?

Loctite Super Glue Gel Formula has many features that make it the first choice for everything one needs to glue. Let’s take a look at its advantages:

  1. Increased Versatility: With Loctite Super Glue Gel, complex materials, and awkward shapes can be pretty good, even in difficult bonding conditions.
  2. Porous Materials: This gel formula effectively bonds porous materials like wood, fabrics, foam, etc. It is deep penetrating and has good bonding, providing durable bonds.
  3. Effective Gap Filling: Loctite Super Glue Gel’s thicker consistency is liquid enough to seep into pores and gaps in the material, making a good bond even when filling minute imperfections.
  4. Quick Repairs: The fast and stable bonding characteristics of Loctite Super Glue Gel for quick repairs make it possible to glue broken household items, jewelry toys, and mend anything.

Technical Parameters:

  • Gel formula for deep penetration and strong adhesion
  • Thicker consistency for effective gap-filling
  • Rapid bonding for quick repairs

Use Loctite Super Glue Gel Formula in various applications that require exceptional bonding performance. Always remember to check the safety instructions that come with the product.

How can maximum control be achieved with a gel control applicator?

To achieve precision control with the Gel Control Applicator Loctite Super Glue Gel Formula, consider taking the following steps:

  1. Apply Pressure: To achieve precise bonding, squeeze the bottle with your palms and gently press the Gel Control Applicator. This will ensure that the gel is dispensed in a controlled way.
  2. Targeted Application: Useof thin layer of the glue will prove beneficial but accuracy in targeting of the area is paramount, Use of Gel Control Applicator will ease the process and enable good accuracy in targeting.
  3. Adjustment and Alignment: A thicker layer of gel will help make adjustments on the surface or align things before the cover sets in. Due to the compositional structure of the gel, it acts by bridging small gaps that would exist in the surrounding areas, forming good adhesive bonds.
  4. Secure and Hold: After inserting the surfaces, firmly hit them per the recommended time for the glue to set in for maximum adhesive strength.

Technical Parameters:

  • Gel for deep and strong adhesive bonds.
  • Large amounts of glue should be applied for heavy spacing and preventive waste of the adhesive cover.
  • Time for bonding is significantly reduced. Secondary bond formation happens quickly.

Always follow the safety rules and precautions provided with the product to have the best results while ensuring bonding.

Does Loctite Super Glue Work on Plastic and Other Materials?

Once bonded, a wide variety of materials, including plastic, can be expected to remain intact. The deep penetration and gel formulation produce strong adhesion, making Loctite Super Glue a worthwhile gadget. A high degree of satisfaction can be obtained when bonding hard plastics since Loctite superglue performs well under such conditions.

The performance of the bonding agent referred to as Loctite Super Glue can even be used for plastic bonding and bonding between porous surfaces and non-porous materials. Because of its thickness, it fills up the gaps and assists in managing the application process more conveniently. It saves time in various applications, whether terracotta, glass, wooden or metallic surfaces. The super glue offers durability for all the vases and metals, etc.

The available documents and downloads provide more specific instructions, safety tips, and information on when and how to use Loctite Super Glue. The documents help illustrate the product’s features, usage, applications, and techniques to avoid waste and guarantee an adequate bond.

Can Loctite Super Glue Bond Hard Plastics?

  1. Surface Preparation Stage: Before bonding, surfaces must be clean and dry and free of excessive dust, grease, or other contamination that might interfere with the bond.
  2. Application Process: After applying a little Loctite Super Glue on one of the plastic surfaces, hold them together firmly for the long recommended period required for the joint to cure.
  3. Curing Pot Life: The period taken to heal varies depending on the temperature and humidity and the type of hard plastic used in the joint. Curing time is very crucial and must be as per the manufacturer’s recommendations as this will bring out maximal bond compression strength.
  4. Reduction of Gaps: Because of the viscosity of the Loctite Super Glue, it can be used to bond hard plastics even if they are not in close contact with one another.
  5. Considerations: The type of hard plastic to be bonded and the Loctite Super Glue must be compatible for the bond to be effective. If unsure, perform the random compatibility tests or refer to the manufacturer’s recommendations.

Loctite Super Glue can be praised more favorably when hard plastics are joined together. Reliability and long-lasting bonds can be created by adhering to these guidelines and examining the technical parameters. Nevertheless, referring to the product documentation and instructions for any guidance and recommendations suited to the application selected is always advisable.

How Does Loctite Super Glue Perform on Porous and Non-Porous Surfaces?

Loctite superglue has proven effective on porous and non-porous surfaces, forming strong and durable bonds. Notably, the adhesive’s composition and formulation are detailed enough to enable it to stick even to rigid plastics.

For example, when bonding porous surfaces such as fabric or wood, the glue manages to Graham significantly, resulting in a rigid bond. However, when bonding porous surfaces, adhesive penetrates through the pores. On the other hand, when bonding nonporous surfaces such as metal or glass, there is no such action as penetration, and the glue bonds instantly.

The following are specific technical parameters that should be observed while using Loctite super glue:

  1. Surface preparation: The surfaces destined to be bonded need to be clean and dry, and dust, grease, or any other substance that may interfere with or foul the bonding process must be absent.
  2. Curing Time: The curing time can differ depending on the hard plastics used during bonding. Therefore, to achieve maximum bond strength, the user should adhere to the bonding times specified by the manufacturer for any specific type of hard plastic used.
  3. Overall, Loctite Super Glue has a thickness that can be used to fill small gaps between the surfaces, ensuring a solid and lasting bond:
  4. Compatibility: It is crucial to ensure compatibility between Loctite super glue and the materials you aim to bond. You can comply with this requirement by conducting appropriate compatibility tests or following the manufacturer’s guidelines.

Loctite Super Glue can be used on porous and non-porous surfaces, provided these technical parameters are observed and the specified application techniques are adhered to. It is always recommended to consult the product documentation and instructions for particular details and recommendations for specific use.

Where to Find Documents and Downloads for Loctite Super Glue Products?

The official website of Loctite should be the first stop of call for all questions related to the usage, technical specs, and requirements of their Super Glue products. Over here, you can access detailed documents and safety data sheets on particular Loctite Super Glue products, the application instructions, and other relevant resources. It is best to search for the specific product page of the Loctite Super Glue product you wish to purchase via the company’s website. You will have access to the general effective use of the product as well as footnotes on compatibility charts, bonding times and recommended application techniques of the product. Nevertheless, visit the manufacturer’s instructions and guidelines since they contain all the necessary details and recommendations concerning your application.

What Technical Documents Are Available?

As someone who has been working with Loctite Super Glue models for a considerable amount of time, I appreciate having well-laid-out supporting documents and downloads to rely on. Their website is the most recommended if you need any technical data on the various types of Loctite Super Glue products. They have an extensive technical section where product standards, Safety Data Sheets (SDS), recommended uses, and more are all kept. Cases fully encompassing the suggested use and smooth application are almost guaranteed when the necessary product page on the Loctite Super Glue range is accessed. Other essential information for achieving the best results, such as compatibility tables, bonding times, application methods recommended, and more, will also be available. When in any doubt, always adhere to the written instructions provided by the manufacturer as they contain useful advice based on their particular use cases.

How to Access Product Downloads?

How to Download Technical Documentation for Loctite Superglue: The process is uncomplicated and guarantees that you have access to all relevant technical documentation. The following steps outline how to access the product documentation downloads:

  1. Go to Loctite Official Site: Visit the official page of the Loctite company. The instructions apply to Michelle’s Super Glue but should also apply to all their glue.
  2. Download Links: Search for a section on the product page that mentions the product availability or technical documents. In some cases, it may be indicated as a “Technical Data Sheet,” “Safety Data Sheet (SDS),” or “Product Volume Variants.”
  3. Helper Documents: You should be able to access all relevant documents by clicking on the relevant links on the product page. These documents provide specifications for the product, instructions for applying the adhesive, instructions for using the glue safely, and more.
  4. Technical Documents Review: During the usage of the reported adhesive, focus more on the following technical parameters, which are critical for the proper and effective usage of Michelle’s Super Glue. These include but are not limited to:
  5. The Glue Specifications: The actual contents of the glue, the viscosity level, the capacity of the glue, and so on.
  6. Glue Safety Data Sheets: Providing detailed information on the safety of the glue, its ingredients, alertness, antidote procedures, and so many others.
  7. Bond Strength Charts: Information and advice on what the glue supposedly sticks well to.
  8. Application Guidelines: These are stepwise instructions for applying the product, containing measures for application techniques, curing conditions, and bonding time.

You are encouraged to follow the defined parameters and steps in the downloads. All this information will help you properly use Loctite Super Glue and achieve great results. However, for the most accurate guidelines regarding your application, please also consult the manufacturer or the product document.

Are There Related Articles to Enhance Your Knowledge of Loctite Super Glue?

Sure, there are related articles that can help expand your knowledge about Loctite Super Glue. These articles give specifics that would assist you in utilizing the product to the best of your abilities. Some of the topics covered include:

  • Product Specifications, Viscosity, curing time, and other technical information about the product and where it is applicable.
  • Safety Data Sheets (SDS): Safe handling protocols, first aid, details of hazardous constituent components, etc.
  • Compatibility Charts: Suggestions on the materials for which the product can form adhesive bonds.
  • Application Guidelines: Instruction on analysis, including recommended application methods, curing conditions, duration, bonding times, etc.

The related articles and technical parameters in the Downloads section provide all the information you need to ensure the correct use of Loctite Super Glue and the best results. Always consult the manufacturer’s manual for specific recommendations for your scenario.

Which Articles Provide Additional Insights into Gel Super Glue?

The following sources are helpful for better comprehending Gel Super Glue and its technology.

  • Composition and Technical Specifications: Gel Super Glue is described in a great detail formulation, including viscosity, cure time, bond strength, and other engineering properties in which this glue bonds.
  • Safety Data Sheets (SDS): The SDS concerns risk information, precautions to be taken while using the Gel Super Glue, first aid in case of exposure, and any poisonous chemical compounds present.
  • Compatibility Chart: This guide identifies the substances or surfaces Gel Super Glue can adequately stick or bind.
  • Application Guidelines: The application guideline article explains how the Gel Super Glue is intended to be used in the procedures for its application. It deals with the recommended ways of applying the adhesive recreating conditions for curing and bonding times.

This is because these articles offer deep technical details and instructions directed towards enhancing the performance of Gel Super Glue. Always check the manufacturer’s instructions and guidelines for specific recommendations relating to your particular application.

What Can You Learn from Articles on Loctite Super Glue Ultra?

What Insights Can You Have From Articles Related To Loctite Super Glue Ultra? Here is what you will be able to learn:

  1. Quick and Strong Bond: Articles emphasize that Loctite Super Glue Ultra provides a strong bond and takes most of the time needed for bonding, thus incurring the least delay in repairs or any work to be done.
  2. Technical Parameters: Clear and reasonable technical parameters must be documented, such as the bonding agent’s tensile qualities and curing time.
  3. Wide Range of Applications: The articles stress that Loctite Super Glue Ultra can be used on wood, metal, ceramics, and plastic, among other materials.
  4. Technical Parameters: It is equally necessary to provide a list of the materials to be used within the parameters specified by the manufacturers.
  5. Can Withstand Several Conditions: This adhesive resists moisture, heat, and impact and is therefore suitable for indoor and outdoor decor.
  6. Technical Parameters: Include and justify technical parameters, such as strength retention temperature and water or impact caliber resistance.

Watch out for the data provided as technical parameters because they must be real and from trusted sources of information. They should match the product description.

Frequently Asked Questions (FAQ)

Q: What makes Loctite Super Glue different from ordinary adhesives?

A: Loctite Super Glue is a cyanoacrylate adhesive offering superior performance over ordinary glues. It is designed to hold firmer on more surfaces and works well on various porous and non-porous surfaces, including leather.

Q: How does the Loctite Super Glue formula set?

A: The formula sets quickly, usually within seconds, allowing precise application without clamping. This makes it ideal for a wide range of applications, including vertical applications.

Q: Can Loctite Super Glue be used for crafting projects?

A: Yes, Loctite Super Glue is perfect for crafting projects. It dries transparent, providing invisible repairs on various materials, making it a versatile choice for crafting and repair tasks.

Q: What is the difference between Loctite Super Glue Liquid and Loctite Super Glue Gel?

A: Loctite Super Glue Liquid is ideal for precise application and is suitable for non-porous surfaces, while Loctite Gel is designed for vertical applications and drip-free usage.

Q: Is Loctite Super Glue suitable for ceramic repairs?

A: Yes, Loctite Super Glue, especially the Loctite Super Glue Liquid Professional, is excellent for ceramic repairs. It sets quickly and holds strong on porous and non-porous surfaces.

Q: Does Loctite Super Glue have a patented additive?

A: Yes, Loctite Super Glue features a patented additive that enhances its adhesive properties, allowing it to perform exceptionally well across various applications.

Q: Can Loctite Super Glue be used on non-porous surfaces, including leather?

A: Absolutely; Loctite Super Glue is formulated to work on various porous and non-porous surfaces,s including leather, making it a versatile adhesive solution.

Q: What kind of repairs can Loctite Super Glue be used for?

A: Loctite Super Glue is ideal for a wide range of repairs, including crafting projects, ceramic fixes, and other applications requiring quick setting and strong bonding.

Q: Why is cyanoacrylate used in Loctite Super Glue?

A: Cyanoacrylate is the primary adhesive component in Loctite Super Glue, known for its fast-setting and strong bonding capabilities, making it practical for various applications.

Q: How does the Loctite Super Glue Professional differ from regular superglue?

A: Loctite Super Glue Professional offers enhanced performance with a formula that increases strength and durability, suitable for more demanding applications than regular superglue.

The Ultimate Guide to Polyamide 66: Unveiling the Secrets of High-Performance Plastics

This is ”The Ultimate Guide to Polyamide 66: The High-Performance Plastics” blog post.’ Imagine it as the world of performance plastics with our focus on one of the most popular plastics — Polyamide 66 (PA 66). Polyamide 66 however is just a cooky name. What’s even more exciting is how woven it is in the composition of various other building elements, say sub-sectors in automotive, engineering plastics, or, for that matter, even the joints of components in low to high-temperature settings. Understanding the other components, distinguishing features, composition, production models, and most importantly, Praer’s resolve’s build quality may set the stage for promoting other building blocks. In totality, this knowledge greatly determines the tensile strength, hardness factor, and thermal and chemical resistance of Nylon 66. The knowledge thus gained ideally suits the domain of PA 66. Now that we understand the salient features of PA 66 in better detail let’s journey together through the world of high-level performance-building elements!https://pom-material.com/pa66/

What is PA 66, and Why is it a Preferred Plastic?

Engineered Plastic 66, or Polyamide 66, has a well-established rank due to its high tensile strength, dimensional characteristics, and thermal stability. Nylon, a chemical compound, is a polyamide with higher strength, hardness, and durability, making it more preferred in the industrial sector. Due to the high temperature bearing capability, Polyamide 66 is preferable in applications where most plastics would fail. PA66 offers excellent physical and mechanical attributes and anti-chemical and moisture shield characteristics, which has extensively widened their applicability in heavy engineering. Due to their excellent tensile strength and flexibility, PA 66-made polymers have a wide range of uses in making automotive and electrical components, industrial equipment, and any other part for which durability and great performance are required.

Understanding Polyamide and Nylon Composition

Polyamide, known as nylon, is a synthetic polymer with admirable mechanical strength, chemical resistance, and dimensional stability. It comprises one or more repeating units of -CONH- (amide) linked through aliphatic or aromatic links. Depending on the various functional properties desired, the particular makeup of polyamide can differ.

A family of poly amides, one of them being PA 66, is called nylon. Polyamide 66 (PA 66) is the strongest among nylon because of its mechanical and thermal properties. ’66’ denotes the placement of the ‘amide yarns’ composition in PA66, where two amide yarns made of six carbons are interlinked.

PA 66 is an ideal plastic because of its unparalleled strength, hardness, and remarkable toughness. Because it has good heat and mechanical resistance, it is exceptionally resistant to the effects of deformation and stress. Also, PA 66 does not absorb much water and has a good chemical resistance, making it useful in advanced engineering applications.

Much attention has been focused on PA 66, used in several industries, including automobile components, electrical connectors, industrial machinery, and others. Its survivability in a high-temperature environment makes it usable where thousands of other plastics would fail. Due to its excellent mechanical strength and reliability, PA 66 is still and likely to be a contender for the most demanding applications.https://pom-material.com/blog/the-comprehensive-guide-to-pa66-engineering-plastic-unveiled/

Key Differences Between PA66 and PA6

Chemical Structure: Polyamide 66, or PA66, is synthesized via hexamethylenediamine and adipic acid condensation polymerization. In contrast, polyamide six, or PA6, results from the polymerization of caprolactam.

Mechanical Properties:

  • Strength and Hardness: Polyamide 66 is a polyamide used in applications with weak mechanical performance due to its higher strength and hardness than PA6.
  • Dimensional Stability: PA66 has excellent dimensional stability, with a minimal tendency to warp and deform due to mechanical stress or a temperature change.
  • Resistance to Chemicals and Moisture Absorption: Compared to the relatively low moisture absorption of PA6, PA66 displays higher resistance to various fluids, and PA6 has lower moisture absorption; this proves PA66 for cleanliness in modern, diverse engineering applications.

Applications:

  • Automotive Components: The strength and high-temperature performance of PA66 allow it to be used in several automotive components.
  • Electrical Connectors: Polyamide 66 finds application in electrical connectors and related articles due to its good insulating characteristics.
  • Industrial Machinery: PA66 is used in various industrial machinery, especially where mechanical strength and resistance to certain chemicals are paramount.

The exact technical parameters and application suitability may vary according to product formulations and production processes. For accurate and detailed information about these products, it is advisable to refer to the PA66 and PA6 technical datasheets and the manufacturers’ specifications.

The Role of Hexamethylenediamine and Adipic Acid in Production

Based on existing data, I would confidently state that adipic acid and hexamethylenediamine (HMD) are necessary to produce polyamide 66 (PA66) in a polymerization process. The polymer comprises two monomers, one of which is HMD, and an essential one is adipic acid in the PA66 polycondensation reaction. Monomers undergo condensation reactions to produce PA66, a high-engineering thermoplastic. Below are some further details that highlight their importance in PA66 production.

It should be emphasized that specialty chemicals or formulations should be within the limits, and technical parameters should depend on each HMD or adipic acid manufacturer. It is more effective to get such information from a PA66 production primer or technical specification from a manufacturer.

Exploring the Main Features of Nylon 66

I have to say that I do not fully understand because, for a science student, it is impractical to focus specifically on one type of material. Still, in terms of my thumb rule that I learned in engineering science, Nylon 66 has interesting properties. Thus, I do think that it is widely used. In this case, I have some concrete evidence to support my belief as I have done quite an analysis. The findings related to Nylon 66 are as follows:

  1. High Mechanical Strength: As an avid learner of engineering science, I am well aware that impact resistance, or the ability to handle heavy loads, is a design requirement of many engineering applications. Due to its High mechanical strength, nylon 66 is perfect for such engineering designs.
  2. Excellent Heat Resistance: Nylon 66 has high thermal stability, meaning structural degradation will not occur even when supplied with heat. Such properties are highly sought after when designing for exposure to heat, as they allow thermally demanding functions to be performed.
  3. Superior Chemical Resistance: Because nylon is chemically stable, it becomes an ideal material for applications that require solvents, oils, or many chemicals. This stability in corrosion allows NYLON 66 to be used in a broader range of applications that do not fear integration with other compounds.

Exceptional Mechanical Properties

Nylon 66 has outstanding mechanical characteristics, making it one of the most preferred materials in many industries. Its high tensile strength, impact strength, and toughness facilitate use in locations where strong and durable parts are essential. Furthermore, its high elongation at break also causes slight deformation but more excellent elasticity under stress. These mechanical properties, good shape retention, and chemical resistance render Nylon 66 useful in many industrial applications.

Importance of Dimensional Stability

I assume that I need not introduce myself to you, given that it is common knowledge that I am an authoritative figure in the technical domain. In this context, I would like to make one clear statement regarding Polyamide 66 (Nylon 66) – dimensional stability is the need of the hour. Dimensional stability can be defined as the ability of a material to withstand external climatic and mechanical conditions that might reasonably be expected to result in changes to the form or profile of the material. It is an important feature for applications where accuracy and reliability are essential.

In regards to the question posed as to why longitudinal compression is important, indeed, there are many reasons for that:

  • Mechanical Integrity: Compounds based on Nylon 66 can undergo thermal fluctuations without loss of dimension, which is a prerequisite for the integrity and functionality of such products over time.
  • Tolerance Control: Applications involving close tolerances and specific gripping characteristics cannot function without dimensional stability to ensure such gripping characteristics and functions apply to other components.
  • Consistency and Quality: Consistency and quality always go hand in hand. A dimensional change in the length of the body of the Nylon 66 nanocomposites with high dimensional stability will be lower, consequently increasing their quality to meet the client’s requirements and satisfaction.

To conclude, the dimensional stability of Polyamide 66 (Nylon 66) is essential to preserving mechanical integrity, controlling tolerances, and providing consistent and exemplary performance in various industrial applications.

How Moisture Absorption Affects Performance

Polyamide 66 (Nylon 66) moisture absorption should be considered as the application efficiency may vary. Therefore, understanding how the material would perform throughout its usage life is insightful. Some of the necessary information to consider is as follows:

  • Dimensional Stability: Among other consequences, the nylon has the potential to experience moisture-induced dimensional changes, which would negatively affect its warping and swelling strength. If the mechanical characteristics are threatened, the tolerances increase, thus degrading the end item’s quality.
  • Mechanical Properties: Like all polymers, nylon66 tends to change in tensile strength, impact, and hardness due to moisture absorption. Moisture absorption results in a loss of the polymer’s performance and mechanical strength, and it must be considered to obtain accurate results.
  • Electrical Properties: Polyamide 66 is hydrophilic and thus possesses moisture absorption tendencies, which can affect polyamide 66’s dielectric attributes, insulation strength, and electrical attribute potency in some applications.

Multiple approaches may be employed to reduce the adverse impact of moisture uptake, such as formulating moisture-resistant compounds, proper joint sealing or coating, and adequate maintenance and monitoring. It is essential to comprehend the moisture absorption properties of Nylon 66 and incorporate correct methodologies to consistently optimally use and extend the material’s service life in numerous industries.

Also, the pertinent moisture absorption technical parameters and testing methods should be formulated based on material investigations and analysis specific to the application requirements.

Which Industries Target Polyamide 66?

Nylon 66 or polyamide 66 is used in various industries thanks to its unique characteristics and multifunctionality. Here is a brief snapshot of the sectors which target Polyamide 66:

  • Automotive Sector: In the automobile industry, polyamide 66 is used because of its strength, heat resistance, and durability. Its applications include engine parts, fuel systems, electrical connectors, and other automotive components.
  • Engineering Plastics and More: The engineering plastics industry makes extensive use of polyamide 66 owing to its high-quality mechanical characteristics such as tensile strength, toughness, and dimensional stability. It produces electrical connectors, gears, bushings, and other mechanical parts.
  • High-temperature environment: Due to its thermal stability, Polyamide 66 is used in high-temperature environments. It is employed in the aerospace, electrical, and industrial manufacturing industries, which require heat resistance.

With polyamide 66, these industries can produce materials that perform, are reliable, and flexible, enabling them to be used in numerous applications.

Applications in the Automotive Sector

The automotive sector widely uses Polyamide 66 (PA 66) because of its unmatched characteristics and wide range of uses. Moreover, several applications of PA 66 are employed in various components and systems, which enhance vehicle performance, longevity, and safety overall.

  1. Under-the-Hood Components: It is widely used in under-the-hood components like intake manifolds, engine covers, and fuel systems. Its ability to withstand high temperatures makes it suitable for these applications.
  2. Electrical and Electronic Components: Within automobiles, PA 66 is additionally used in electrical and electronic components. Due to its high electrical insulating properties and moisture resistance, it is an outstanding material for connectors, sensors, and wire harnesses.
  3. Interior and Exterior Components: Finally, PA 66 is used in the interior and exterior of motor vehicles. These include interior parts such as door panels, seat frames, and instrument panels where strength, durability, and quality appearance are necessary. PA 66 is also used in the exterior parts, such as bumpers, grilles, and fender liners, to enhance the impact strength.

In summary, PA 66 is very well suited for a wide range of automotive applications due to its excellent thermal stability and strength and its resistance to various environmental factors. Its usage enhances the safety, performance, and durability of the vehicles.

Potential in High-Temperature Environments

From my observations, it was found that Nylon 66 has good stability and thus can operate at extreme temperatures without suffering degradation and any significant loss of mechanical characteristics. Its high melting point and excellent dimensional stability are factors that would make it ideal for applications that require heat resistance. In addition, Nylon 66 also has a strong ability to withstand thermal aging, allowing it to function efficiently in high-temperature applications. Considering these aspects, it can also be stated that Nylon 66 is an excellent material across various engineering aspects, with particular attention to high operating temperatures.

Delving into the Technical Details of Nylon 66

Nylon 66 is an engineering plastic that seems to be very popular. Its mechanical properties, such as hardness and tensile strength, are impressive. Focusing on tensile strength implies that the material has a high resistance to external forces and can bear heavy loads without deforming or fracturing. 

The following technical information can be extracted:

  • Chemical Composition and Structure: Nylon 66, sometimes called poly hexamethylene adipamide, is a synthetic polyamide whose repeating unit consists of a hexamethylene diamine and an adipic acid. This structure enhances its mechanical properties and thermal stability.
  • Thermal Properties: Nylon 66’s rather high melting point makes it relatively easy to use these plastics in applications requiring heat resistance; Due to its excellent dimensional stability, minimal deformation under high temperatures and extended periods is possible. Also, the long-term use of Nylon 66 in high temperatures is possible because the nylon is resistant to thermal aging.
  • Physical and Mechanical Properties: In addition to its tensile strength and hardness, Nylon 66 also possesses other advantageous physical and mechanical properties. These include excellent fatigue resistance, stiffness, and toughness, which enable it to resist compressive cyclic loading and impact loading without breaking early. Moreover, Nylon 66 has low friction and good abrasion resistance, making it suitable for use in places with moving components.
  • Chemical Resistance: Nylon 66 can resist several chemicals, including oils, fuels, alcohols, and alkalis. However, some solvents and acids may affect it, so caution must be exercised regarding specific chemical environments when choosing Nylon 66 for a particular application.

Considering these technical details, Nylon 66 is a multipurpose and dependable material for several engineering applications, even in adverse conditions of high ambient temperatures. Its remarkable tensile strength, hardness, thermal stability, and chemical resistance make it ideal for applications that demand durability, shape retention, and long-term active use.

Impact of Glass Fiber Reinforcement

When reinforced with glass fibers, Nylon 66 demonstrates enhanced mechanical properties. The addition of glass fibers improves its tensile strength, modulus of elasticity, and dimensional stability, making it suitable for demanding applications that require high strength and rigidity. Glass fiber reinforcement also enhances the resistance of Nylon 66 to creep, ensuring long-term structural integrity even under prolonged stress conditions.

Exploring Thermal Properties and Melting Point

Nylon 66 exhibits excellent thermal properties, making it well-suited for elevated-temperature applications. It can withstand prolonged exposure to heat without significant degradation or loss of mechanical properties. Its dimensional stability remains intact, allowing it to maintain its shape and structural integrity even under extreme temperatures. Furthermore, it exhibits remarkable resistance to thermal aging, ensuring its long-term performance in high-temperature settings.

How Does PA 66 Perform Against Chemical Resistance?

Nylon 66 is known for its excellent resistance to chemicals; therefore, it is appropriate for applications placed in harsh environments and containing different chemicals. It can withstand solvents, oils, and acids, which warms it up to the service even in the most demanding industrial applications. As far as the chemical resistance of Nylon 66 is concerned, the following must be taken into consideration:

  1. Chemical Compatibility: Nylon 66 is fairly compatible with several chemicals, such as acids, alkalis, and solvents. To determine whether Nylon 66 would work for the proposed application, it is suggested that chemical compatibility charts and specific resistance reports be utilized.
  2. Temperature Considerations: Although Nylon 66 performs well with heat, it is crucial to check how it would fare with chemicals at high temperatures. The chemical resistance and compatibility of Nylon 66 has the added factor of a specific chemical focusing on temperature conditions, too.
  3. Exposure Duration: The duration of chemical exposure can change the functioning of Nylon 66. In this case, making assumptions based on the duration and the frequency of chemical exposure would be of the essence, ensuring the reliability of the material in the long run.

Examining technical data sheets and industrial standards or performing specific tests or evaluations in particular physical and chemical environments is advisable. This is necessary when evaluating the chemical resistance of nylon 66 since these chemicals and physical conditions are intended for use during operation.

Resistance to Heat and Chemicals

Nylon 66 is exceptionally resistant to heat and various chemicals, making it suitable for applications that require exposure to harsh environments. It can withstand exposure to a wide range of solvents, oils, and acids without significant deterioration or loss of properties. This chemical resistance contributes to its longevity and reliability in challenging industrial settings.

Understanding Abrasion and Wear Resistance

Nylon 66 demonstrates excellent abrasion resistance, making it highly durable and suitable for applications that involve contact with abrasive materials or repetitive mechanical actions. Its resistance to wear ensures prolonged service life and reduces the need for frequent maintenance or replacement, making it a cost-effective choice for demanding applications.

The Effectiveness of Injection Molding and Extrusion

Nylon 66 is highly processable, especially in injection molding and extrusion operations. Complex and detailed shapes can be easily fabricated at reduced cost and with improved efficiency in production processes. These attributes make it highly desirable in the automotive, electrical, and consumer goods industries.

Nylon 66 has been the most preferred polymer for many engineering applications because of its excellent combination of mechanical, thermal, and chemical properties. Thus, it can endure rigorous conditions where heat and corrosive materials prevail. In particular, Nylon 66 is effective in applications with continuous operational requirements such as high tensile strength, significant hardness and thermal stability, and increased chemical and wear resistance.

Frequently Asked Questions (FAQ)

Q: What is Polyamide 66, and how is it different from other types of polyamide or nylon?

A: Polyamide 66, also known as nylon 6-6, is a type of polyamide renowned for its excellent mechanical properties. It differs from other polyamides like nylon 6 because its unique chemical structure provides high strength and toughness, outstanding wear resistance, and low frictional properties.

Q: What are the typical applications of Polyamide 66 in target industries?

A: Polyamide 66 is widely used in target industries such as automotive, electronics, and e&E (electrical and electronic) due to its high strength and toughness. Its resistance and low frictional properties make it ideal for gears, bearings, and other mechanical components.

Q: How does Polyamide 66 perform in high-temperature applications?

A: Due to its high heat deflection temperature, Polyamide 66 offers excellent performance in high-temperature environments. This makes it suitable for applications requiring thermal stress and stability resistance, such as under-the-hood automotive components.

Q: What are the benefits of using glass fiber-reinforced Polyamide 66?

A: Glass fiber-reinforced Polyamide 66 has enhanced physical properties, including increased dimensional stability, improved impact properties, and higher mechanical strength. This makes it suitable for demanding applications that require robust materials.

Q: How does Polyamide 66 compare to other thermoplastics in terms of performance?

A: Polyamide 66 is a high-performance thermoplastic with several properties, including excellent mechanical strength, wear resistance, and low frictional properties. It tends to absorb moisture, which can impact some physical properties, but its overall performance is superior in many industrial applications.

Q: What is the stock program availability for Polyamide 66 products?

A: The stock program for Polyamide 66 products, such as tecamid® 66 by Ensinger, ensures that a wide range of sizes and forms are readily available to meet the needs of various industries. Users should know that stock availability might vary based on specific requirements and market demand.

Q: How do monomers used in Polyamide 66 affect its properties?

A: The monomers used in Polyamide 66, specifically hexamethylene diamine and adipic acid, contribute to its excellent mechanical properties. These monomers result in a polymer chain with high strength and toughness, making Polyamide 66 suitable for various demanding applications.

Q: Can Polyamide 66 absorb moisture, and how does this affect its use?

A: Polyamide 66 can absorb moisture, which users should be aware of as it tends to impact some of its physical properties, such as dimensional stability and mechanical strength. Despite this, it remains a preferred choice for applications requiring high performance.

Q: What are some notable characteristics of Tecamid 66 by Ensinger?

A: Tecamid 66 by Ensinger offers excellent mechanical properties and is known for its outstanding wear resistance and low frictional properties. It is a high-performance polyamide pa66 that serves numerous industrial applications where reliability and durability are crucial.

Exploring the Versatility of PA66 GF30 Plastic: A Comprehensive Guide

In today’s segment, we will examine the different aspects of a significant material: PA66 GF30 plastic. This includes its application, mechanical properties, processing, high-temperature applicability, and more.

To begin with, PA66 GF30, or 30% glass fiber reinforced Polyamide 66, is effective in many industries, from automotive to electronics and industrial. This material provides us with many options while serving many purposes.

Plastic has many applications in many industries and sectors, and we begin by defining the technological improvements that can be made by using PA66 GF30. We will then describe the mechanical properties of PA66 GF30, such as its strength, before discussing the extent to which it has been reinforced by glass fiber and how it compares to other engineering composites.

Furthermore, we shall be looking for the thermal properties of the polymer to see to what extent glass fiber reinforcement can improve heat resistance while also looking at other high-temperature applications using the polymer fibers. Glass fibers possess a lot of properties mentioned above, and it is essential to see which material would be suitable for high-demanding environments.https://pom-material.com/blog/pa66-mf40/

Additionally, we share our experience processing and molding PA66 GF30. We provide you with all the necessary information, from injection molding techniques to the problems and solutions that can be encountered while processing this adaptable material.

In the next sections, let us discover the electrical properties, the fire resistance of PA66 GF30 plastic, and its sustainability issues. After reading this article, you will have a deep insight into the PA66 GF30 and its ability and implications for your application.

This is the new material for the new age, so let’s explore the infinite possibilities of PA66 GF30 plastic together!

What are the Applications of PA66 GF30 in Various Industries?

PA66 GF30 plastic has extensive applications in various industries due to its exceptional properties and versatility. Let’s explore the significant applications of PA66 GF30 in various sectors:

Automotive Industry: Utilizing PA66 GF30 for Enhanced Performance

In my opinion, it is safe to say that the plastic PA66 GF30 is used in many applications within the automotive industry due to its remarkable properties. Regarding parts and components of an automobile, PA66 GF30 shows exceptional mechanical strength, heat resistance, and dimensional stability, thereby making it suitable for the automobile’s harsh surroundings. This is the case for several automotive parts, implying that some characteristics are even more appreciated in specific applications. One favorable application of PA66 GF30 in the automotive industry is:

  1. Cover parts: Besides structural parts, PA66 GF30 covers are mainly utilized for oil pans, manifolds, and even cylinders because of their versatility, strength, and heat resistance, which are necessities for working in engine compartments.
  2. Electrical parts: As one of the essential electrical connectors, housings, and even terminals, PA66 GF30 (as a material) finds its place within automotive electrical systems owing to its robust performance. All these electrical systems are powerful due to their excellent electrical insulation properties.
  3. Rugged Applications: In a wide-ranging amount of under-the-hood applications such as radiator end tanks, fan blades, and coolant components, PA66 GF30 finds itself widely utilized, and since these applications are quite rigorous, the material’s properties are a perfect fit.

PA66 GF30 plastic is a multi-functional material with unrivaled strength, which can be employed in different ways in the automotive industry to improve performance, durability, and safety.https://pom-material.com/pa66/

Electronics: The Role of PA66 GF30 in Modern Devices

High-performance engineering plastics like PA66 GF30 are critical in modern electronic devices. Exceptional properties allow it to be used in making all the electronic components required to function and last for a long time. Let’s have a closer look at the aspects of PA66 GF30 within the electronics field:

1. Connectors and Housings:

Some particular grades of PA66 GF30 are widely employed in fabricating electrical connectors, including their corresponding housings. Their exceptional electrical insulation and mechanical strength characteristics are quite essential in ensuring solid connections and reliable protection within electronic equipment.

2. Circuit Boards and Enclosures:

With PA66 GF30 as an integral part of their formulation, circuit boards, and enclosures have excellent resistance to thermal degradation and chemical attack. Such features enable them to withstand harsh environmental conditions typically associated with most electronic devices.

3. Electronic Components:

PA66 GF30 is found in various electronic device components such as switches, sockets, and terminals. PA66 GF30 can resist high temperatures and chemicals, which ensures the parts last long and operate correctly.

Technical Parameters:

  • Tensile Strength: The PA66 GF30 has a high tensile strength of [insert value] MPa, which helps it withstand mechanical stresses.
  • Heat Resistance: The PA66 GF30 remains structurally sound at temperatures over [insert value]°C, making it suitable for usage in electronic applications with heat deflection temperatures that may be elevated.
  • Electrical Insulation Properties: Given a dielectric strength of [insert value] kV/mm, PA66 GF30 provides excellent electrical insulation, ensuring no electric leakages occur.

In summary, PA66 GF30’s properties make it crucial in electronics. Its strength, thermal resistance, and electric insulation properties enable it to work well with various electronic components, thus enhancing the performance of contemporary equipment.

Industrial Applications: PA66 GF30 in Manufacturing and Machinery

Having sound professional practice, I have researched the industrial use of PA66 GF30 in manufacturing and machinery. This high material is widely used owing to its properties and performance reliability. Given below are some key applications where PA66 GF30 stands out:

  1. Automotive Components: PA66 GF30 is widely used in the automotive industry to manufacture various components, such as engine covers, intake manifolds, and fuel system components. Due to its high tensile strength and heat resistance, this material’s parts are functional and long-lasting.
  2. Electrical and Electronics: Due to its beneficial characteristics, such as electrical insulation and heat resistance, PA66 GF30 is comprehensively employed in electrical and electronic applications. Uses include connectors, switches, and insulating components.
  3. Machinery Components: PA66 GF30 is appropriate for producing machinery parts that require strength, heat resistance, and mechanical stress resistance. It is used in gears, bearings, and structural components.
  4. Tensile Strength: The high tensile strength of [insert value] MPa in PA66 GF30 guarantees strength and long Michigan life of machinery components that experience high mechanical stresses.
  5. Heat Resistance: The heat deflection temperature of PA66 GF30 is [insert value]°C and makes it appropriate for use in this industry by guaranteeing the components perform satisfactorily over time.

The PA66 GF30, in conclusion, is a general-purpose material with industrial applications in manufacturing and machinery components. Its characteristics, such as high tensile strength, heat resistance, and electrical insulating properties, render it ideal for use in several components, which facilitates the functioning of modern manufacturing processes and machines.

How Does PA66 GF30 Plastic Compare in Terms of Mechanical Properties?

PA66 GF30 is characterized by the following broad features that set it apart:

  1. Working Load Limit:  PA66 GF30 would assist every arm of the deepest exhibitions, displaying machinery components that boast tensile strength in near-unbreakable conditions, implying “significant mechanical and bearing any load.” This increased tensile strength and resistance to distress and deformation almost guarantee its approval for use with other functional bearing materials.
  2. Operating Temperature: The operating temperature conditions, because it’d be a machinery part, reinforce the fact that I am after “impressively consistent” performance without respect for structural and mechanical destruction.

Wrapping up what has been established so far alongside new data revealed along the way, PA66 GF30 can be thoroughly commended for usage as per construction of reliable and unshakable components to urge more into the machinery manufacturing landscape due to how great relates to power due to internal tensile strength while maintaining unfathomable reach with its operating temperature.

Understanding the Mechanical Strength of PA66 GF30

PA66 GF30 is a type of glass fiber-reinforced polyamide with excellent mechanical properties and is well suited for manufacturing strong machinery parts. The following points will help you understand it better:

  1. Tensile Strength: PA66 GF30 has a relatively high tensile strength and can withstand large amounts of mechanical stress. This tensile strength ensures the efficiency of load-bearing machinery parts and their application in the most stressed parts, such as welcoming usage.
  2. Flexural Strength: PA66 flexural strength met with impressive mechanical properties where it is stated that the potential of the nominated material, even with bending loading capabilities, won’t be easily deformed. Even when subjected to harsh working environments, such performance can help preserve the material longer.
  3. Impact Strength: From further assessing the mechanical properties of the nominated material,  Such high potential endures the material or items made from such material to withstand and absorb external force or shocks entirely without shattering or breaking it, ensuring reliability.
  4. Heat Deflection Temperature: Due to having a high impact temperature potential reaching [insert value], PA66 GF30 can be operated in reasonably wide temperature ranges without any worries. Such Employment guarantees optimal machining performance and structural integrity, and durable high-grade tooling of such materials can easily withstand harsh heating environments.

This includes high strength in tensile tests, flexural load testing, and impact and heat deflection temperature. These characteristics make it a suitable candidate for producing robust machinery parts that are meant to operate under severe working conditions.

The Impact of Glass Fiber Reinforcement on PA66

It is important to note that glass fiber reinforcement plays a vital role in improving the mechanical properties of PA66 (Polyamide 66), by incorporating glass fibers into the matrices of PA66, strength, stiffness, and general performance increase. The following are the notable impacts of glass fiber reinforcement on PA66.

  1. Increase in Tensile Strength: The addition of glass fiber reinforcement greatly improves the tensile strength of PA66, enabling the material to resist force-induced stretching and pulling better. The degree to which tensile strength increases depends on the amount of glass fibers used and the production method employed.
  2. Improved Flexural Strength: PA66 GF (glass fiber) composites possess greater flexural strength than mostly unfilled PA66. This property enables the material to resist bending and load-bearing more efficiently.
  3. Increased Impact Resistance: The use of glass fiber reinforcement in PA66 significantly improves the material’s impact resistance. While anti-fracture glass fibers increase the strength of the material, they also give it the ability to absorb shocks and other strong forces that may have caused the material to break, making it ideal for harsh environments.
  4. High Heat Deflection Temperature: Due to the incorporation of glass fibers, PA66 GF composites’ strength improves under heat deflection temperatures. This means that even in high temperatures, which can cause a composite to deform, the PA66 composite can still sustain its mechanical strength and rigidity and thus perform operations in such temperatures.

Incorporating glass fiber reinforcement into PA66 GF composites enhances their mechanical strength, making such composites easy to procure and efficient for manufacturing robust and reliable equipment parts. However, the technical parameters of the composite material, such as tensile, flexural, impact strength, deflection temperature, and others, depend on the specific formulation and the amount of glass fiber used in the composite material. To arrive at the required tensile strength or any other desirable performance, optimizing the amount of glass fiber to be used and the production methods employed as per the particular application is necessary.

Comparing PA66 GF30 with Other Engineering Plastics

Compared with other engineering plastics, the comparison of PA66 GF30 and other engineering plastics should consider other important aspects. First, the incorporation of glass fibers considerably improves the mechanical strength of the PA66 GF composite so that high values of tensile strength, flexural strength, and impact strength are evident. This makes PA66 GF30 a good candidate in areas where machinery components that are durable and reliable are required. The heat deflection temperature of PA66 GF composites is another crucial aspect, for it provides the mechanical properties and the shape of the part under service in high-temperature conditions. However, it should be emphasized that specific technological parameters will be slightly different for each glass fiber composite depending on its formulation and the content of the glass fibers. Therefore, to obtain the required mechanical properties and performance of the materials in specific applications such as glass fiber reinforced composites, the fiber content, and the manufacturing process must be selected appropriately.

What Makes PA66 GF30 Suitable for High-Temperature Applications?

PA66 GF30 is a polyamide 66 (PA66) matrix composite containing 30% glass by volume. It can be suitably handled in high-temperature situations. Its unique combination of mechanical properties with thermal resistance is something the applications can be aggressive enough to require. The critical points owing to its suitability include:

  1. Improved Mechanical Properties: Incorporating glass fibers into PA66 GF30’s mass greatly enhances its mechanical properties, resulting in a high tensile strength, flexural strength, and impact strength. This guarantees excellent durability and reliability even in harsh environments.
  2. Increased Heat Deflection Temperature: PA66 GF30 retains a high heat deflection temperature based on its composition and marking. This allows it to utilize its mechanical properties and structural integrity when subjected to high temperatures, making it suitable for applications expecting high temperatures.
  3. Customized Formulations: When choosing PA66 GF30 for high-temperature conditions, it is crucial to outline and specify some technical parameters. The percentage of glass fiber and the technological mode of production are paramount to achieving the required mechanical properties and performance. Optimizing these parameters ensures the best adequacy for particular application parameters.

To conclude, due to improved mechanical strength, increased heat deflection temperature, and selected formulations, PA66 GF30 proves to be optimally suited for applications at elevated temperatures where consistent performance and longevity are a prerequisite.

Exploring the Thermal Properties of PA66 GF30

I am an expert on the thermal characteristics of PA66 GF30, thanks to my considerable research and analysis. The grade has good heat performance and can be used in high-temperature applications.

A particular point that deserves emphasis is the high heat deflection temperature of PA66 GF30. These thermoplastics can withstand extreme heat stress and remain in their original state while performing their function without adversely affecting their structure. This has a unique advantage in applications associated with high heat stress.

This can also be controlled by adding needed materials to the formulation. The amount of reinforcement material, in this case, glass fiber, and the production method dramatically affect the material’s mechanical functionality and general performance. These parameters must be carefully chosen and modified to satisfy specific applications.

In conclusion, a composite material, PA66 GF30, is effective in high temperatures as constant stress is applied to it while also having high heat tolerance values and being custom-made. Thus, PA66 GF30 should be used where heating or thermal exposure is a significant stressor, as this composite has proven to perform well under direct thermal exposure.

The Role of Glass Fiber in Enhancing Heat Resistance

The incorporation of glass fibers has considerably improved PA66 GF30’s temperature-withstanding ability. Fiberglass is added to the polymer mass to enhance the material’s mechanical strength and stability, enabling it to function under high temperatures without losing its structural form.

Regarding the furnished PA66 GF30, the properties of the composite material are determined by the amount of glass fiber and the specific technology employed. These characteristics are vitally important when considering the use of the material in case of high operating temperatures and the material’s mechanical properties.

All design parameters are crucial and should be specially adjusted to fit each other and the target requirements. This includes determining the ratio of glass fiber reinforcement based on the applications’ requisite characteristics and the most appropriate technology.

Thanks to the possibility of using glass fiber reinforcement, PA66 GF30’s thermal characteristics can be met, making it suitable for applications requiring heat resistance. The formulation of the device’s components, its mechanical strength, heat deflection temperature rise, and other factors ascertain its reliable operation and durability.

However, special attention should be given to the specific values of the technical characteristics of the glass fiber, such as its content and the technology used to make the composite, which would be different for each use.

How is PA66 GF30 Processed and Molded?

To ensure that PA66 GF30 can maintain its integrity and performance and achieve maximum quality, several important processes must be conducted when molding and shaping it. The steps that should be taken into account are as follows:

  1. Molding Process: A standard process used in molding PA66 GF30 is the click process, where the material is melted, injected, and molded under high pressure. This method provides high precision control during the molding process, ensuring the piece’s quality is satisfactory.
  2. Template Cutting and Increasing Temperature: The final cut geometric shapes and dimensions of the PA66 GF30 parts can be accomplished by adequately designing the molding plate. Proper fitting of the cooling system into the molding also plays a vital role in tightening up the fixtures and reducing the cycle’s time.
  3. Mixing ingredients: To remove moisture, Granules of PA66 GF30 are commonly subjected to the drying process before commencing the primary step. This is significant because it can help avoid jeopardizing the mass’s mechanical properties during the process.
  4. Parameters Used: Generally, the parameters of freeze, temperature during injection, and pressure are used during the final stage of production, and those parameters will be changed on the gears’ scale to achieve the complexity of the PA66 GF30 part.
  5. Finishing process: Parts may be cu,t trimmed or smoothed after injection to pass quality tests after injection. Plain edge cuts and surface finishing are among the best techniques that enhance aesthetics.

It should be kept in mind that the requirement specifications and molding parameters differ according to the intended use and the equipment employed. Technical literature and practical tests should be consulted to identify the best parameters to work with PA66 GF30 in a specific application.

Injection Molding Techniques for PA66 GF30

Several aspects are important while carrying out injection molding of PA66 GF30. These include the following:

  1. Drying: Drying of PA66 GF30 material is crucial as it eliminates moisture content that may affect the end mechanical performance of the components.
  2. Moisture Management: A thorough routing and circulation of the industrial cooling water minimizes issues related to the need for additional gaseous vents or a lack thereof and assists in resolving issues of air being trapped in the injection process.
  3. Temperature References: It is within this operational boundary that PA66 GF30 maintains integrity by not degrading. Thus, a temperature of at least 260°C and above 290°C must be maintained while pouring it.
  4. Geometry: These renders alter the viscosity and capillary action dynamics of the PA66 GF30 fluid within the chamber. Seal ribs also greatly enhance the filling speed of the mold. However, optimum molds should complement low-viscosity fluids.
  5. Pressure Requirements: An application of sufficient pressure is optimal and necessary for the condensation-free filling of the mold shaft while concurrently reducing the chances of air leaks and void pockets.
  6. Cooling Time: Cooling Time is essential for allowing the part to cool and fully enhance its dimensional accuracy. The cooling time depends on the part’s size, geometry, and wall thickness.
  7. Post-Molding Operations: According to the product’s actual use, operations like trimming and surface treatment may be required after the injection molding to fulfill the requirements.

However, it should be understood that the parameters for injection molding may vary because of the parts to be manufactured, the equipment available, and the end use. It is advisable to look at the materials and equipment suppliers for some of their parameters and also, for your project, do in-depth studies and tests for appropriate parameters for satisfactory results with PA66 GF30.

Challenges and Solutions in Processing PA66 GF30

While working with Polyamide 66 reinforced with 30% Fiberglass (PA66 GF30) can be very exciting, it also has various challenges that must be overcome effectively. These challenges are necessary to complete and vital to the end success. The following contains the most critical challenges that arise when dealing with PA66 GF30:

  • High Viscosity: Higher viscosity is a common problem with PA66 GF30 as a doped polymer. However, the melting temperature can rise and allow the polymer to melt quickly, which can cause difficulties in flow and filling molds accurately.
  • Molded Part Dimensional Stability: One more common problem faced when working with PA66 GF30 is that due to the incorporation of fiberglass, expansion becomes very difficult as there is dimensional change within the molecules due to the cooling time of a part.
  • Glass Fiber Orientation: The process of the injection itself is the reason for many difficulties; it allows the force in a given direction, which affects the orientation of Glass Fibers; in consequence, they become homogeneous throughout the PA66 GF30, affecting multiple areas of the part.
  • Solution: it is wise to try to control fiber orientation by avoiding using flow control inserts, considering the type of mold design to be used, and selecting the correct mold design, gate location, and runner system.

It is essential to mention that some processing parameters of PA66 GF30 will change depending on the machine, geometry of the part, and application requirements. It is advisable to reference technical guidelines, carry out extensive trials, and work with material and equipment manufacturers to establish the most appropriate parameters geared towards optimal results with PA66 GF30 in your case.

Why is PA66 GF30 a Preferred Choice in the Engineering Plastics Industry?

PA66 GF30, a 30% glass fiber reinforced polyamide 66, is one of the most innovative materials in engineering plastics. There are several reasons why this is the case:

  1. Improved Strength and Stiffness: Combining glass fibers with polyamide significantly enhances tensile strength, stiffness, and dimensional stability. This makes PA66 GF30 suitable for areas where high-strength components are vital.
  2. High Thermal Resistance: The addition of glass fibers alters the PA66 GF30 heat properties so that it can easily sustain higher temperatures without considerably reducing its properties. This makes the material suitable for harsh environments with constant high temperatures.
  3. Elemental Chemical Resistance: PA66 GF30 is strengthened, and glass fibers are added that resist various oils, fuels, and solvents. This chemical advancement makes the material suitable for applications with high exposure to destructive substances.
  4. Better Melt Flow and Processability: PA66 GF30 does not pose many flow problems during the injection molding, even with glass fibers. This means that intricate parts with sophisticated shapes can easily be manufactured.
  5. Applicability Range: Because of its mechanical strength, heat resistance, and chemical resistance, they are quite sought after, and as such, PA66 GF30 is used in automotive, electrical and electronics, industrial equipment, and consumer goods.

Encapsulated by its superior mechanical properties, heat resistance, chemical resistance, processability, and multifunctionality, PA66 GF30 has been accepted and embraced in the engineering plastics market. It can meet the compressive strength and dimensional requirements as well as thermal and chemical stability requirements, making it suitable for various applications.

The Role of Dimensional Stability in Engineering Applications

The integrity, performance, and size of manufactured components depend on the properties of the selected material. In dimensional control applications, this ability of a given material is designated as dimensional stability. This is especially important because side deformation can occur due to mechanical stress, heat or moisture.

  1. Therefore, dimensional control becomes central in engineering since components or devices must fit the criteria for operation, ensuring the specified dimensions for working conditions are adhered to. Some factors, though, directly impact dimensional stability, such as temperature ranges, which translate to the degree of expansion experienced by a material.
  2. Water Vapour Amount: Water absorption can also cause an increase or decrease in essential components, especially polymers, which can result in dimensional control complications. Applying a high amount of moisture can distort the ratio and cause interference in subsequent combined usage; hence, the component’s performance is compromised.
  3. Mechanical Stress: Applying compressive and tensile force enables a component to experience a workload, which can deform the dimensions within the perimeter. Definite interchange within high tensile or compressive forces can also initiate contraction and elongation, affecting the contours of other material components.
  4. Creep Resistance: Creep is the long-term change of shape of a material that remains under stress. Dimensional or shape changes occur more slowly in materials with high creep resistance.

Therefore, critical applications must ensure these parameters are considered in the material selection and design processes. To assist in the material selection and design of engineering components, the dimensions of various materials can be tested using tests like thermal analysis or mechanical testing.

Comparative Analysis: PA66 GF30 vs. Other Polyamides

The presence of glass fibers in PA66 GF30 makes it stronger, stiffer, and thermally stable, recommending it for high mechanical performance and dimensional applications. All else being equal, PA66 GF30 also devotes mechanical strength, stiffness, thermal stability, and good chemical, abrasion, and impact resistance, making it usable in automotive, electrical, and industrial sectors. In contrast, other polyamides may present relatively lower mechanical strength, thermal stability, and harsh environmental resistance than PA66 GF30. However, one should look at specific application needs and factors when deciding which polyamide material to use.

Frequently Asked Questions (FAQ)

Q: What is PA66 GF30 plastic?

A: PA66 GF30 plastic is a polyamide 66 (nylon 66) reinforced with 30% glass fiber. This reinforcement enhances the material’s mechanical properties, such as stiffness, tensile strength, and impact resistance.

Q: What are the key properties of PA66 GF30?

A: PA66 GF30 is known for its excellent mechanical properties, high tensile strength, rigidity, and toughness. It also exhibits good creep resistance, making it suitable for applications exposed to long-term loads.

Q: In which applications is PA66 GF30 commonly used?

A: PA66 GF30 is commonly used in the electrical and electronic industries for components like connectors due to its good insulating properties. It’s also used in automotive and industrial applications requiring high mechanical strength and temperature resistance.

Q: How does the addition of glass fiber affect PA66?

A: Adding glass fiber to PA66 increases its mechanical strength and rigidity, making it more suitable for high-stress applications. However, in some cases, it may tend to have a marked abrasive effect on mating surfaces.

Q: What are the benefits of using PA66 GF30 in electrical applications?

A: PA66 GF30 offers excellent electrical insulation properties, making it ideal for use in electrical and electronic components. Its toughness and impact resistance further enhance its suitability for these applications.

Q: Can PA66 GF30 be used at high temperatures?

A: Yes, PA66 GF30 is suitable for high-temperature environments due to its excellent thermal stability. It maintains its mechanical properties even when exposed to high temperatures.

Q: How does PA66 GF30 compare to other reinforced polyamides?

A: Compared to reinforced polyamides like PA6, PA66 GF30 offers superior mechanical and thermal properties. Its higher glass fiber content provides greater stiffness and tensile strength.

Q: Are there any limitations to using PA66 GF30?

A: While PA66 GF30 has excellent mechanical properties, its glass fiber content can cause an abrasive effect on mating surfaces. Additionally, it may not be suitable for applications requiring flexibility due to its rigidity.

Q: Who are the typical suppliers or manufacturers of PA66 GF30?

A: Manufacturers like Ensinger produce PA66 GF30, often branded as Tecamid® 66 GF30. These suppliers provide technical data and support for using this material in various applications.

Step-by-Step Guide to Threading Your Sewing Machine for Beginners

We welcome you to this comprehensive guide on threading your sewing machine. Suppose you are a newcomer to sewing or seeking to strengthen your threading technique. In that case, this tutorial answers all your queries and comprehensively explains the best approaches and strategies to threading easily. Many people are apprehensive about threading a sewing machine; however, it doesn’t have to be that scary. With a logical approach, we have divided the entire process into smaller parts, including the most effective way to thread your machine to the significance of proper threading. Once you reach the end of this guide, there is no doubt you will be able to thread a sewing machine without any help. Without further delay, we wish to embark you on your threading journey and hope to provide you with a great start. Thus, let us begin.https://textile-yarn.com/acrylic-yarn/

What is the Best Way to Thread a Sewing Machine?

A correctly threaded machine simplifies sewing, but as with every task, there are a couple of points to pay attention to to get it done right. Here’s a better insight into sewing machine threading.

Learn How to thread into the sewing machine.​

Threading a sewing machine may look overly complex, but it is a seamless flow, provided you have the appropriate information. Here’s an easy-to-follow, step-by-step instruction to avoid making mistakes when threading your sewing machine:

  1. Look for the Guidelines: First, it is advisable to consult the manual, which can provide information specifically on how to thread the individual model of the sewing machine. As it is evident, different sewing machines will seemingly have some form of difference, making it vital to follow the manufacturer’s instructions.
  2. Thread Setup: In the usual case, the threaded spool has to revolve counterclockwise between two tension disks and move toward the sewing machine’s moving stem. Thus, various books and sewing machine diagrams depict this process. Ensure you follow the steps sequentially as numbered in the manual for correct threading.
  3. Encased in these tension discs and positioned under the presser foot is the control knob responsible for endowing the right amount of tension to the fabrics you work with to achieve a uniform stitch. In great detail, there are two phases one has to focus on I the instructions on how to set the controls accurately for the fabric and II accurately tension setting depending on your specific project fabric.
  4. Whether you are using a manual or automatic needle, in both cases, you start by piercing the back end through the front and stitching through a fabric. Always use the specified needle depending on the specifications of the fabric and the project you are working on.

It is best advised to seek reputable manufacturer sites or known sewing resources for detailed application, as well as guidance from your sewing machine’s manual, to ensure that you are winding the thread appropriately.

Essential Steps to Thread the Needle

Learning how to thread a sewing machine can be made easier through guided steps that ensure the final sewing is done with precision and accuracy. The first step is to prepare the thread by making sure it is cut to the appropriate length suitable for the project. If any thread from the preceding um needs to be removed, then it should be discarded as well before starting the new project.https://textile-yarn.com/blog/acrylic-vs-cotton-yarn/

The second stage helps understand the upper thread path, which involves locating the sewing machine’s thread guides. Each model has a different manual, so if in doubt, refer to the model’s user manual. Failing to do so might make stitching through the machine harder. Every sewing mechanism provides steps that need to be followed in an accurate, sequential manner.

The third stage focuses on tension control, which is achieved through the tension control dial or mechanism located in the sewing machine. It is also important to check the project and fabric specifics in the manual to ensure the correct setting of tension control. Loosening or tightening the tension is important to maintain balance and even stitches.

The final step revolves around the placement of the needle, through which you have to ensure that the needle passes through the eye of the thread. Moreover, use only the required fabric and make sure the needle you place is suitable and as instructed in the manual.

Bear in mind that these procedures are general and can be cautiously followed. For more thorough and specific guidance, it is advisable to access the websites of manufacturers and other recognized sources about sewing. By merging the details from these sources and your sewing machine manual, you can be sure to thread your machine correctly and start sewing without any further complications.

Tips for Using the Thread Guide

When threading your sewing machine with the thread guide, there are things that you have to do correctly to achieve the correct tension and a good stitch. Some suggestions are as follows:

  1. Threading Sequence: It helps to know the various paths the thread requires while threading the sewing machine. This mainly includes passing the thread through different tensioning devices and hooks to get the required grip and appropriate movement of the thread.
  2. Type of Thread: Always check if the thread is suited to the sewing machine and the fabric. Depending on the type of thread, either polyester, cotton, or nylon, it may be necessary to change the tension or even the needle. The manufacturers have suggested this, as has the sewing machine manual.
  3. Tightness of Tension: Thread tension is critical in interblock stitch-making. Modify the tension control dial or its mechanism on the sewing machine depending on the fabric and thread used. Balance must be achieved to make the stitches even and balanced. The manual has information regarding this and should be referred to adjust the tension for your specific machine.
  4. Follow This Order of Threading the Needle: Proper sewing requires the correct needle threading. The thread should go through the eye of the needle from the front to the back. As mentioned in the manual, choose a needle based on fabric and project requirements.
  5. Routine Cleaning: The thread guide and every other part of your sewing machine should be free of dust, lint, and debris. Maintenance schedules are important to decrease thread breakage while enabling easy thread flow through the guide.

It should be clear that the technical parameters of a sewing machine might differ from one machine to another. For details of the technical specifications and adjustments, refer to the manual of your specific sewing machine.

How to Use a Sewing Machine Manual for Threading?

Threading a sewing machine correctly is essential for achieving precise and professional stitching results. To leverage your sewing machine’s manual effectively, follow these steps:

  • Understanding the Sewing Machine Diagram:
  • Following the Transcript Instructions:
  • Identifying the Bobbin Case and Spool Holder:
  • Gathering the Right Thread and Needle:
  • Choosing the Correct Bobbin Size:
  • Ensuring You Have a Sewing Machine Handy:
  • Step-by-Step: Threading the Needle:
    • Follow the manual’s instructions to thread the needle, passing the thread through the appropriate thread guide, tension discs, and needle eye. Be sure to thread from front to back.
  • Using the Automatic Needle Threader:
    • If your sewing machine has an automatic needle threader, consult the manual for specific instructions on using this feature effectively.
  • Inserting the Bobbin Correctly:
    • Wind the bobbin with the chosen thread and insert it into the bobbin case as the manual directs. Ensure the thread is properly threaded through the tension spring and positioned correctly in the bobbin case.

Continue referring to your sewing machine manual for the most accurate and detailed information regarding technical specifications, adjustments, and troubleshooting specific to your machine model. The manual is your authoritative guide, ensuring you maximize your sewing machine’s potential and achieve optimal stitching results.

Understanding the Sewing Machine Diagram

I will summarize the information from the sewing machine diagram; as far as I know, I understand the sewing machine diagram. Such diagrams usually geographically distribute specific components of the sewing machine spool holder, presser foot, feed dogs, bobbin case, and needle. However, to get the most in-depth information on the components and their functions, the first source of this information is your sewing machine’s manual. So, with the help of looking at the diagram and the aims of every detail, one can acquire sufficient knowledge about how the sewing machine works and diagnose and fix it in case it breaks.

Following the Transcript Instructions

The manual details locating positions, their use, and how they work. The instructional books have pictorials of the various components required for such tasks as sewing and give a rough description of those parts that are relevant to the spool case and holder or apply to the bobbin case and holder.

Including machine threading, the required tools will be:

  1. Fabric Weight and Composition – a thread ideal for the fabric weight and fiber composition, as well as the color, has to be chosen.
  2. Fabrication, distance, and wire gauge are the criteria used to select a sewing needle gauge most appropriate for the fabric—common sewing needle gauges vary between 70/10 and 100/16.
  3. Depending on the machine model, sewing machines use different types of bobbins, such as Class 15 or Class 66. Bobbins are numerous and, hence, the right one for the machine.

Check the bottom bobbins first and the top needle soon after to ensure your machine can be threaded. Then, ensure the sewing machine is set up and plugged in.

To correctly operate the sewing machine and more straightforward sewing process, the following steps should be followed:

  1. Before you make any adjustments, I recommend lifting the presser foot to release the tension discs.
  2. Then, I suggest using the guide pin (first, ensure it is clipped into place) and the tension disc (only after passing the thread through both items into the sewing machine). Be sure to also keep following the path from the machine manual.
  3. In accordance with best sewing practices, thread always passes from the front of the needle to the back of the needle’s underside, ensuring that knots or twisting of the thread never occur.

It is advisable to consult the machine manual on using such a feature, mainly if your machine contains an automatic needle threader.

The next step involves inserting the bobbin, which, too, must be followed according to any manual guidelines from your sewing machine brand. Typically, it is first placed into the sewing machine holder and then threaded through the tension block.

Ultimately, this forms the basis of your sewing projects and will remain the most overlooked customization portion. However, failing to follow outline instructions can cause significant rework at the seams or pointed ends of the fabric. Plus, this greatly enhances the cost and time efficiency of future projects.

The relevant details and the associated technical parameters may depend on your sewing machine’s manufacturer and model. It is recommended that you check your manual for precise and detailed information about your particular machine.

Identifying the Bobbin Case and Spool Holder

Knowing the bobbin case and spool holder is helpful in the quilting process. From the lower part of the sewing machine, on the right is the bobbin case used to insert the bobbin with the lower thread. However, the sewing machine manual may be necessary to determine its position on the machine and figure out how to insert the bobbin into the case because it tends to differ in different types of machines. The upper thread lock is placed in a spool holder, and usually, it is on the sewing machine top farther or around the site of the needle. The problem related to threading and stitching is accurately solved by knowing these components. Since sewing machine specifications and information differ from other models, make it a habit to consult your sewing machine manual for correct and recommended procedures for your machine.

What Materials Do I Need to Thread Your Machine?

To thread your sewing machine, you will need the following supplies:

  1. Thread: Always select the correct thread type for the project you wish to sew. The type, weight, and color of the thread will depend on the fabric you are using and the final result you want to achieve.
  2. Bobbin: Ensure you have a bobbin loaded with the same thread color that your upper thread requires, winding it correctly according to the sewing machine’s manual. Check the mechanics of your sewing machine for bobbin filling instructions.
  3. Needle: Select a needle that fits the fabric and its thickness. Different needles are available for different kinds of weather conditions and fabrics, such as woven and knit. Check the manual for instructions on how to choose the needle.
  4. Thread Guide: Most especially, use the thread guide that some sewing machines feature to guide the thread around the machine. Check for the thread guide in your machine’s manual, as you may have different models.
  5. Tension Discs: Tension control is a fundamental factor in the top thread balance stitch, and tension balance is achieved through proper control adjustment. Seek your manual for clarification on how to set the tension.
  6. Thread Cutter or Scissors: Always have a sewing machine or a pair of scissors to cut and clear up unnecessary threads after your sewing is complete and the machine is threaded.

It is understood that it is necessary to cross-check the instructions with the sewing machine’s manual specific to the make or manufacturer of the unit. According to the manual, information will emphasize the correct procedure of how the sewing machine will be adequately threaded, and what materials should be used as required by the machine’s technical specifications.

Gathering the Right Thread and Needle

The appropriate thread and needle are critical factors in determining the result one expects to obtain when sewing with a sewing machine. Regarding the thread, consideration is given to the fabric weight, type, and color. Regarding the needle, various types and sizes suit multiple fabrics and sewing techniques. 

Choosing the Correct Bobbin Size

In stitch regulation and achieving the best performance of one’s sewing machine, one of the most effective measures is choosing the right bobbin size. To do that, take into account the following observations:

  1. Check Your Sewing Machine Manual: The sewing manual determines the bobbin size for various fabrics and stitches. Ideally, it should provide adequate details regarding the compatible bobbin sizes for each sewing machine.
  2. Consider the Thread Weight: Comparatively thicker threads are expected to be accommodated in bigger bobbins; thus, the bobbin size must be proportionate to the type of thread used, yes? Smaller bobbins would do fine, whereas lighter threads would use finer threads.
  3. Evaluate the Fabric Thickness: When the fabric to be worked upon is thicker, twiddling the thread with dozens of lines would require a larger bobbin, but smaller bobbins would work well with a thinner teddy waist.
  4. Machine Compatibility: be it any sewing machine, checking what bobbin size to use is crucial; makers attach a factual document showing the required thread size. Following the instructions guarantees seeking in flails or other dumfounds.

Remember that particular bobbin sizes can differ from one sewing machine manufacturer to another and even from one model to another. Reading through your sewing machine guide and considering the strength of the thread used, the thickness of the fabric being sewn, and the sewing machine used should help you choose the correct bobbin size suitable for the sewing task.

Ensuring You Have a Sewing Machine Handy

It is vital to work with the right sewing machine to make proper use of the recommendations regarding the bobbin size given. In my search for what might be the most appropriate bobbin size, some parameters were critical to consider:

  1. Thread Weight: The weight of the thread you have selected will affect the size of the bobbin that should be used. If you are using heavy threads, it would make sense to also go for larger bobbins, but if your threads are light, perhaps smaller bobbins would do just fine.
  2. Fabric Thickness: This is crucial because thicker fabrics will require more stitches to hold together. This will, in turn, mean that larger bobbins will be necessary because more thread will be needed for strong stitching. However, the currently available smaller bobbins should work fine for lighter materials.
  3. Machine Compatibility: The bobbin size should be suitable for your particular sewing machine. Consult the manufacturer’s parameters and recommendations to confirm that the dimensions are appropriate to avoid problems.

Considering these factors and the technical parameters above, you will be able to choose the correct bobbin size for your sewing requirements and get the most out of your sewing machine.

How do you properly thread the needle and Bobbin?

Threading the needle and bobbin properly is essential for smooth and efficient sewing. Here’s a concise guide to help you with this crucial process:

Threading the Needle:

  • Threading the Bobbin:
    • Start by winding the thread onto the bobbin. Your machine’s manual provides specific instructions on how to wind the bobbin correctly.
    • Once the bobbin is wound, locate your machine’s bobbin case or area.
    • Insert the bobbin into the bobbin case or area, following the specific threading path illustrated in your machine’s manual.
    • Ensure the bobbin rotates clockwise when you pull the thread.

Always consult your sewing machine’s manual for precise instructions and illustrations tailored to your machine’s model. Properly threading the needle and bobbin will ensure optimal stitching results and prevent any potential issues during your sewing projects.

Step-by-Step: Threading the Needle

Step-by-Step: Threading the Needle

Threading the needle correctly is crucial to ensure smooth and efficient sewing. Here’s a concise guide that combines insights to answer your questions:

  • Prepare the Needle:
  • Using a Needle Threader :
  • Securing the Thread:
  • Pull a length of thread through the eye of the needle, leaving a tail of a few inches. Make a knot at the end of the thread to secure it.

Remember, these steps provide a general guide. Sewing machine models may have slight variations, so consult your sewing machine’s manual for precise instructions tailored to your specific model. Threading the needle correctly ensures smooth stitching and prevents disruptions during sewing projects.

Using the Automatic Needle Threader

One outstanding invention in sewing machines today is the automatic needle threader, which is an addition to most sewing machines. This additional feature aids in fastening the process of threading a needle, which traditionally is very time-consuming. The automatic needle threader can be used by following the steps mentioned below.

  1. The first step is as simple as finding the automatic needle threader; this enables the automatic needle threader to be made and installed close to the end of the needle zone, which is located on most sewing machines.
  2. If your machine has an automatic needle threader, engage it so the hook can be used instead. You also have to ensure the position of the needle is set high in the housing of the sewing machine
  3. .To engage the hook head and to close the ey,e drive the automatic needle threader lever down or press the required button that comes with the device- once the button is pressed, the hook of the threader moves behind the needle.e
  4. To complete the needle threading, hold out the thread with your free hand and place it into the hook of the flosser. This forces the hook to grasp the thread and pull it through the eye.
  5. Finally, once you dry the needle alongside the eye, make sure that the thread is still wrapped around the needle while you are left with a few strands draping. Before proceeding, please ensure that the thread is tightly wound.
  6. Cut Off The Extra Thread: If necessary, cut the thread with scissors or thread snips while leaving a suitable tail for sewing.

Keep in mind that different models will have slightly different guidelines in the user’s manual. Hence, always refer to your sewing machine’s manual for the proper instructions and specifications that apply to your machine. A properly utilized automatic needle threader will help you a lot and make all the sewing work correct and fast.

Inserting the Bobbin Correctly

Inserting the bobbin correctly will go a long way toward making sewing much more organized. Here are the steps on how to correctly put in a bobbin:

  1. Prepare the bobbin: Take the time to wind a thread around the bobbin, observing the guidance provided in the sewing machine manual.
  2. Open the Bobbin Case: Depending on your model (if it is a Singer or Brother), you will have a button that, when pressed, opens the cover to the bobbin case. Otherwise, you can simply slide the cover and bobbin out if the button is not available.
  3. Insert the Bobbin: Holding the bobbin while turning it to the left is always advisable. After this, ensure the seated bobbin pulls the thread gently, then place the bobbin case in the case bobbing so that it fits tightly with the case.
  4. Thread the Tension Spring: Make sure to adjust the tension spring so that the thread moves to the position indicated by the manual, always focusing on the threading groove.
  5. Pull the Thread: Ensure the thread is below the spring. Once that is done and the bobbin is placed, gently catch a few inches of the thread and pull it very gently.
  6. Close the Bobbin Case: Place the cover on the case by either sliding the Bobbin case or pressing the button available for it. This will position the bobbing in an efficient position.

Why is It Important to Thread Your Sewing Machine Correctly?

One of the most vital steps when sewing with a sewing machine is correctly threading it, as it profoundly affects the sewing performance and the quality of the stitches. Let’s examine a few key reasons that underscore the importance of threading properly:

  1. Threadworks as intended: Correct threading minimizes the possibility of spring thread or double needle thread covering itself at some point while stitching, which would have otherwise resulted in skipping or skipping stitches. Each stitch is formed neatly and uniformly, thus enhancing the entire sewing process.
  2. Reduced Thread Busting: Improper thread tension causes the thread to bust or slack when it shouldn’t. This results in threads busting in the middle of sewing for no apparent reason and raises the incidence of needing a break. Properly threading the sewing machine in this situation would eliminate the problem as it provides the perfect balance of slack across the sewing line.
  3. No Tangles or Jams: Threading, jamming at the needles, in the bobbin, or tangling around attachments on the machine is inconvenient and can break the device. Sometimes, pulling too much thread can tighten the stitches. This is likely to happen if the sewing machine is threaded incorrectly. Following the needle threading directions can help prevent this.
  4. Optimal Stitch Control and Machine Functionality: The relevance or misconception about the thread tension being done adequately by having correct threading. Having proper thread tension enables you to maintain control over the stitch length and width. It can also enhance the overall durability and functionality of the sewing machine.

By correctly threading your sewing machine, you prepare yourself for the necessary requirements for making successful sewing projects. This will allow you to enjoy a smooth and efficient sewing process while achieving commendable and professional results.

Avoiding Stitch Errors

One should abide by the proper threading procedures to prevent stitch errors while using your sewing machine. Adequate threading for your machine’s operations reduces the chances of having such cases as skipped stitches, threads breaking, or getting jammed, hence smooth operations. There is always plenty of advice communicated from diverse authorities, which can be a little tricky or blurry at times, so here is a guide on how to avoid stitch errors:

  1. Threading Sequence: Always ensure that the presser foot is raised to relieve the tension disks before starting the actual sewing. Then, follow the specified threading path in your machine’s manual. Cross-check that the thread passes through every guide, tension setting, and needle eye in the desired sequence.
  2. Thread Tension: The dosage of thread tension needs to be done with care to achieve balanced stitches on the machine bed. The optimal tension setting will mostly depend on the fabric and thread being used, but the general rule is to utilize the recommended setting provided by the machine’s manufacturer and make adjustments accordingly.
  3. Bobbin Winding: Bobbin winding is critical, as it indicates the amount of tension on the thread while also avoiding the risk of tangling. Use the spool pin on the machine for the thread, follow the instructions for bobbin winding, and ensure that the thread is wound tightly on the bobbin.
  4. Needle Selection: To minimize probable stitch errors on your sewing project, you are advised to choose a needle that is most compatible with the fabric. During needle selection, consider the fabric weight, fiber content, and the type of stitch that you will be applying. This will assist in eliminating skipped stitches, damaged fabric, or cracked needles.
  5. Machine Maintenance: You should follow the machine manual and regularly clean and oil the sewing machine. This helps to keep the moving parts appropriately lubricated and enables the machine to avoid lint and debris accumulation that could obstruct the stitching process.

However, please be aware that some technical parameters tend to differ according to the make and model of the sewing machine and the specific fabric type employed. Instructions and suggestions regarding your machine should always be followed from the manual. All these measures, coupled with adequately maintaining your sewing machine, will assist you in avoiding joggles in a seam and achieving professional standards in your sewing tasks.

Improving Sew Quality

One should be precise and consider some recognized principles to improve the sewing quality. Here are some guidelines I suggest to optimize stitching quality:

  1. Thread Tension: The appropriate thread tension establishes the balance of stitches. Alter the tension setting depending on the kind of fabric and stitch you want. Lower the tension for light fabrics; try slightly higher tension for heavy ones. Do not forget to test and balance the stitches to achieve even stitches, preferably.
  2. Bobbin Winding: After winding a bobbin, ensure it is wound evenly and neatly. A poorly wound bobbin will likely snag, break threads, and produce unsightly and uneven stitches. Pay attention to the bottom winding being smooth and free of overlaps and gaps.
  3. Needle Selection: A needle should be selected based on the fabric’s type and weight and the stitch type to use. A universal needle is appropriate for woven bases; however, it would be better to buy a stretching or ballpoint needle for knits. Many manuals accompany machines that indicate what needles to use and add that the needle size should reflect the fabric’s thickness.
  4. Injection Molding Machine and Maintenance: Stitch Quality will be Normal if Sewing Machines are regularly maintained. Cleaning the machine regularly by removing lint and soot from the machine parts responsible for stitch formation is advisable. Also, follow the specific instructions related to oiling provided by the manufacturer.

Technical parameters may vary squarely based on the sewing machine or the specified fabric. However, reading your machine manual for specific recommendations and settings is essential. Test your stitches on scrap pieces of cloth to establish whether you’ll achieve the desired stitch quality before commencing with the sewing project. By implementing such practices and caring for the machine, you will likely achieve good and uniform results in your sewing tasks.

Ensuring Smooth Sewing Projects

To ensure smooth sewing projects, it is essential to consider various factors and adhere to best practices. Here are some key considerations and corresponding technical parameters to help you achieve optimal results:

Choosing the Right Needle:

  • Thread Selection:
  • Machine Tension:
  • Stitch Length and Width:
  • Presser Foot Pressure:
  • Machine Maintenance:
    • Regularly clean and oil the sewing machine per the manufacturer’s instructions to ensure smooth operation.
    • Replace needles and check for wear or damage to maintain consistent stitching quality.

By carefully considering these factors and ensuring that technical parameters align with the specific requirements of each project, you can enjoy smooth and successful sewing projects. Consult the sewing machine manual and experiment with different settings for the best results.

Frequently Asked Questions (FAQ)

Q: What are the basic steps for beginners to use to thread a sewing machine?

A: To thread a sewing machine, you’ll need to start by placing the spool of thread on the top of your machine. Pull the thread and wrap it around the thread guide on the top. Then, follow the path through the second thread guide, ensuring the thread goes through the take-up lever. Finally, pull the thread down to the needle, threading it from front to back.

Q: How do I wind the bobbin and replace it in the machine?

A: To wind the bobbin, place the spool of thread on the machine and wind the thread around the bobbin winder. Engage the winder and start the machine. Once the bobbin is complete, replace the bobbin in its case, ensuring the bobbin thread is correctly positioned.

Q: What should I do if the machine starts making unusual noises while sewing?

A: If your machine starts making unusual noises, stop sewing immediately. Check if the thread is tangled or if the bobbin is incorrectly placed. Re-thread the machine and ensure the bobbin is correctly installed before resuming.

Q: How can I ensure the thread doesn’t break while sewing?

A: To prevent the thread from breaking, ensure it is correctly placed through all guides and the tension is properly set. Also, ensure the needle is the correct size for your fabric and thread type.

Q: How do I bring the thread from the bobbin up through the needle plate?

A: After threading the top of the machine, hold the thread end from the needle with one hand. Turn the handwheel towards you to lower and then raise the needle. This motion will bring the thread from the bobbin up through the needle plate. Pull the thread back gently to reveal both threads.

Q: What are some sewing tips for beginners learning to sew?

A: Beginners should practice threading their machine regularly and start sewing with easy-to-handle fabrics. Watching sewing tutorials on platforms like YouTube can provide visual guidance and tips. Also, familiarize yourself with basic sewing patterns to gain confidence.

Q: What is the purpose of the take-up lever in sewing machines?

A: The take-up lever is an essential part of the threading path. It helps maintain the proper tension on the thread as the machine stitches and ensures the thread is fed smoothly from the spool of thread to the needle.

Q: How can I troubleshoot if my machine does not sew correctly?

A: If your machine may not sew correctly, check the threading, both the top and bobbin thread, for tangles or misplacement. Re-thread if necessary. Also, ensure the needle is not bent or dull, and the tension settings are appropriate for your fabric.

Q: Why is it important to follow a threading tutorial for beginners?

A: Following a threading tutorial is crucial for beginners because it provides step-by-step instructions and visual aids that help you understand the threading process. This foundation ensures you can start sewing efficiently and reduces the likelihood of errors.